9

I was working on building this drawer by FOTOSOK I had ordered from amazon.

and in the instruction booklet on page 11 step 12 there is a mysterious step which I don't understand the purpose of. I have attached a photo below:
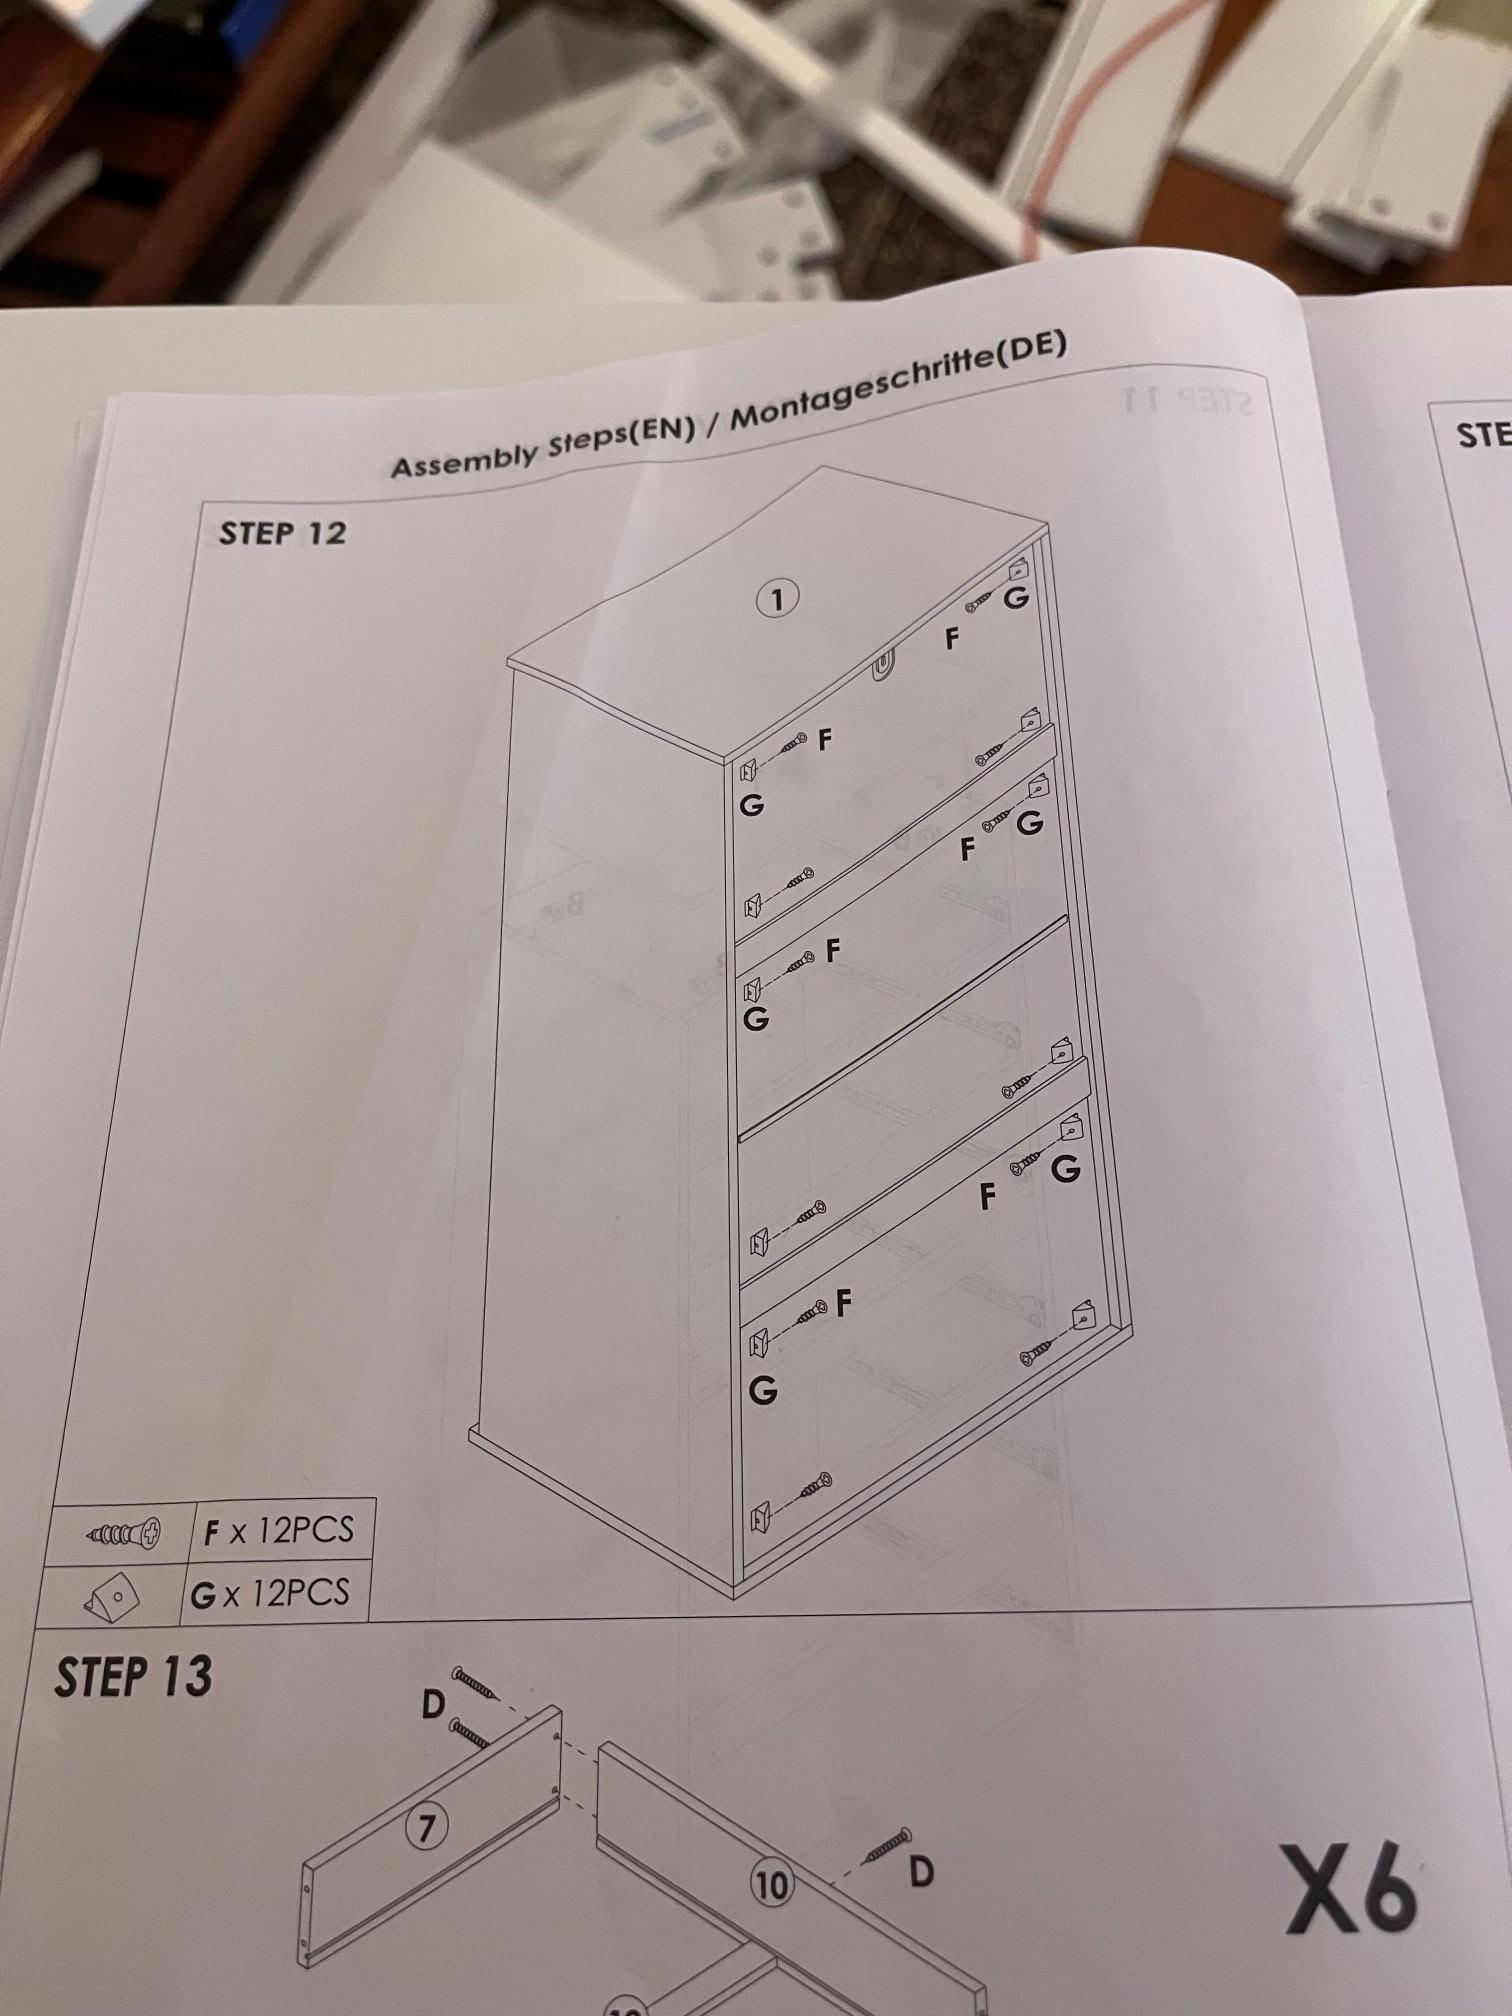
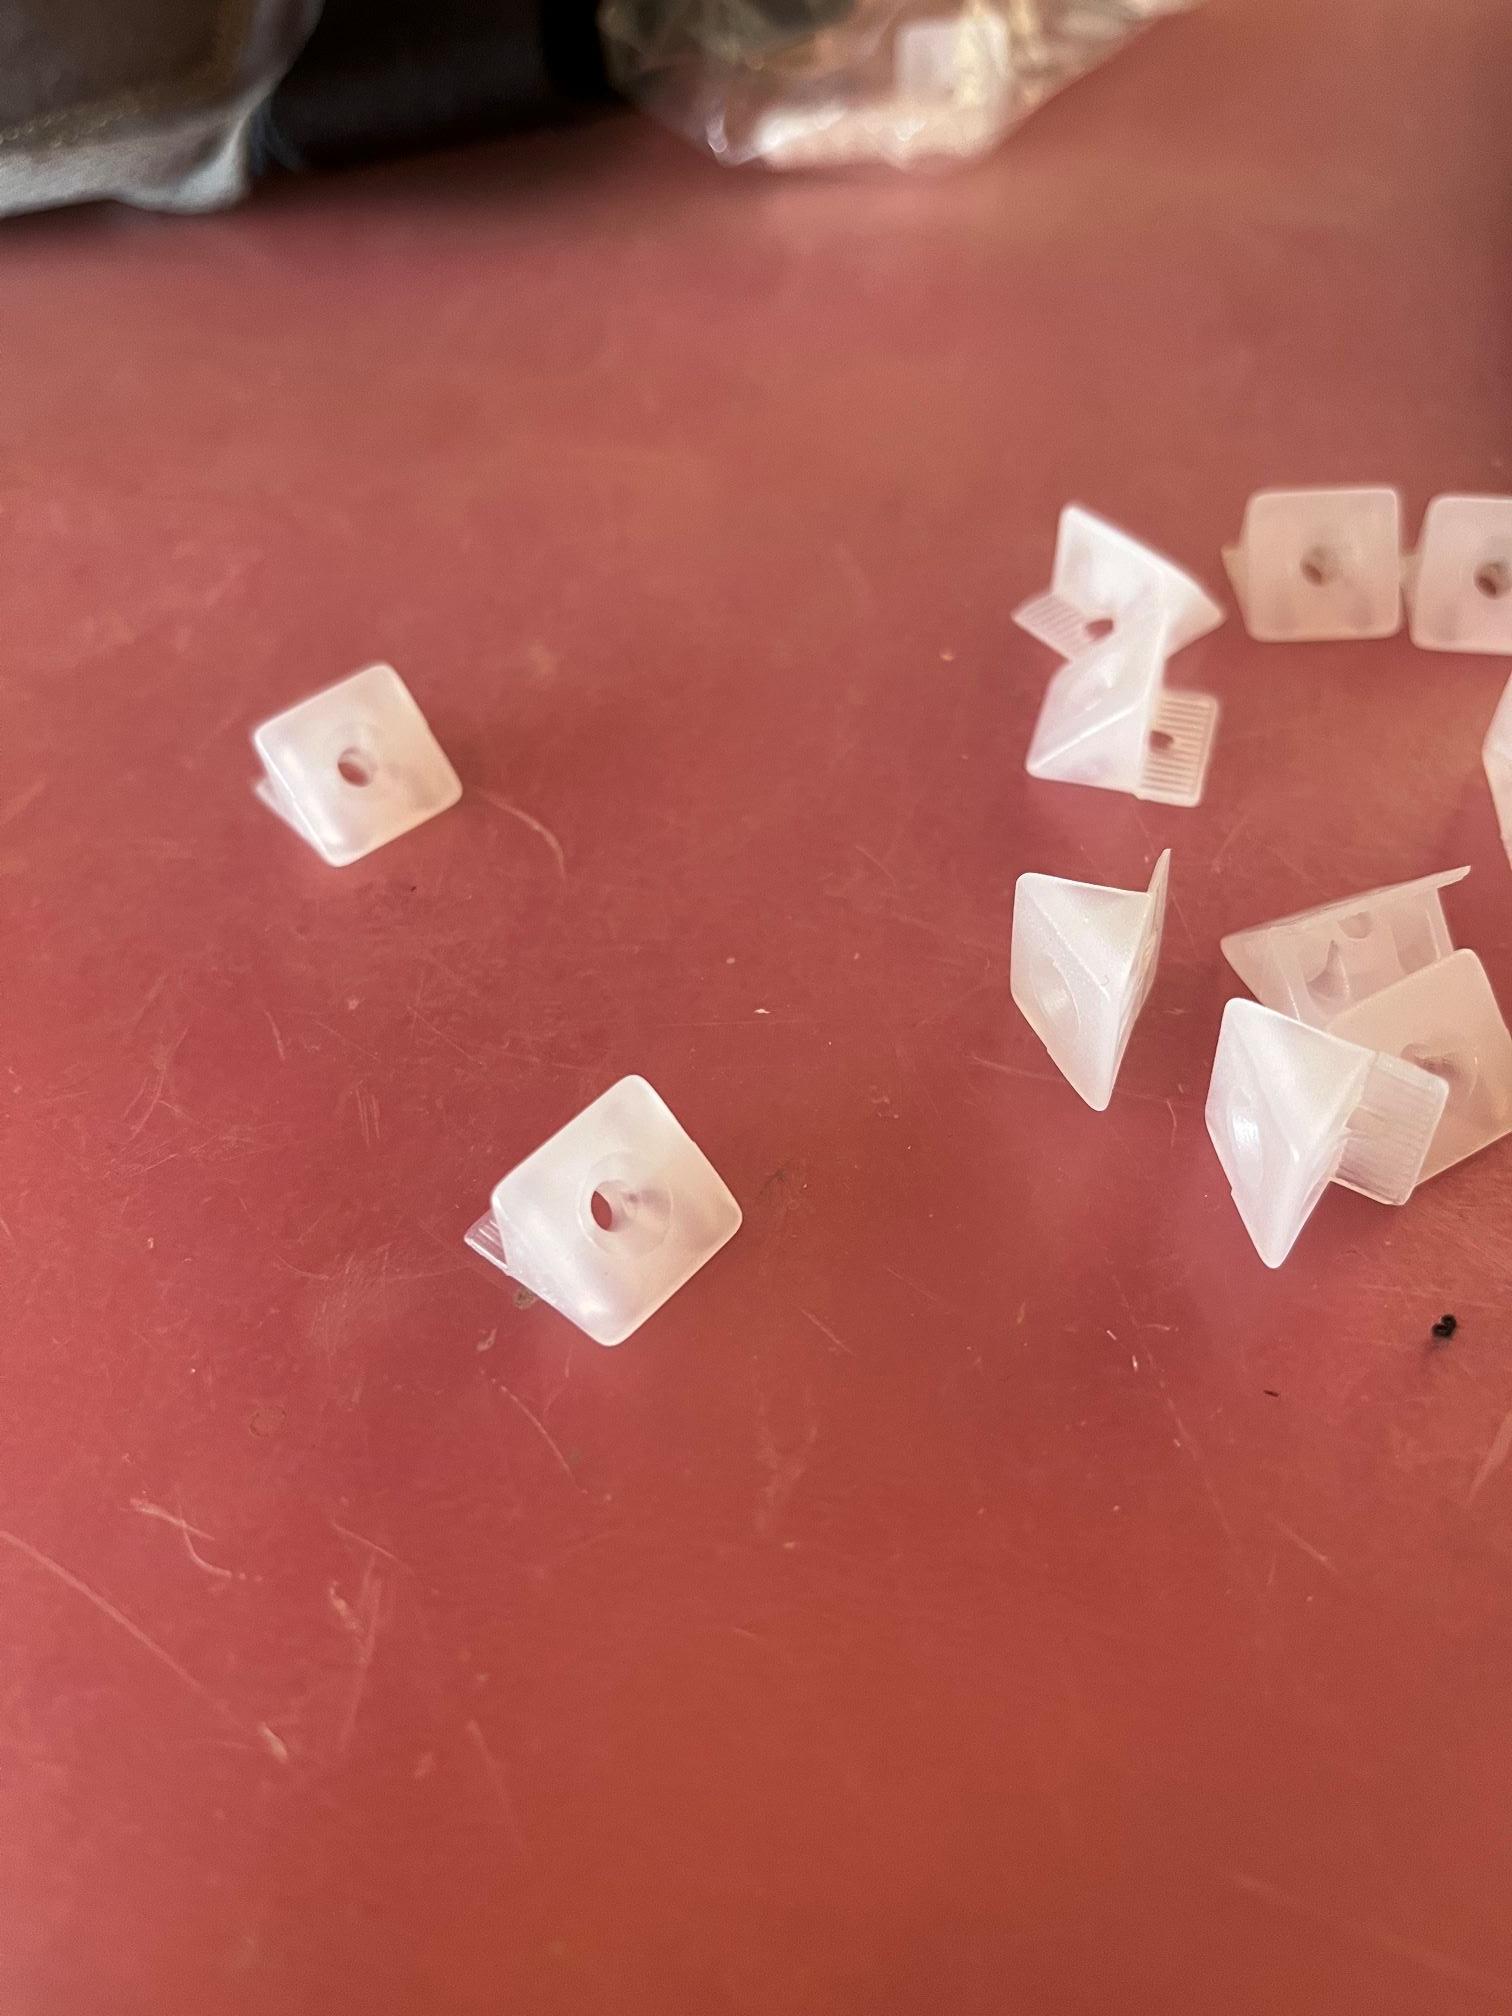
enter image description here Basically it involves adding 4 small plastic studs (photo below) to the back of the drawer.

enter image description here

The instructions don't appear to indicate any clear lines/landmarks to align the studs to. And they never get mentioned later in the manual after insertion. It seems I can skip this step without affecting any other steps so I want to know what exactly is the purpose of this. Is it just some kind of reinforcement? Is there some obvious alignment of the pegs that I have missed?

Edit, the image (1) is the “back” of the entire built dresser. The studs are inserted into a flat panel that is the back of the dresser. The studs don’t have a name in the parts list.

6
  • Maybe these prevent you from pushing the drawers out the back? Or if there is a solid panel (but flimsy, as is often the case) added on the back later, maybe this keeps the drawers from bumping into it. Commented Nov 27, 2023 at 1:01
  • 1
    So there is a flimsy panel, and these studs are attached to that flimsy panel. the more I think about it, it seems likely they make it difficult for the flimsy panel to bend more than a few mm before the studs ram into wall that the dresser would be placed along. Commented Nov 27, 2023 at 1:04
  • Is there a parts list at the beginning of the instructions? If so it might include a name for those pieces, which might be helpful in understanding their purpose.
    – Mark
    Commented Nov 27, 2023 at 2:02
  • Yes there is but it doesn’t have a name. Just an image of a stud and 12 + 1 underneath indicating 12 copies + 1 extra Commented Nov 27, 2023 at 2:51
  • 3
    Given the direction of the screws on the drawing (parallel to the back panel), they're 100% meant to attach to the frame, not the panel.
    – Martha
    Commented Nov 27, 2023 at 18:19

1 Answer 1

22

These are clips that prevent the thin material that is slid into the groove from coming out and provides more support for the panel and to prevent racking.

The thin plastic goes in the groove behind the panel and screws into place. Press the piece into the general area depicted and then screw it into the wood sides/top/bottom (NOT the panel).

After some searching, the proper name seems to be "45 Degrees Angle Wedge Bracket Retaining Clip"

6
  • 3
    It might not be clear that the screw that goes through this part then goes into the carcass at 45 degrees, rather than perpendicular.
    – MikeB
    Commented Nov 27, 2023 at 10:23
  • 3
    The purpose is to clamp the back panel in place and stop it from moving. With these clips clamping the back panel, it prevents the dresser from racking/twisting. These are quite important for the structure of the cabinet.
    – JPhi1618
    Commented Nov 27, 2023 at 15:40
  • 1
    @JPhi1618 I hadn't considered it for racking prevention, but that totally makes sense. The 45 degree screw goes through the edge of the panel an into the wood to lock it together. Commented Nov 27, 2023 at 16:08
  • Odd... Usually the back panel (often just heavy card stock) is nailed to the back. These clips and screws must cost quite a bit more than the handful of nails usually provided.
    – FreeMan
    Commented Nov 27, 2023 at 16:16
  • @FreeMan The nail on panels are difficult to install and error prone (nails not straight), and with IKEA's return policy for people near their stores, that could be an high cost for them. IKEA is cheap, but they really do make an effort for their furniture to be easy to assemble and as durable as possible considering the materials.
    – JPhi1618
    Commented Nov 28, 2023 at 15:59

Your Answer

By clicking “Post Your Answer”, you agree to our terms of service and acknowledge you have read our privacy policy.

Not the answer you're looking for? Browse other questions tagged or ask your own question.