0

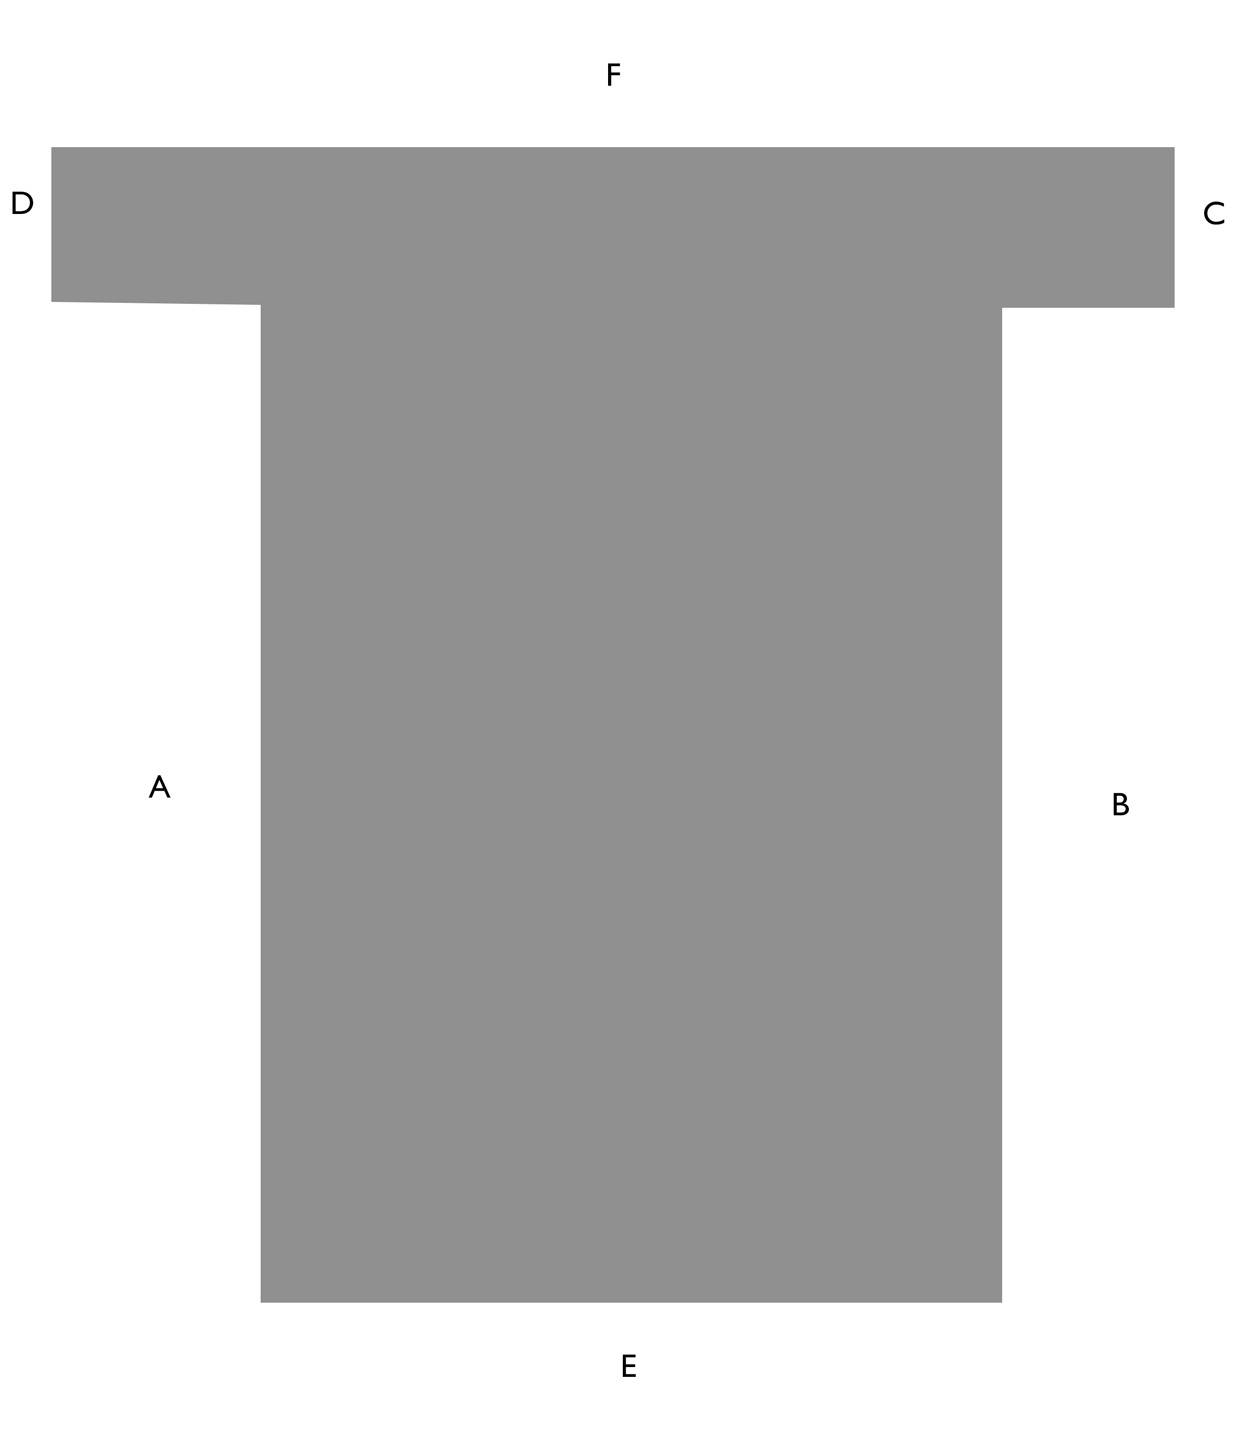
I'm getting ready to put down hardwood in a newly constructed room. The room is "T" shaped as such:

T-shaped room

I understand that I should start on the longest continuous wall and work across. However, in this case, if I start on "A" for example, and then fill-in between D and A, it seems likely I'll end up with a partial piece in the middle of the floor.

Should I start at D instead, and have the possibility of a partial piece all the way down the A wall? Is there some other way that I should approach this?

Thank you for your help.

Edit: Some additional info:

The room is about 22' the long dimension and 14' on the short. Planks are 3" wide. D is the top of a stairwell, and C is a closet.

4
  • What do you mean by "partial piece"? What kind of hardwood are you installing? Commented Jul 9, 2018 at 13:09
  • Oh - you mean partial as in cut longways (or what we call a "rip cut") - is that right? Commented Jul 9, 2018 at 13:10
  • RE: rip cut, yes, exactly.
    – JeremyLee
    Commented Jul 9, 2018 at 13:12
  • 4
    I don't know who said close this as arts and crafts but it is absolutely DIY home improvement related. Please use a little more discretion in submitting close votes. Commented Jul 9, 2018 at 13:46

5 Answers 5

2

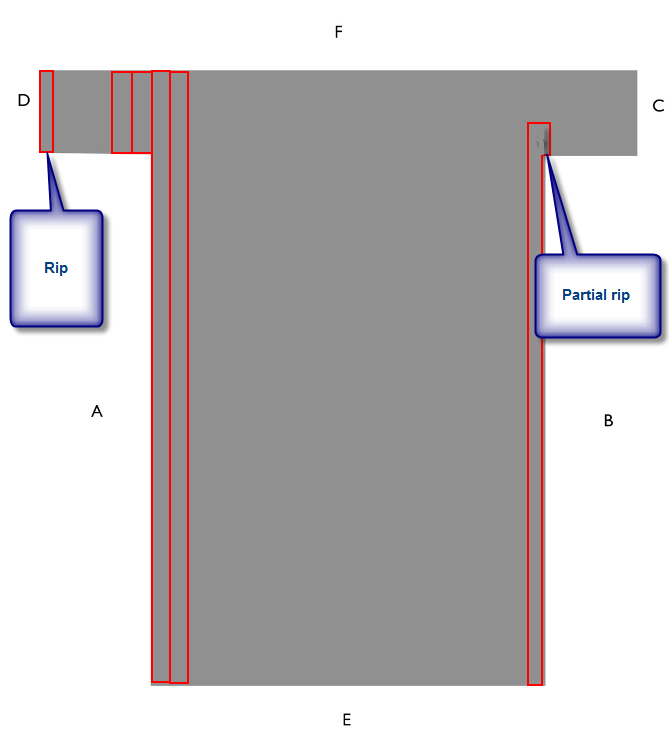
Say you start with your piece running parallel to A. You take it from the bottom left corner all the way up to the F wall. Solid piece, all the way up.

Now you backfill to the left of the piece, working towards D. When you reach D, you will probably need to do a rip cut for the last piece to go in D.

You'll cross the room from A to B also putting in full pieces until you hit B at which point you'll probably need to do some kind of rip there as well.

Here's the only really tricky bit - where B meets the wall that links to C you'll have to do a partial rip cut. Your rip should let you fit the piece in at B but where the space to C is, you want the full piece.

enter image description here

7
  • 1
    In my experience you're lucky if a full board works at side A, for example. It's generally best to run a rip a nearly full board there as well for better fitment. I'd want to know how side B's rip cut will work out (to avoid a sliver), and I wouldn't worry about the rips at C and D. They're short enough to not matter much.
    – isherwood
    Commented Jul 9, 2018 at 14:17
  • 1
    As per edit, D is the top of the stairwell. He's going to need a milled Stair Nose there. So he really can't rip that piece. Commented Jul 9, 2018 at 14:22
  • 1
    per @isherwood 's comment, I would also make sure you know how square the room is to start with. You might need to taper that first piece to avoid the flooring looking slanted. Buildings are rarely exactly square.
    – IronEagle
    Commented Jul 9, 2018 at 14:30
  • 1
    All excellent points. And really at the end of the day nobody's going to notice if there's a partial piece along A or B but they WILL notice if the flooring looks like it's at an accidental angle. Commented Jul 9, 2018 at 14:31
  • Thanks so much for all the excellent information. So if I backfill from A to D, do I need to face-nail those boards? I don't believe I can staple on the tongue side of the board, correct?
    – JeremyLee
    Commented Jul 9, 2018 at 14:51
1

When laying wood floors or tile you always start in the middle of the room and lay out to the edges. Measure the width of the flooring you are going to use and try to start so there is a half width board or more on either side. This is easy to do. The starting board will either be directly in the middle or the edge of the board will be directly in the middle.You can lay the boards out if it is too difficult to calculate it. The other advantage is that starting from the middle effectively cuts the error from the creep or gaps in the boards in half giving to a much better looking job. Sorry cuts are the name of the game in flooring but it is better to have a two equal+/- half width cuts than two skinny cut because the skinny cut will magnify any errors or irregularities in the walls.

1
  • Good answer: thanks. Keep 'em coming! Commented Mar 15, 2019 at 11:40
0

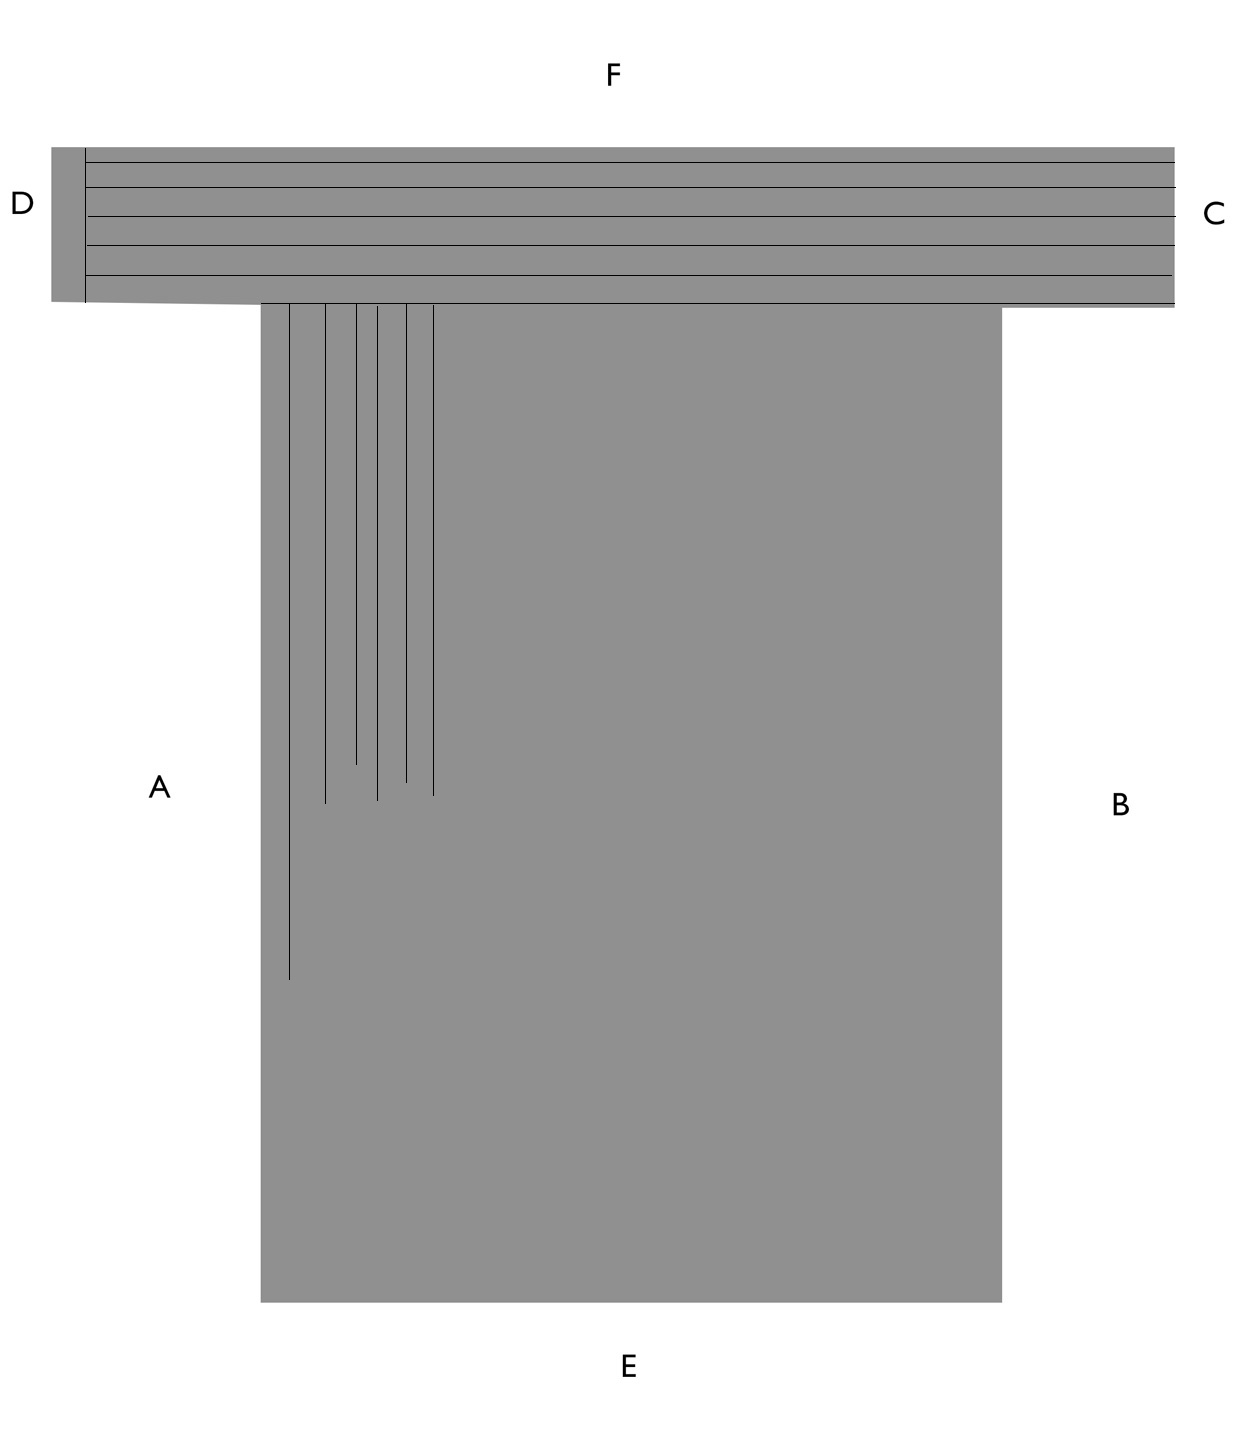
Here's an option, that will only work with real tongue and groove. (That is, that you can T two pieces and have the t&g match) I'd lay out a few pieces and see if it will work for you or not, but it's probably the easiest install.

At D, I've got one piece which is the stair nose (assuming we're at the top of the stairs.) If it's the bottom, then don't worry so much. You can simply rip the end piece and proceed according to The Evil Greebo's answer

enter image description here

0

Snap a line from E - F and start in the middle. You can do do measurements from each wall A and B to find the center. Take the width of half a board and move the center line off center that much. Use a starter block and work toward either A wall or B wall. Put the grooves back to back in the center and use a spline. With some measurement you should be able to

1
  • Hello, and welcome to Home Improvement. It looks like you ended in the middle of a sentence; would you edit your answer to finish it? Thanks. Commented Mar 14, 2019 at 21:16
0

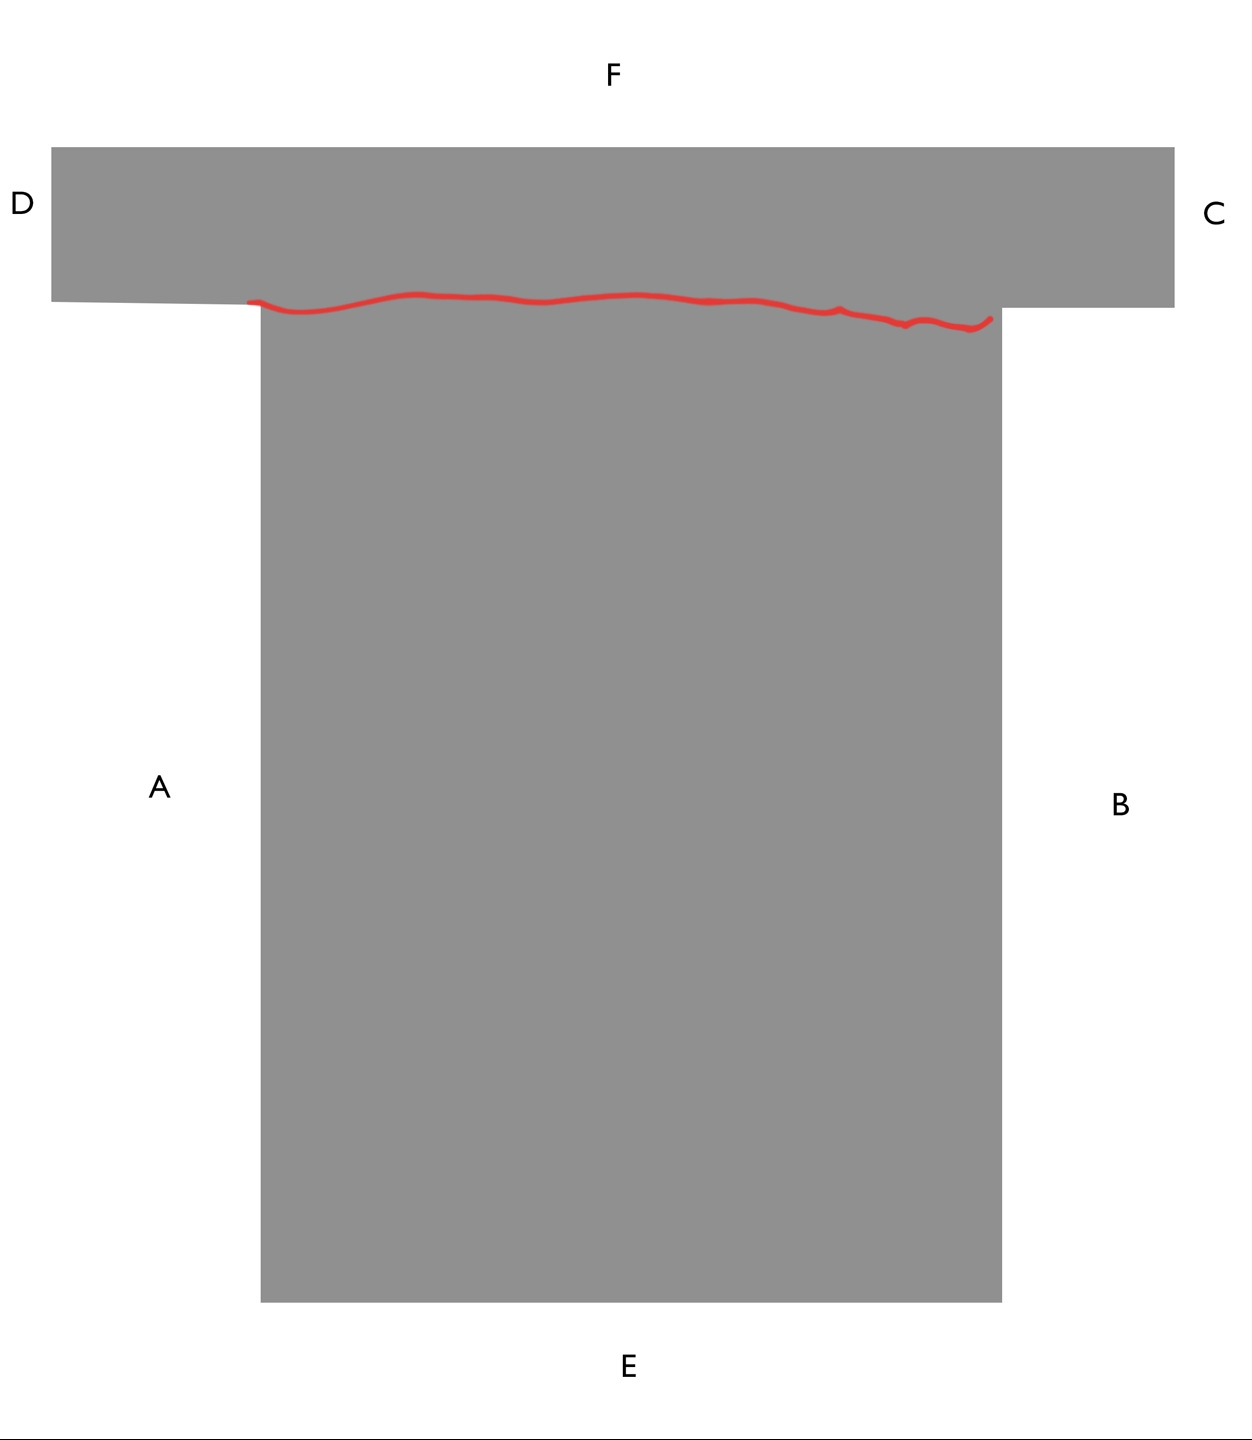
I would run them off wall F. There's no rule that says you need to run them along the longest wall. Visually, vertical lines will make the room look longer but narrower. And horizontal Lions will make the room look wider but shorter. If you prefer the room to look wider in respect to the orientation of the picture posted run them like this. enter image description here Measure off this line to wall F and rip your first cut to have a seamless finish throughout the entire floor.

This method will make for a grander entrance from the stairwell, if that's what your looking for.

Your Answer

By clicking “Post Your Answer”, you agree to our terms of service and acknowledge you have read our privacy policy.

Not the answer you're looking for? Browse other questions tagged or ask your own question.