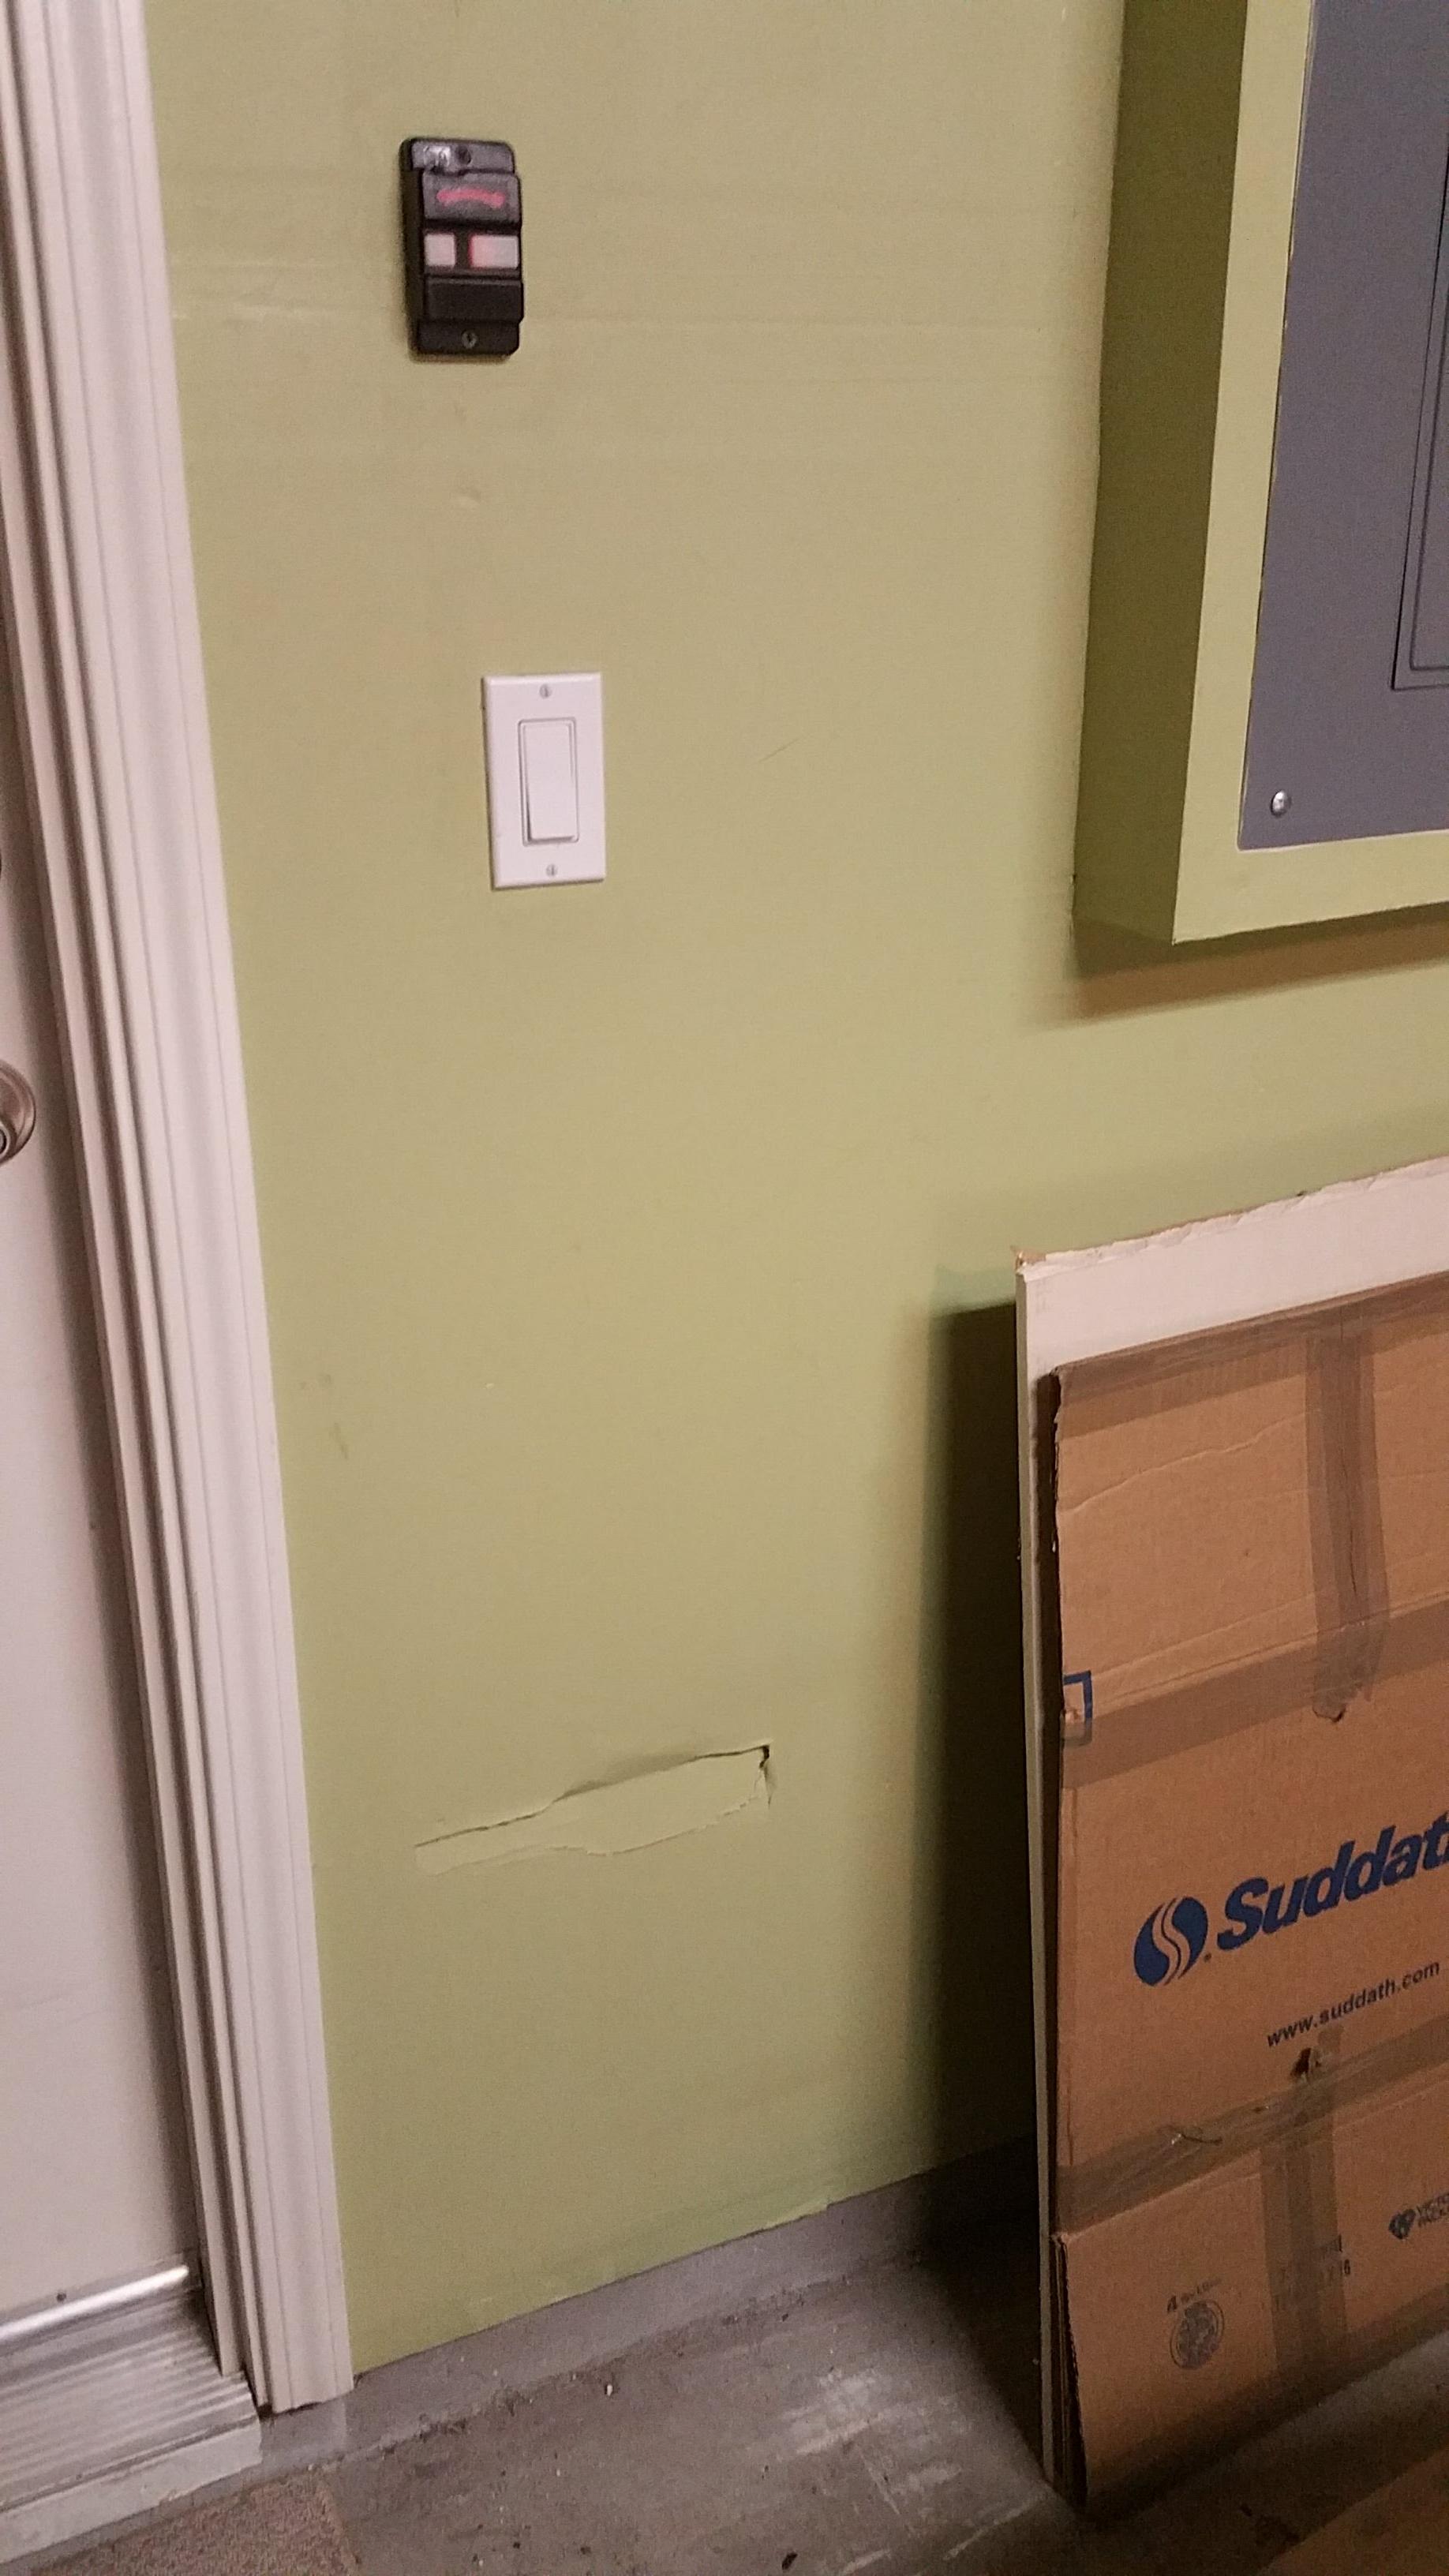
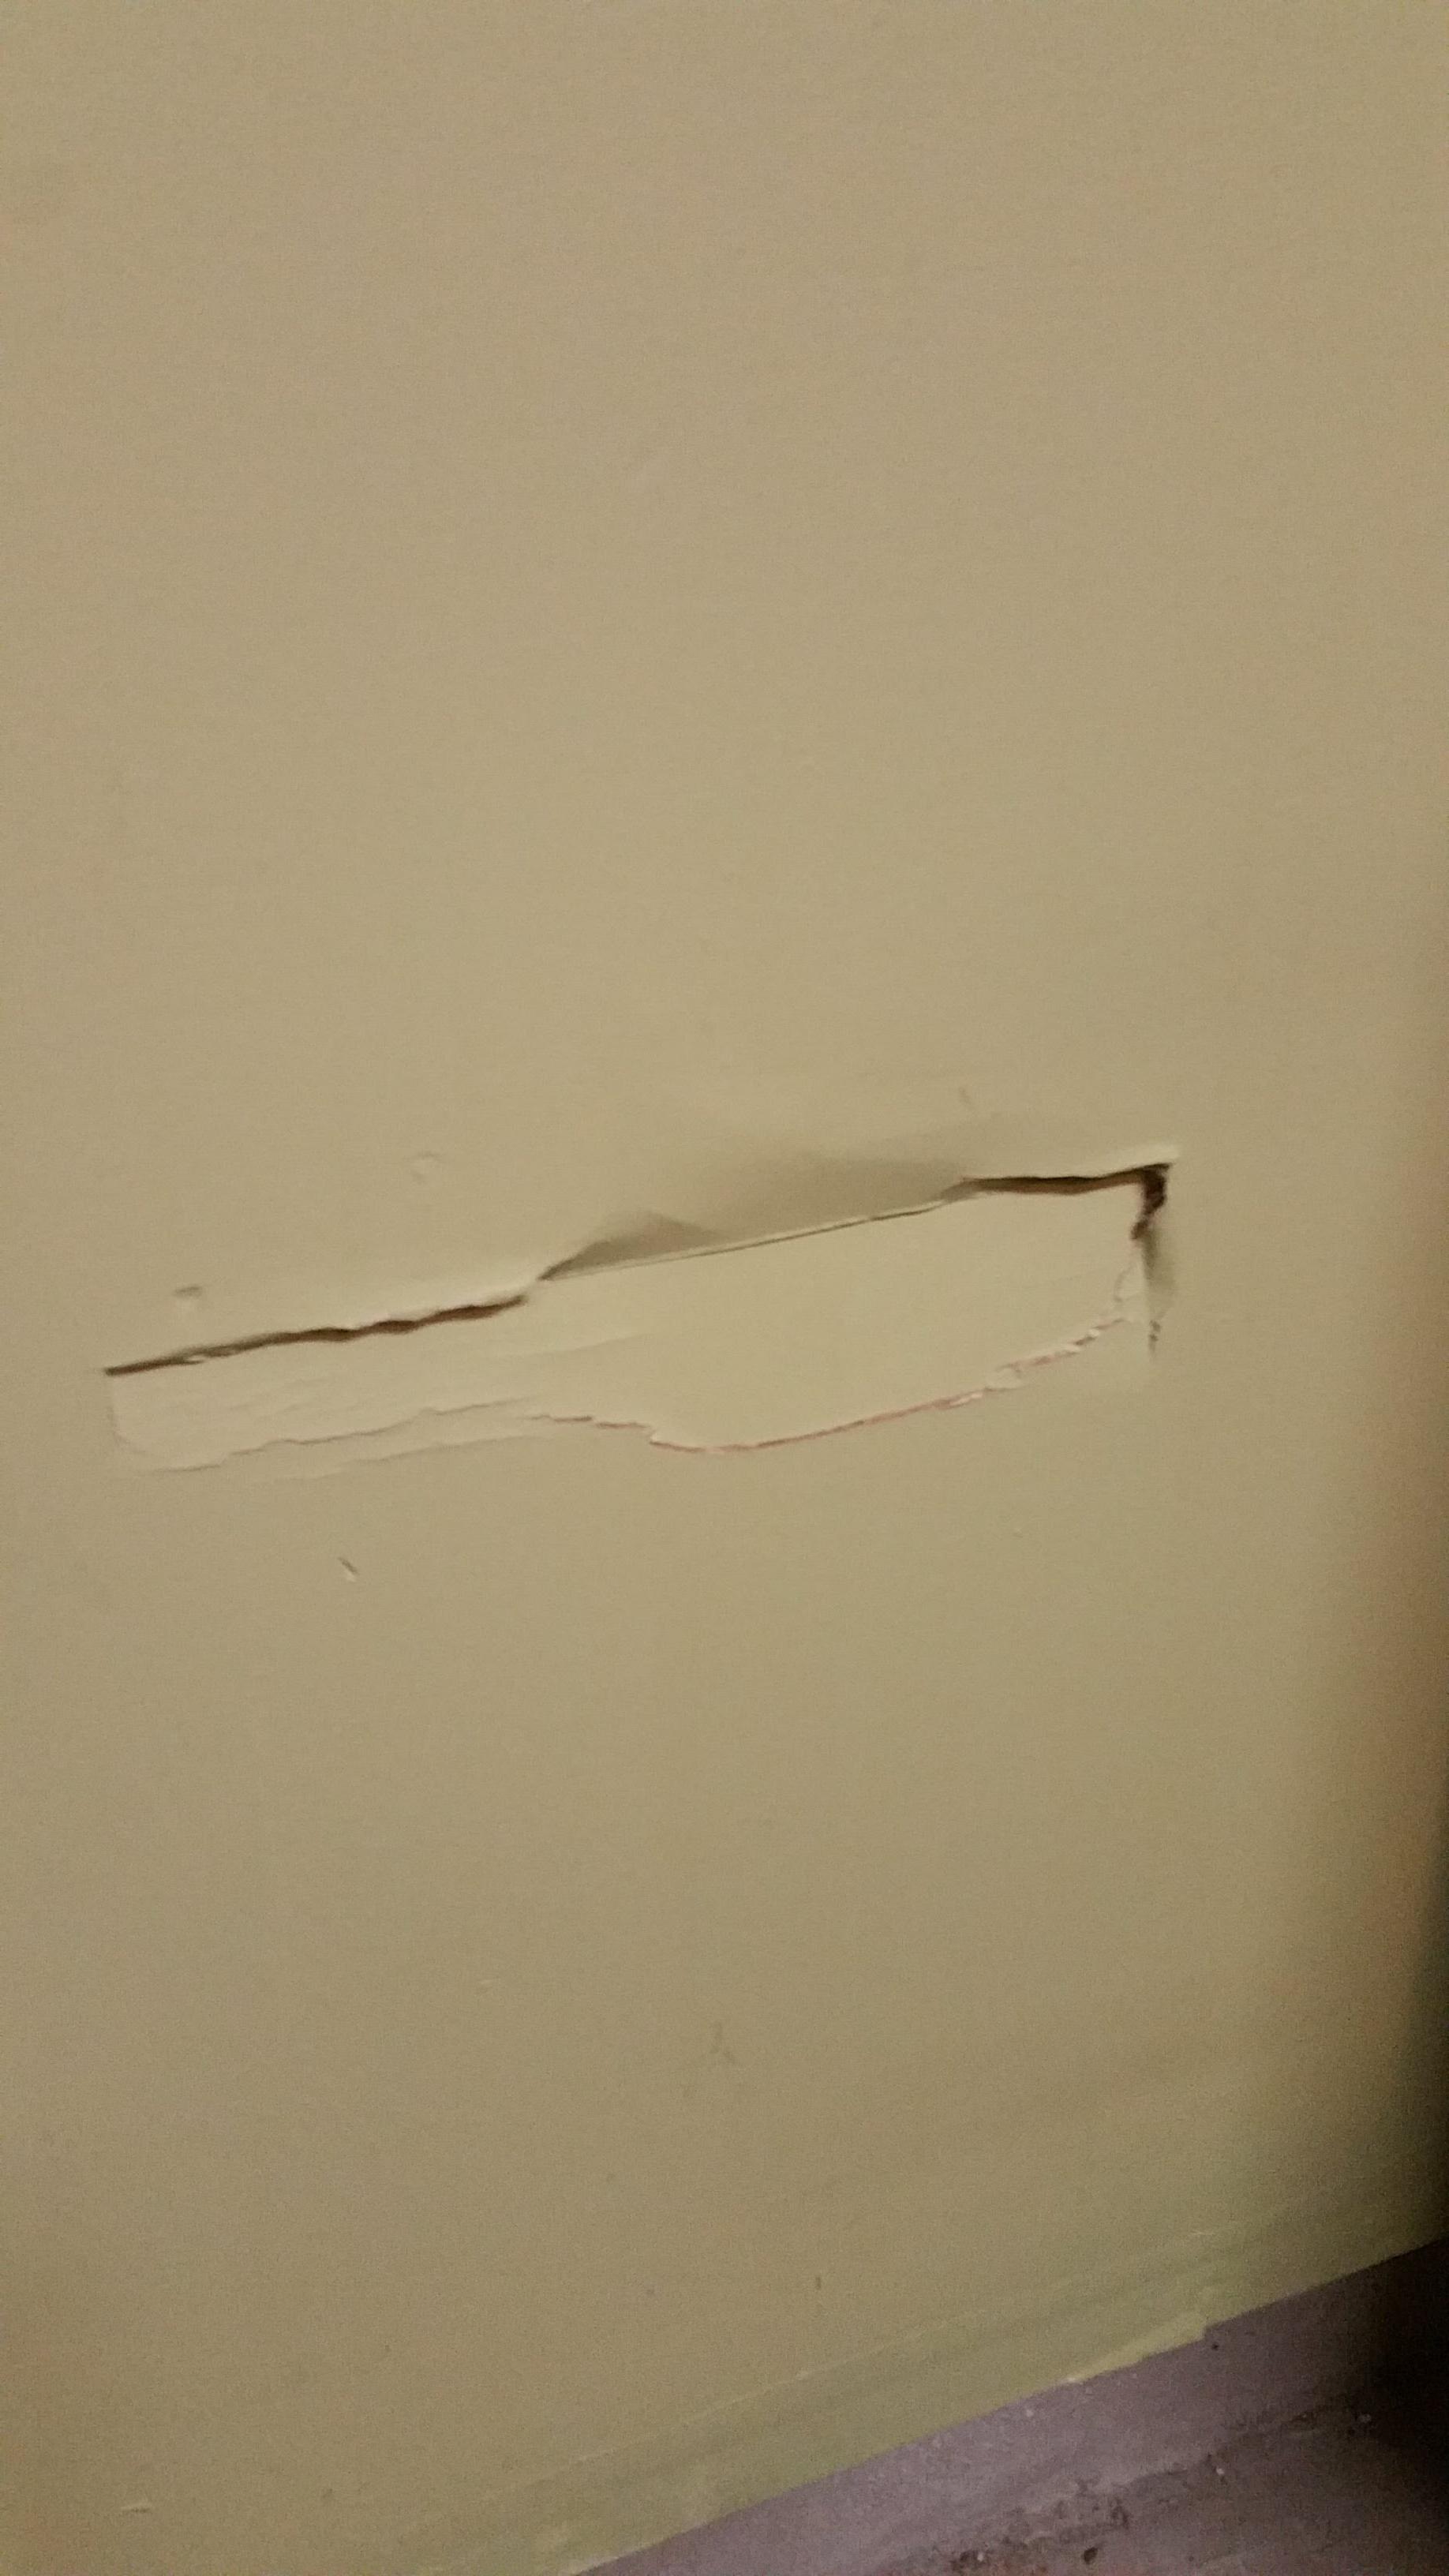
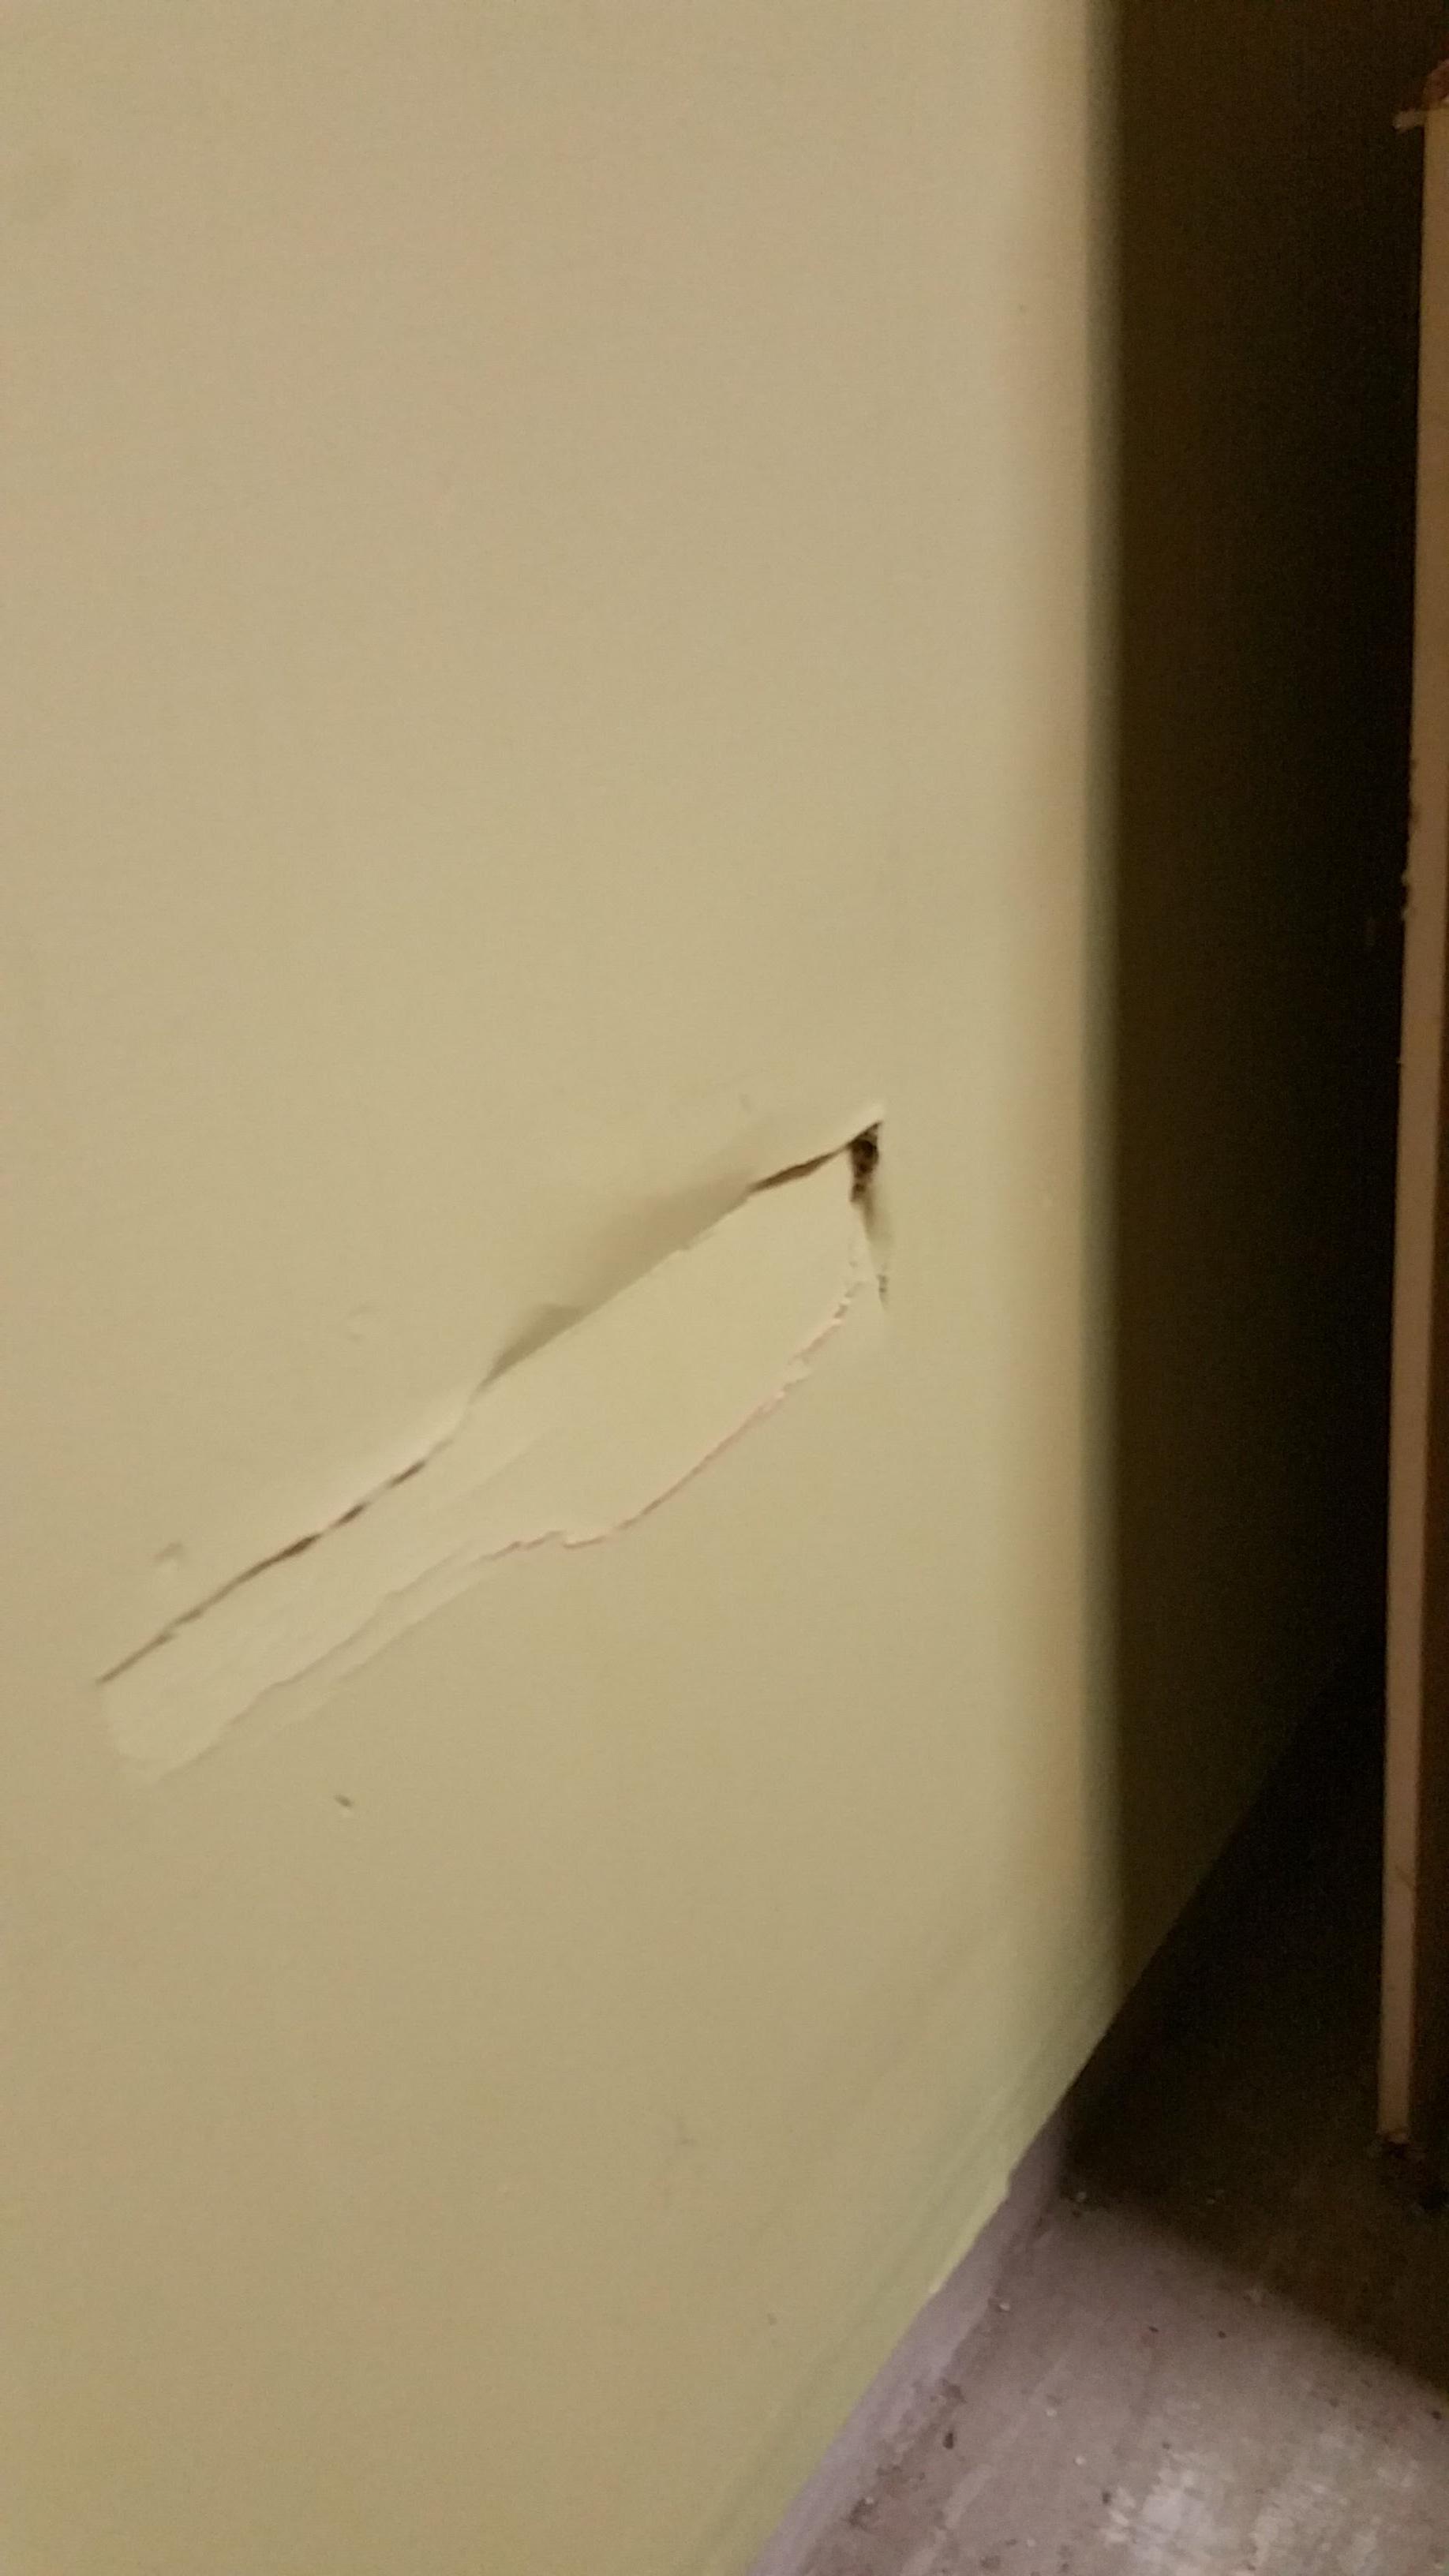
I accidentally ran my car into the interior back wall of my garage three years ago. Now that we are moving out, we would like to get it fixed. Please see the damage area attached. I am not even sure what material the wall is made of, but it looks like some kind of cardboard (about 0.5-1 inch thick) covering drywall. What's the best DIY option for me? Thanks a lot!
3 Answers
It is almost certainly drywall (also called wallboard or plasterboard), which usually consists of a gypsum based core with paper faces on each side.
The damage looks only cosmetic. You could cut out the damaged section and replace it with a patch and then tape and mud it. However, it looks shallow and intact enough to just fill in over it.
You need drywall tape, preferably the self stick mesh type, and drywall compound (also called mud), a filling material.
Cut pieces of tape longer than the hole and cover it horizontally, overlapping pieces of tape so the hole is covered and the tape extends at least 1/2 to 1" on each side.
With a taping knife, apply the taping compound, gently pushing it through the tape. Perfect filling it not essential. Overlap the compound on to the sound area of the wall for at least an inch or two. Do not apply too much mud on the first coat.
Allow to dry. Wipe down the compound with a damp sponge (a form of wet sanding) to remove high spots and any lines.
Reapply another coat of compound, covering a slightly wider area. Again allow to dry.
Wet sand again. If even and smooth enough, allow to dry and repaint. If not, you may want a third coat or additional smoothing.
Note that any painting, even with the exact same paint originally used, will not fully blend with the existing coat due to fading/aging. If an invisible patch is desired (probably not necessary in a garage), you may need to repaint the whole wall or area.
-
I wonder if it is even painted. In my storage room, I have similar wall material that seems to be unpainted drywall - which makes invisible patch more difficult as it would have to match the plain paper surface.– jpaCommented Apr 2, 2018 at 6:04
-
@jpa I have often seen garages taped, but unpainted. But the top picture shows a horizontal tape seam (near the opener control) that does look painted.– bibCommented Apr 2, 2018 at 11:21
-
Compare the wall color to the door frame or the light switch plate. The wall is definitely painted a shade of ecru or cream.– MarthaCommented Apr 2, 2018 at 17:39
-
I don't know why people insist on jamming "mud" in there, as in "tape and mud". The only way to tape drywall is with joint compound. It's redundant. Around here we just do taping and leave the mud to the hogs. :) Commented Apr 2, 2018 at 20:17
-
@isherwood Agreed, but novices may think taping ends with the paper or mesh.– bibCommented Apr 2, 2018 at 20:28
In those cases where the hole is too big to just fill with mud, the procedure is to cut out a rectangle around the hole and insert a new drywall piece that fits in the rectangle. If it were me I would do this in any case since it involves less mud to dry and will finish faster (and gives a more solid result).
In order to keep the new drywall piece in place, put a piece of wood behind the edges that you screw into on both pieces:
Procedure:
- Hold the piece of wood so that it is ca 50% behind the existing drywall.
- Screw in the screws through the existing drywall and into the wood piece.
- Repeat for the other side.
- Insert the new drywall piece into the cut-out (supported by the wood pieces so that it does not fall inwards) and fasten with screws.
- Normally when covering two edges of drywall you should cut a small groove to make sure there is some mud underneath and cover it with a (wet) paper roll in order to make sure it does not crack open later on, but there will be zero movement in the middle of a drywall plate so for this case you can skip this and just fill with mud so that it fills in the gap.
- Let the mud dry, and sand down to a flat surface.
- Reapply another coat of compound like described in the other answer.
You can maybe use just one piece of wood covering the whole cut-out with some margin1 or you might actually want to split the wood pieces into smaller pieces - it depends on how easy it is to get them through the cut-out hole.
1 Tip to hold it while inserting: put a screw in the middle that you hold onto while screwing in the first screws on the edges. When fastened you unscrew this middle screw.
-
If you're clever, you can do that with one piece of wood instead of two. Commented Apr 2, 2018 at 20:00
-
If that hole can be covered by a patch repair kit, purchase one and apply it, then apply joint compound over it. This advice differs only slightly from the above advice, but it's a little bit more novice friendly than fiddling with the fiberglass mesh tape.
Materials needed:
1x Drywall patch kit - typically sold in the drywall aisle. They are an 8x8 self adhesive square with a still steel core.
1x Drywall trowel - a flat, semi-rigid rectangular steel trowel that is slightly curved along the face of the trowel - the curve is important and allows you to apply joint compound properly. Make sure you buy one labeled "drywall trowel" - other rectangular trowels lack the curve and will take off too much compound.
1x drywall taping knife - this is a semi-circular, semi-rigid steel trowel use for applying joint compound and drywall tape.
1x bucket of joint compound. You probably need less than one pound of it. You can get the lightweight stuff or the regular stuff. It does not matter for this project. Don't get "plaster", it's more wet and heavier and messier to work with.
Instructions:
1) Open the kit. The fiberglass tape is self-adhesive. Stick it to the wall, centered over the hole.
2) use your tape knife to load up your drywall trowel with joint compound. You can take off the excess. You can also put more on afterwards - just put on a baseball sized amount to start.
3) Press the trowel against the wall and drag it across the mesh patch. You will deposit a thin layer if compound as your drag the trowel. The curve of the trowel ensures that you will leave a small amount behind as you drag. it is easiest to have only two corners of the trowel touching the drywall as you drag - lift the corners that are towards the direction of drag, so that you are forming a ~5 degree angle between the wall and the trowel.
4) Repeat 2-3 until the entire patch is covered and securely attached to the wall.
5) Wait until the compound dries. (usually ~24-36 hours, depending on climate)
6) Sand the compound smooth. If you start seeing the mesh appear again, apply a second coat of compound. You are sanding just until the compound looks and feels flush with the wall.
7) Paint the wall to match.
-
I'm suprised no one recommended lightweight spackle rather than drywall compound.– user8356Commented Apr 2, 2018 at 20:21
-
Spackle as I know it is extremely soft (fragile). I don't use it for anything other than filling nail holes before I paint. Commented Apr 2, 2018 at 20:48
-
There's a difference between spackle and lightweight joint compound. I'd agree the spackle is not a good choice for large patches. I wouldn't spackle anything larger than a US Quarter sized hole. Commented Apr 3, 2018 at 12:48


