19

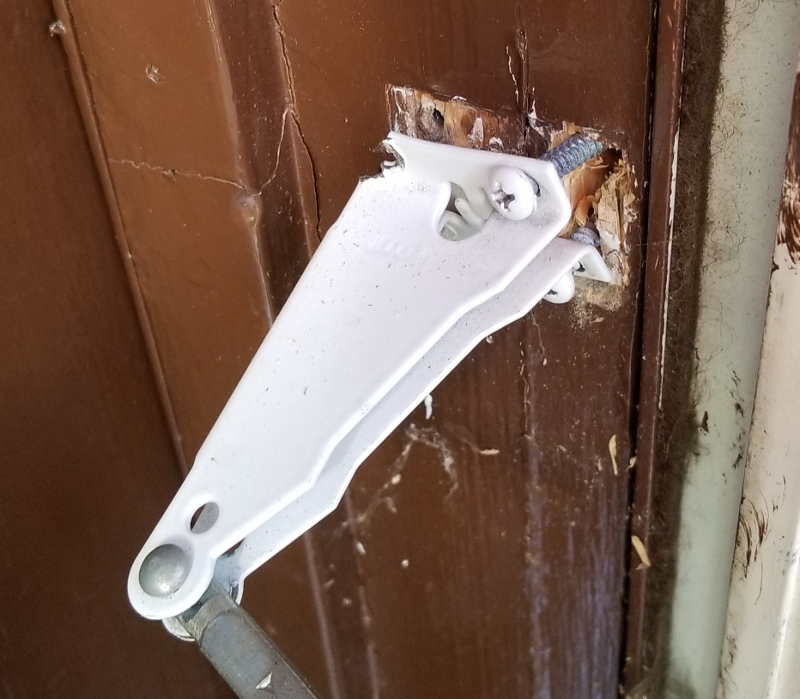
My screen door arm bracket started pulling off of the door jamb. Unfortunately, it was a few days before I noticed, so I've already lost one corner of the bracket (I plan to replace the bracket, because it's also a bit bent up). More unfortunately, it pulled out because the area behind the bracket is pretty chewed up, something which only came to light after this happened.

Broken door arm

I know that there are putties that are used to fill a gap in wood, but I'm also given to understand that they're generally not great to try to screw things into since they have no particular anchor to the wood around them. Is there a better solution, maybe filling in the area, then nailing a piece of wood over it to provide a more solid anchor?

5
  • 2
    What's behind the jamb, wood framing? If so re-attach the bracket with 3" deck screws that will go back into the framing. Commented Sep 25, 2017 at 21:35
  • This door jamb looks exactly like one I installed a few years ago up in VA. Commented Sep 26, 2017 at 14:56
  • 1
    @DarthCaniac: I'm in PA, so I can't blame you. ^_^ Commented Sep 26, 2017 at 15:00
  • 1
    The wood repair resin I've used so far is definitely able to hold a screw. At least our bed hasn't suddenly collapsed in the past few years.
    – Joey
    Commented Sep 26, 2017 at 15:13
  • Wow. That's a lot of answers. I'm going to start with the longer screws and getting some wood putty. I'll let you guys know how it goes. Commented Sep 27, 2017 at 13:39

8 Answers 8

28

You should drill out the hole with a large drill bit and glue in a wooden plug. Then you can drill a pilot hole into that and screw the bracket into that.

Toothpicks will work in the short term but if they are not glued then they will pull out pretty soon. Drilling out the chewed out wood and glueing in a plug will create a new place for screws to bite into.

I would also suggest going for longer screw and making sure that they attach firmly to the wall rather than just the door trim.

5
  • This is the best permanent fix answer. While wood glue and toothpicks are fine for quick fixes, a solid wood plug with a very thin glue interface layer will be more structurally sound.
    – Adam Davis
    Commented Sep 26, 2017 at 12:35
  • 1
    Good answer. I usually use a dowel that is slightly larger than the hole, sharpen it like a pencil put some glue on it and then bang it in as far as I can with a mallet or deadblow hammer. Once it is cut flush you can screw right into it. No need to wait for the glue to dry.
    – JimmyJames
    Commented Sep 26, 2017 at 16:55
  • Rather than a wooden plug, I can recommend Ronseal wood filler (if you can get it in your country). It's smelly stuff, but fills gaps, sets quickly and doesn't shrink while setting. You can and and drill it, and a wood screw (with appropriate pilot hole) will key in nicely.
    – Richard Ev
    Commented Sep 27, 2017 at 7:05
  • I used this dowel technique when I mistakenly drilled out the space where the screws should have gone when installing a mortise lock. Finding a 16mm dowel sold in a location that would be open when I was outside work was the biggest trouble I had. Works like a charm though.
    – Tom W
    Commented Sep 27, 2017 at 11:37
  • 1
    It looks like the paint is beginning to crack, so a refinish might be in order anyway. You might consider sanding back some of the paint just to be sure there isn't any water damage under there. If there is water damage, you may consider replacing the jamb which also gives you the opportunity to check out the framing underneath it. (leading to the 4 most dangerous words in remodeling: "While we're at it..." :)
    – FreeMan
    Commented Sep 27, 2017 at 15:08
20

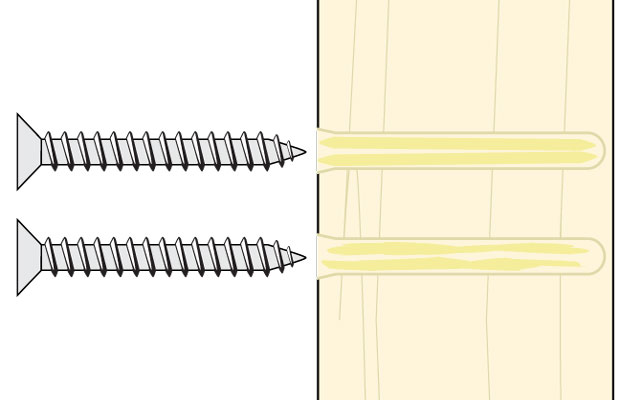
I might get barked at for suggesting this, but take toothpicks and jam them into the holes - as many as you can. Then just break them off so it's flush with everything else. I've done it before and it really works. When you're screwing it back in, the toothpicks will get caught in the threads and actually create a tight seal. I wouldn't recommend using this tactic for something that provides security (from like forced entry). Otherwise, this is a fast, easy, cheap, legitimate method of filling in screw holes for reuse.

Edit: I like visuals, so here's one. As others have suggested, you would just apply glue to each stick before insertion.

Edit2: After seeing all the comments about using dowels, I took a second look at your photo. It almost looks like two of your screw holes are in the same...well hole. So I agree, toothpicks are definitely not the best option for this. I'd take the advice of someone else on this one, but this toothpick hack would work for smaller applications.

enter image description here

8
  • 4
    Actually a pretty good hack for most screw hole failure, but you need to add a bit of wood glue or white glue to the picks. Let dry before reattaching. This one looks a bit more extreme, but worth a shot.
    – bib
    Commented Sep 25, 2017 at 23:35
  • @bib I wouldn't say it's necessary to glue but it certainty would help. It really depends how compact you can get the picks into the opening.
    – hack3rfx
    Commented Sep 26, 2017 at 0:03
  • woof woof..... I've seen this posted elsewhere on here and dont know why it would not work, at least temporarily. I would otherwise recommend a small cut plywood with its own new holes, or even drill new holes 7/16 left of the current ones
    – noybman
    Commented Sep 26, 2017 at 1:45
  • 1
    This decreases the overall structure of the frame wood, and while isn't a bad short term hack, it's not a good solution to the problem. Further, toothpicks are great for screws undergoing shear stresses, but these screws will be undergoing tension and compression stresses. I expect a toothpick fix will fail rather quickly. Adding wood glue would help, but wood glue is meant to adhere two well fitting surfaces with a thin bond layer. The toothpicks with large gaps would require the glue itself to be the filling, and it wouldn't be as strong. Epoxy would be better, let it set, then re-drill.
    – Adam Davis
    Commented Sep 26, 2017 at 12:40
  • 14
    The proper solution is to use dowels. Drill out the hole to the dowel diameter, cut to length and glue it in. Commented Sep 26, 2017 at 14:40
10

If this is the spring for a screen door, which is looks like, try just moving the bracket up or down 1/4" or so. There's usually enough slop in those things that you can do it, and you'll have new wood to screw into.

1
  • 2
    drill first... to avoid further splitting. And then add a tension spring/catch so that it doesn't rip off at the odd wind or teenage blow out
    – noybman
    Commented Sep 26, 2017 at 1:46
7

Filling the holes with tooth picks is good for restoring the wood for screws that don't go through too much stress. I would definitely use glue when going that route.

The issue here is, the wood of the jamb did not withstand the stresses that was given it. Although the toothpicks are a good fix, it is still not quite as strong as the original wood, and if the original wood failed, so will the toothpicks.

Two things need to be done to help keep it from happening again.

First is use longer screws to reattach the new bracket to the jamb. You can fill the holes a bit with toothpicks if you like, even use putty and repaint if you like as well. The real workhorse to keep it from pulling loose again is using longer screws. If the old screws were 2" long, get screws that are 3 1/2" long. Or simply get screws 1 1/2" longer than the old ones. If they are 12 gauge screws, see if 14 gauge will fit in the same hole to add a bit more beef to the hold.

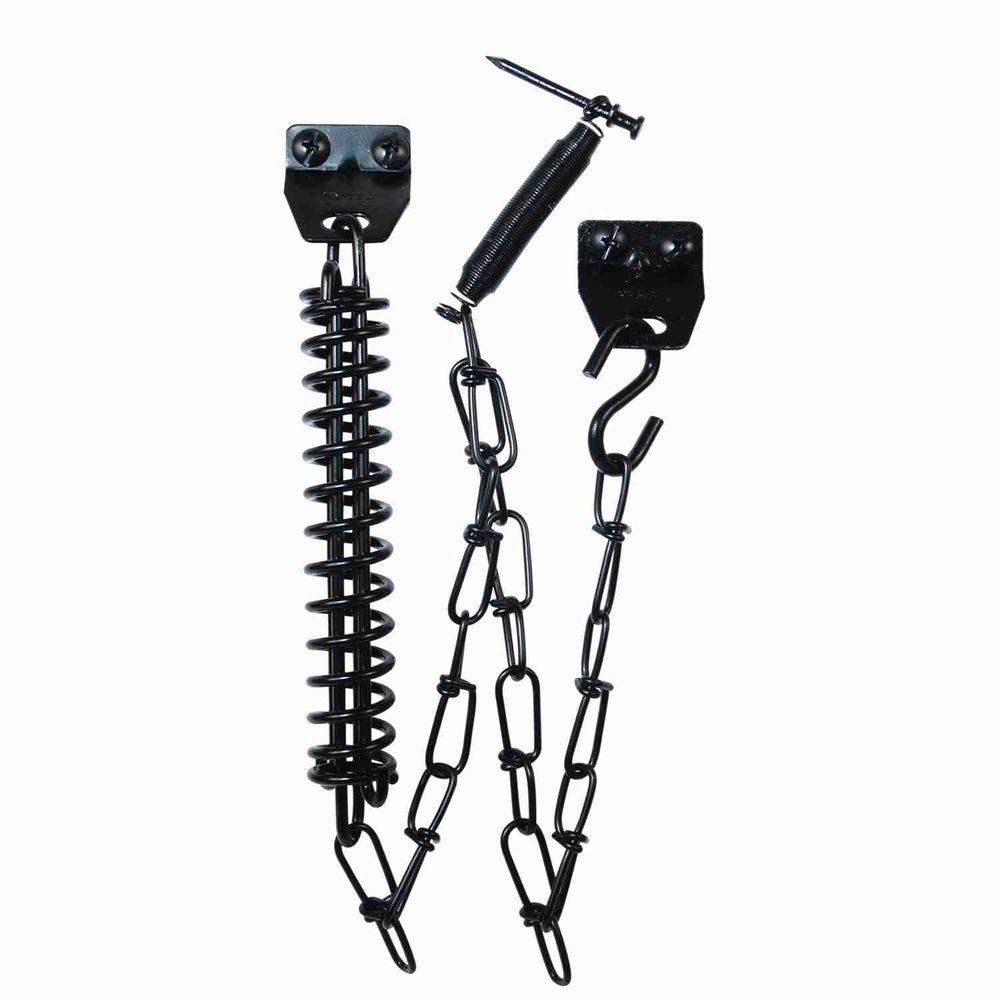
The other step was mentioned in a comment by nobyman, get the chain stop for the top that has a spring dampener with it.

enter image description here

5

I'd recommend putty by fixing the "bite" problem. You can give putty something to bite into by gouging the sides of the space it will be used to fill. The advantage of using a wood filler or Bondo is that after it sets up, you can sand it and paint it and drill 4 new holes. It will look as good as new and probably function even better than new. Although the repair will be covered by the hardware, it's always better to fill holes in wood than to have holes in wood, even concealed ones. They can end up wet, and because of poor air circulation, slow to dry, inviting rot. If there's the tiniest access, they can serve as home base to some kind of 6- or 8-legged creatures you'd rather not host.

Given the dimensions of the space you have to fill, wooden toothpicks would not be up to the task. It would be different if it were just a case of ripped-out screws needing a shim or two. What you have is empty space from the top of the top screw-hole to the bottom of the bottom one. You'd need 20 or 30 for that space, and they don't defeat the "bite" problem. With glue, they probably would. With glue in the contest, the decision between toothpicks and filler is an aesthetic one.

You mentioned screwing a piece of wood over the damaged area. It would have to be at least 5/8" to stabilize the screws, but anything over 1/4" is going to look pretty funky, and not in a good way.

1
  • This. (Premium, stainable, not putty) wood filler is the right material to use here, and if you apply it right, it will likely be stronger than the original wood. Commented Sep 27, 2017 at 4:44
5

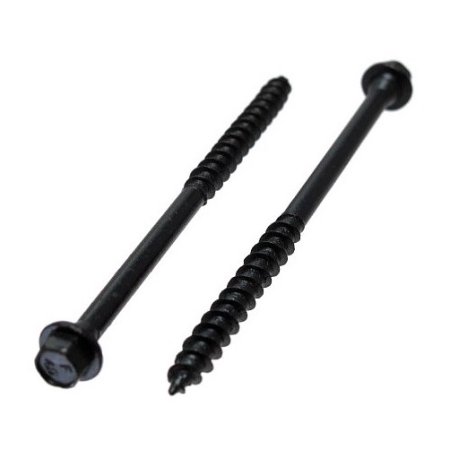
Assuming that you've got a solid frame, my suggestion isn't a simple 3" deck screw, but either a 3" or 4" screw-in bolt. I had to put a chin-up bar on a wall and I wanted to ensure that the 2x4 I was mounting it on wouldn't move. I bought some 4" flathead screws (note that my local big box sells these individually so you don't need the 250 counts they sell online).

These are overkill but you've got 2 major advantages in doing this

  1. They have a pan head. In case you hadn't noticed, the metal plate is damaged. You have 3 screws doing the work of 4. The flat head will pull the existing plate against the wall (if you can, you should buy a new attachment plate as well). Most 3" deck screws are designed to countersink, and that will not work on the damaged corner
  2. These will extend into the frame and, most importantly, will never move.
2
  • 2
    You might need to put a little wax on the threads of these to get them to go in easier. With the hex head you can put a lot of torque on the shaft and snap the head off if the threads stick. Then you'll have a heck of a time backing them out.
    – Arluin
    Commented Sep 26, 2017 at 17:05
  • Also note that these screws have a large diameter shank, which may not fit the bracket, and the pan head may interfere with the side of the bracket. While this is a good fastening solution in general, it probably won't work in this specific situation without modifying the bracket.
    – Adam Davis
    Commented Sep 28, 2017 at 13:05
3

Rachet Freak has a good answer but looking at the picture, this might be an atypical situation. It looks like there has been a mortise cut out of the jamb. There's no way to tell how deep it is from the pic but you might not be getting enough bite to hold the screws.

First thing, inspect for rot. If you find rotted wood (soft like cork), you need to 1. find the source of water and fix it immediately. 2. remove any rotted wood and replace it.

It doesn't look like you have rot here so let's assume that's not an issue. Next, if you don't have one, invest in a block plane. It's really an essential tool. The find or buy a small piece of pine like a 1X2 that's maybe a foot long (if you cut it short it will make the next step much more difficult.) Then with the plane, shave off the wood until it can fit into the hole. This takes a little bit of practice but it will go fast once you get the plane set right. Technically you should sharpen the plane but it will cut soft pine from the factory.

Once you have a piece of wood that fits tightly, put some wood glue on it and drive it in snugly. Take a flush cut saw or a chisel and trim off the excess. You can use your plane to make perfectly flush but it needs to be really sharp to cut across the grain neatly. Let it set up for an hour or more and then you can screw into it.

0

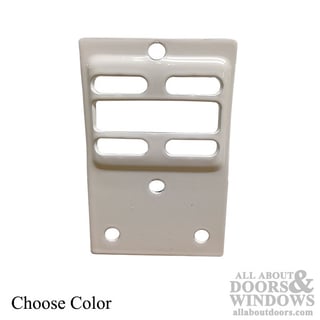
Just to add my actual solution, when I went to Lowes to get another bracket, and longer screws, I found a plate like the following that let me bolt into the area around the damage rather than directly into it. I will try to remember to take a picture of the actual setup when I get home.

Reinforcing mounting plate

Your Answer

By clicking “Post Your Answer”, you agree to our terms of service and acknowledge you have read our privacy policy.

Not the answer you're looking for? Browse other questions tagged or ask your own question.