0

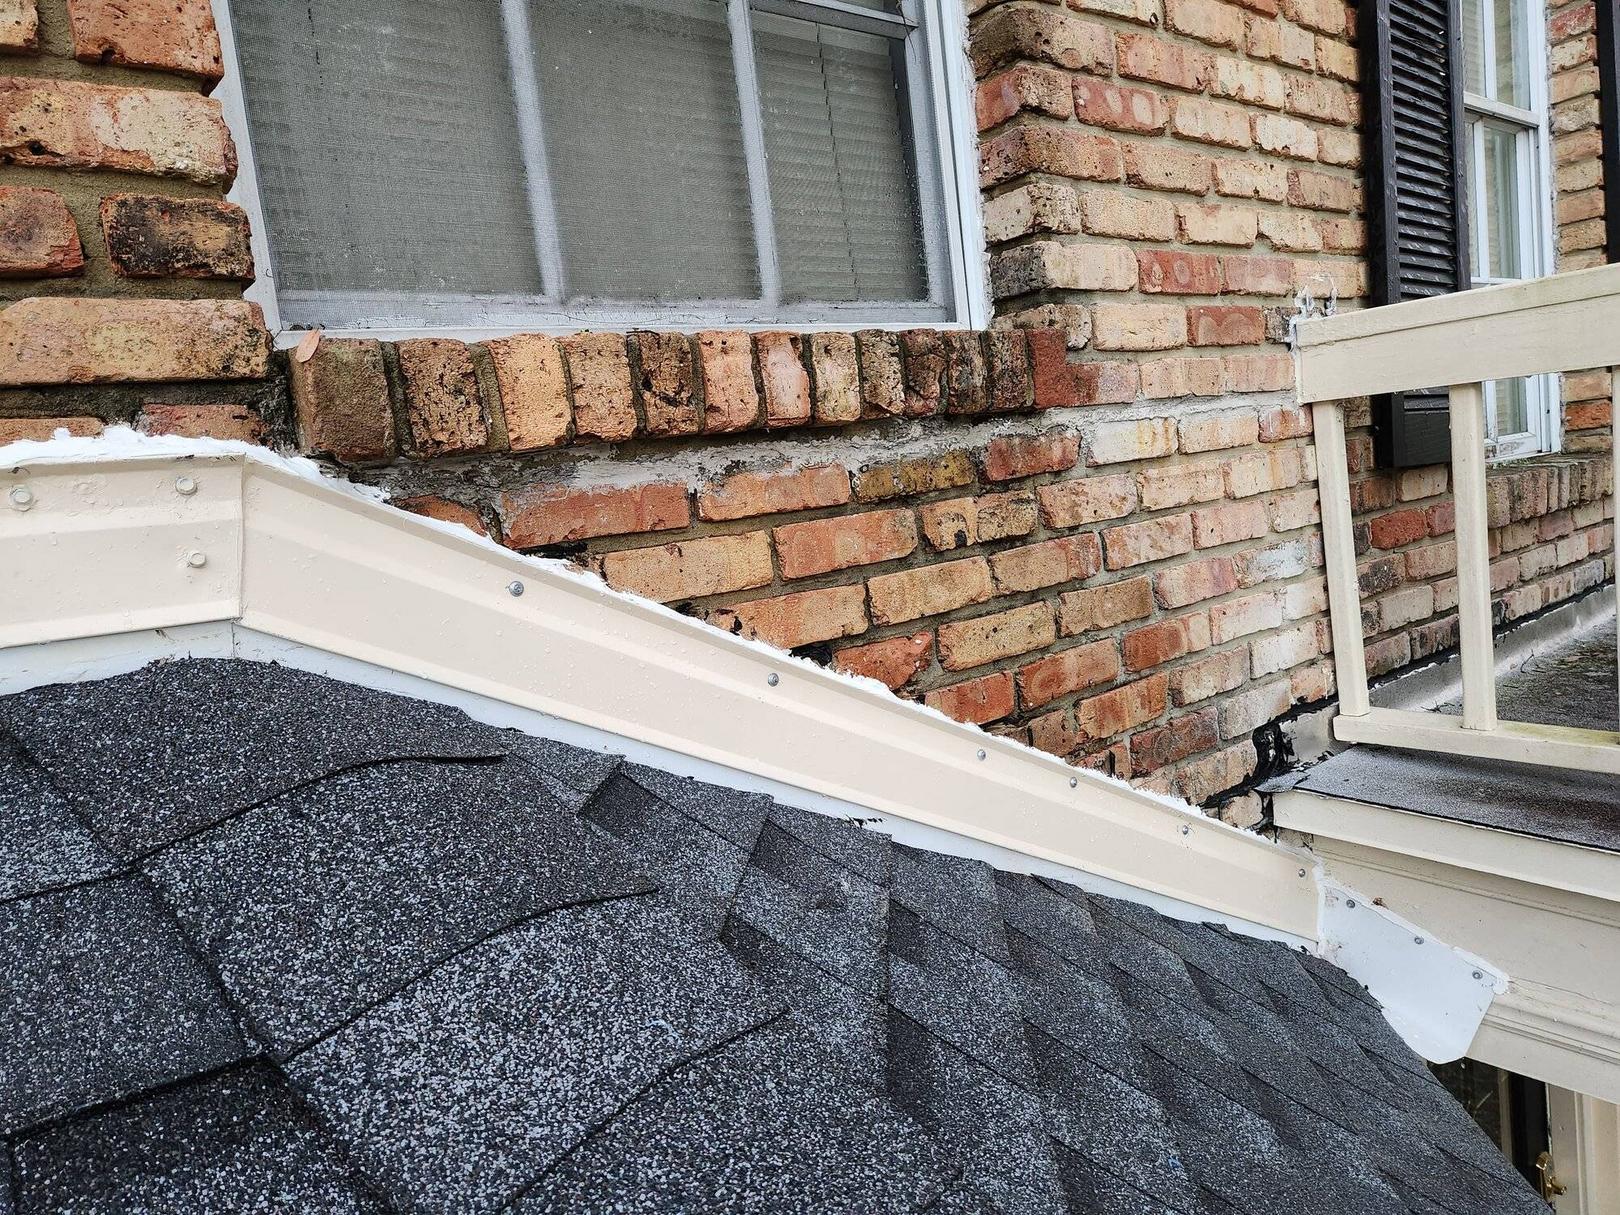
I have a bay window with its own roof, that connects to a brick wall. The joint between the roof and brick leaks when water is sprayed at or otherwise lands on the brick -- during our last hurricane, gallons of water made it through into the room below.

At first, I thought it was an issue with the roofing company using the preexisting flashing, but they've come back and completely redone the roof and flashing, and the leak remains.

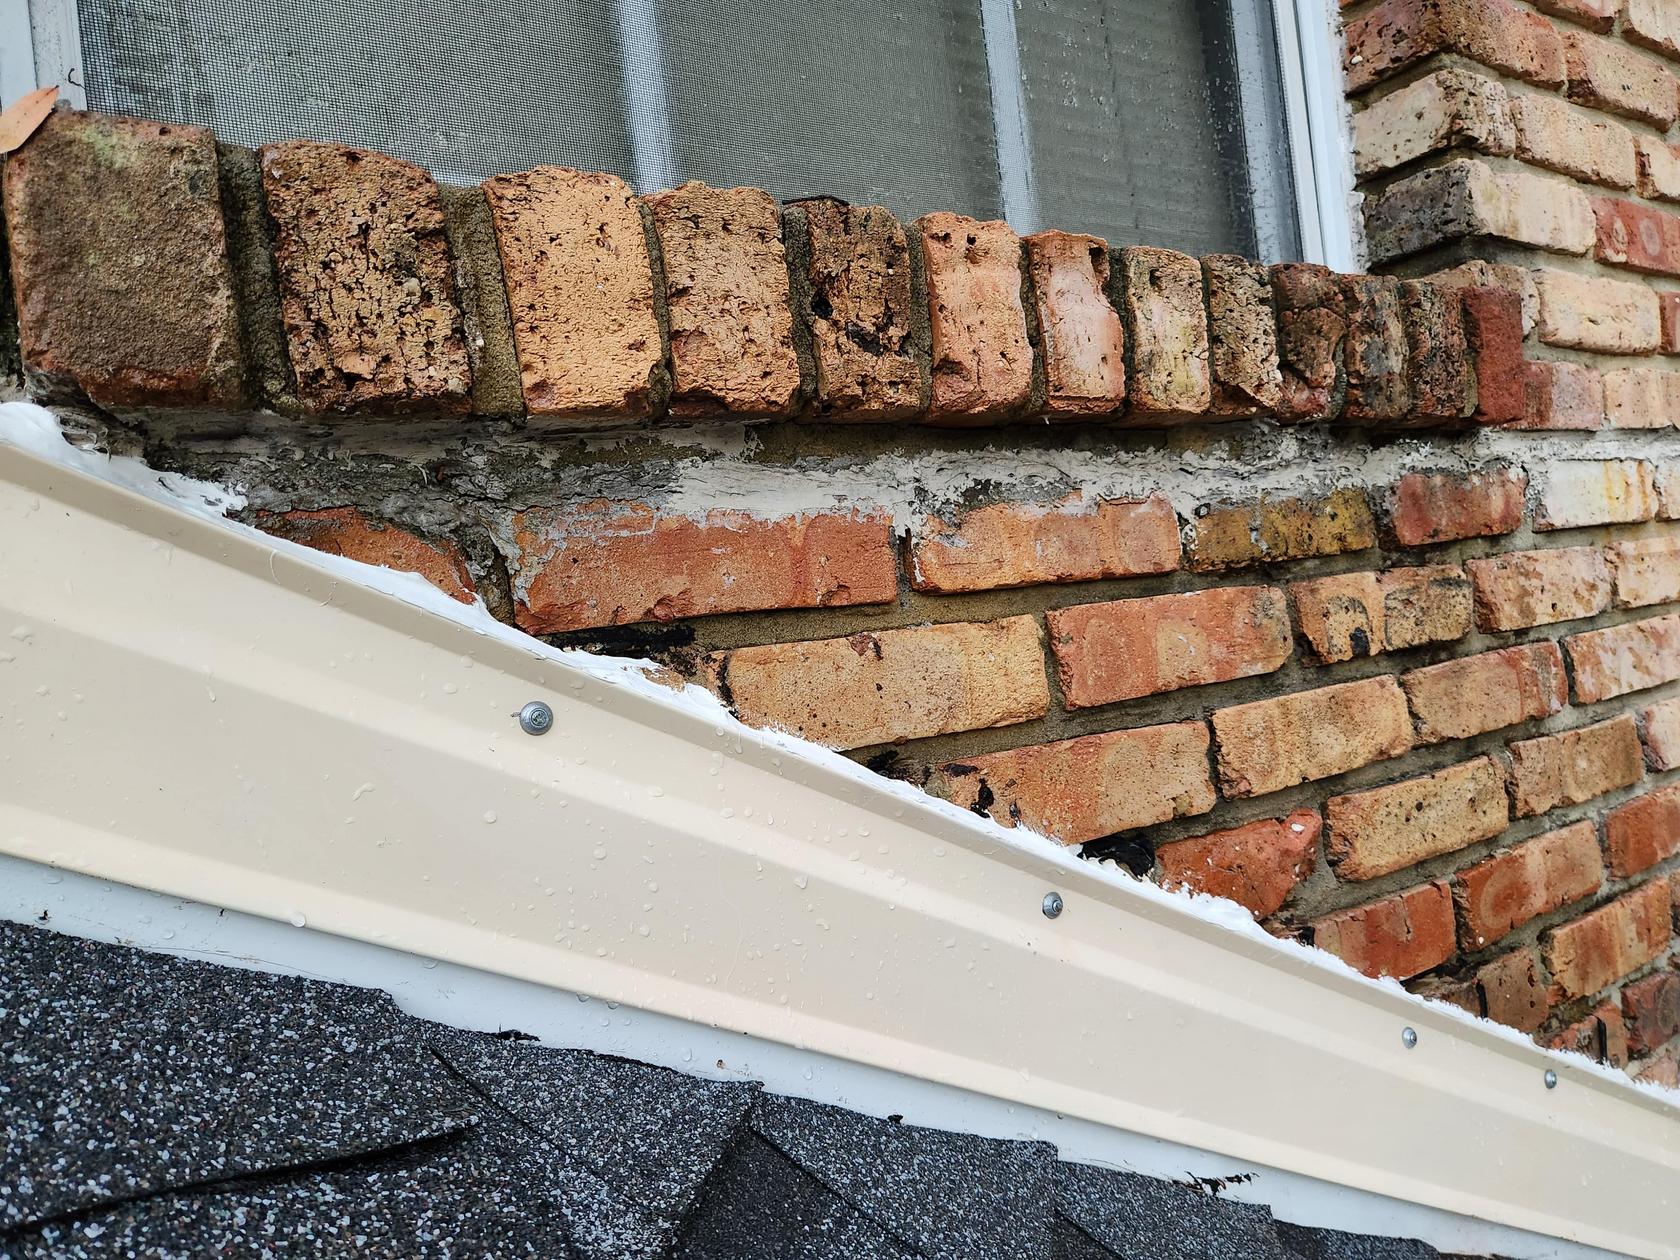
Could something be wrong with the brick, and is there anything I can do about it? Or is this something that can be resolved at the flashing junction? I've tested this area with a hose -- water sprayed onto the flashing itself doesn't cause a leak. Water put on the brick directly above the flashing causes a steady stream of water into the room below.

Brick wall

Wider Angle

4
  • no wonder with those large gaps between the bricks, difficult to fill
    – DIY75
    Commented Feb 5, 2023 at 3:02
  • Are you floding the wall only, or are you flooding the lightly sloped surface of the window sill brick too?
    – Jack
    Commented Feb 5, 2023 at 3:23
  • @Jack the wall only.
    – Itinerati
    Commented Feb 5, 2023 at 12:54
  • 1
    Thanks, the answer Mark gave below is the proper answer. You need to show it to your roofer. If they did not use any step flashing on the sloped sides of the roof, that is an open invite for water infiltration, let alone with the counterflashing only applied to the face of a wall, instead on in a kerf cut into the brick joints. Brick are very porous, at a building science class I was in, 10% of the water that is on the surface of the brick make it THROUGH the wall. That is where proper construction techniques are used so when the roofer does his job right, it all works. They must kerf the wall
    – Jack
    Commented Feb 5, 2023 at 18:21

2 Answers 2

3

From what I've seen, the standard approach for flashing where a sloped roof is adjacent to a brick wall is to use step flashing and counter flashing.

The bottom flashing is made as a series of steps that are installed underneath the adjacent shingle, and bent to run vertically up the wall. The next piece partially overlaps the previous one, and ends one step higher on the wall, etc.

The counter flashing is installed over the bottom flashing, and is imbedded into a slot cut into the mortar joints between rows of bricks.

In your picture, it looks like the bottom flashing is just one long piece sitting under the shingles, and the top piece is also one long piece, totally dependent on globs of silicone to keep water out - which it's clearly not doing.

The step approach is routinely used on brick chimneys that penetrate the roof, and there are many articles and videos showing how to do it - search for "step flashing chimney" or "step flashing brick wall", for example. Here is one article that shows much of the process.

1
  • Thank you! The roofers are coming back tomorrow, and I'll discuss this with them.
    – Itinerati
    Commented Feb 6, 2023 at 14:43
0

To prevent the bricks absorbing water coat the bricks.

To prevent the leaking from above the flashing, remove it and use mortar to make the surface flat, by filling all spaces, then use silicone to seal.

Your Answer

By clicking “Post Your Answer”, you agree to our terms of service and acknowledge you have read our privacy policy.

Not the answer you're looking for? Browse other questions tagged or ask your own question.