1

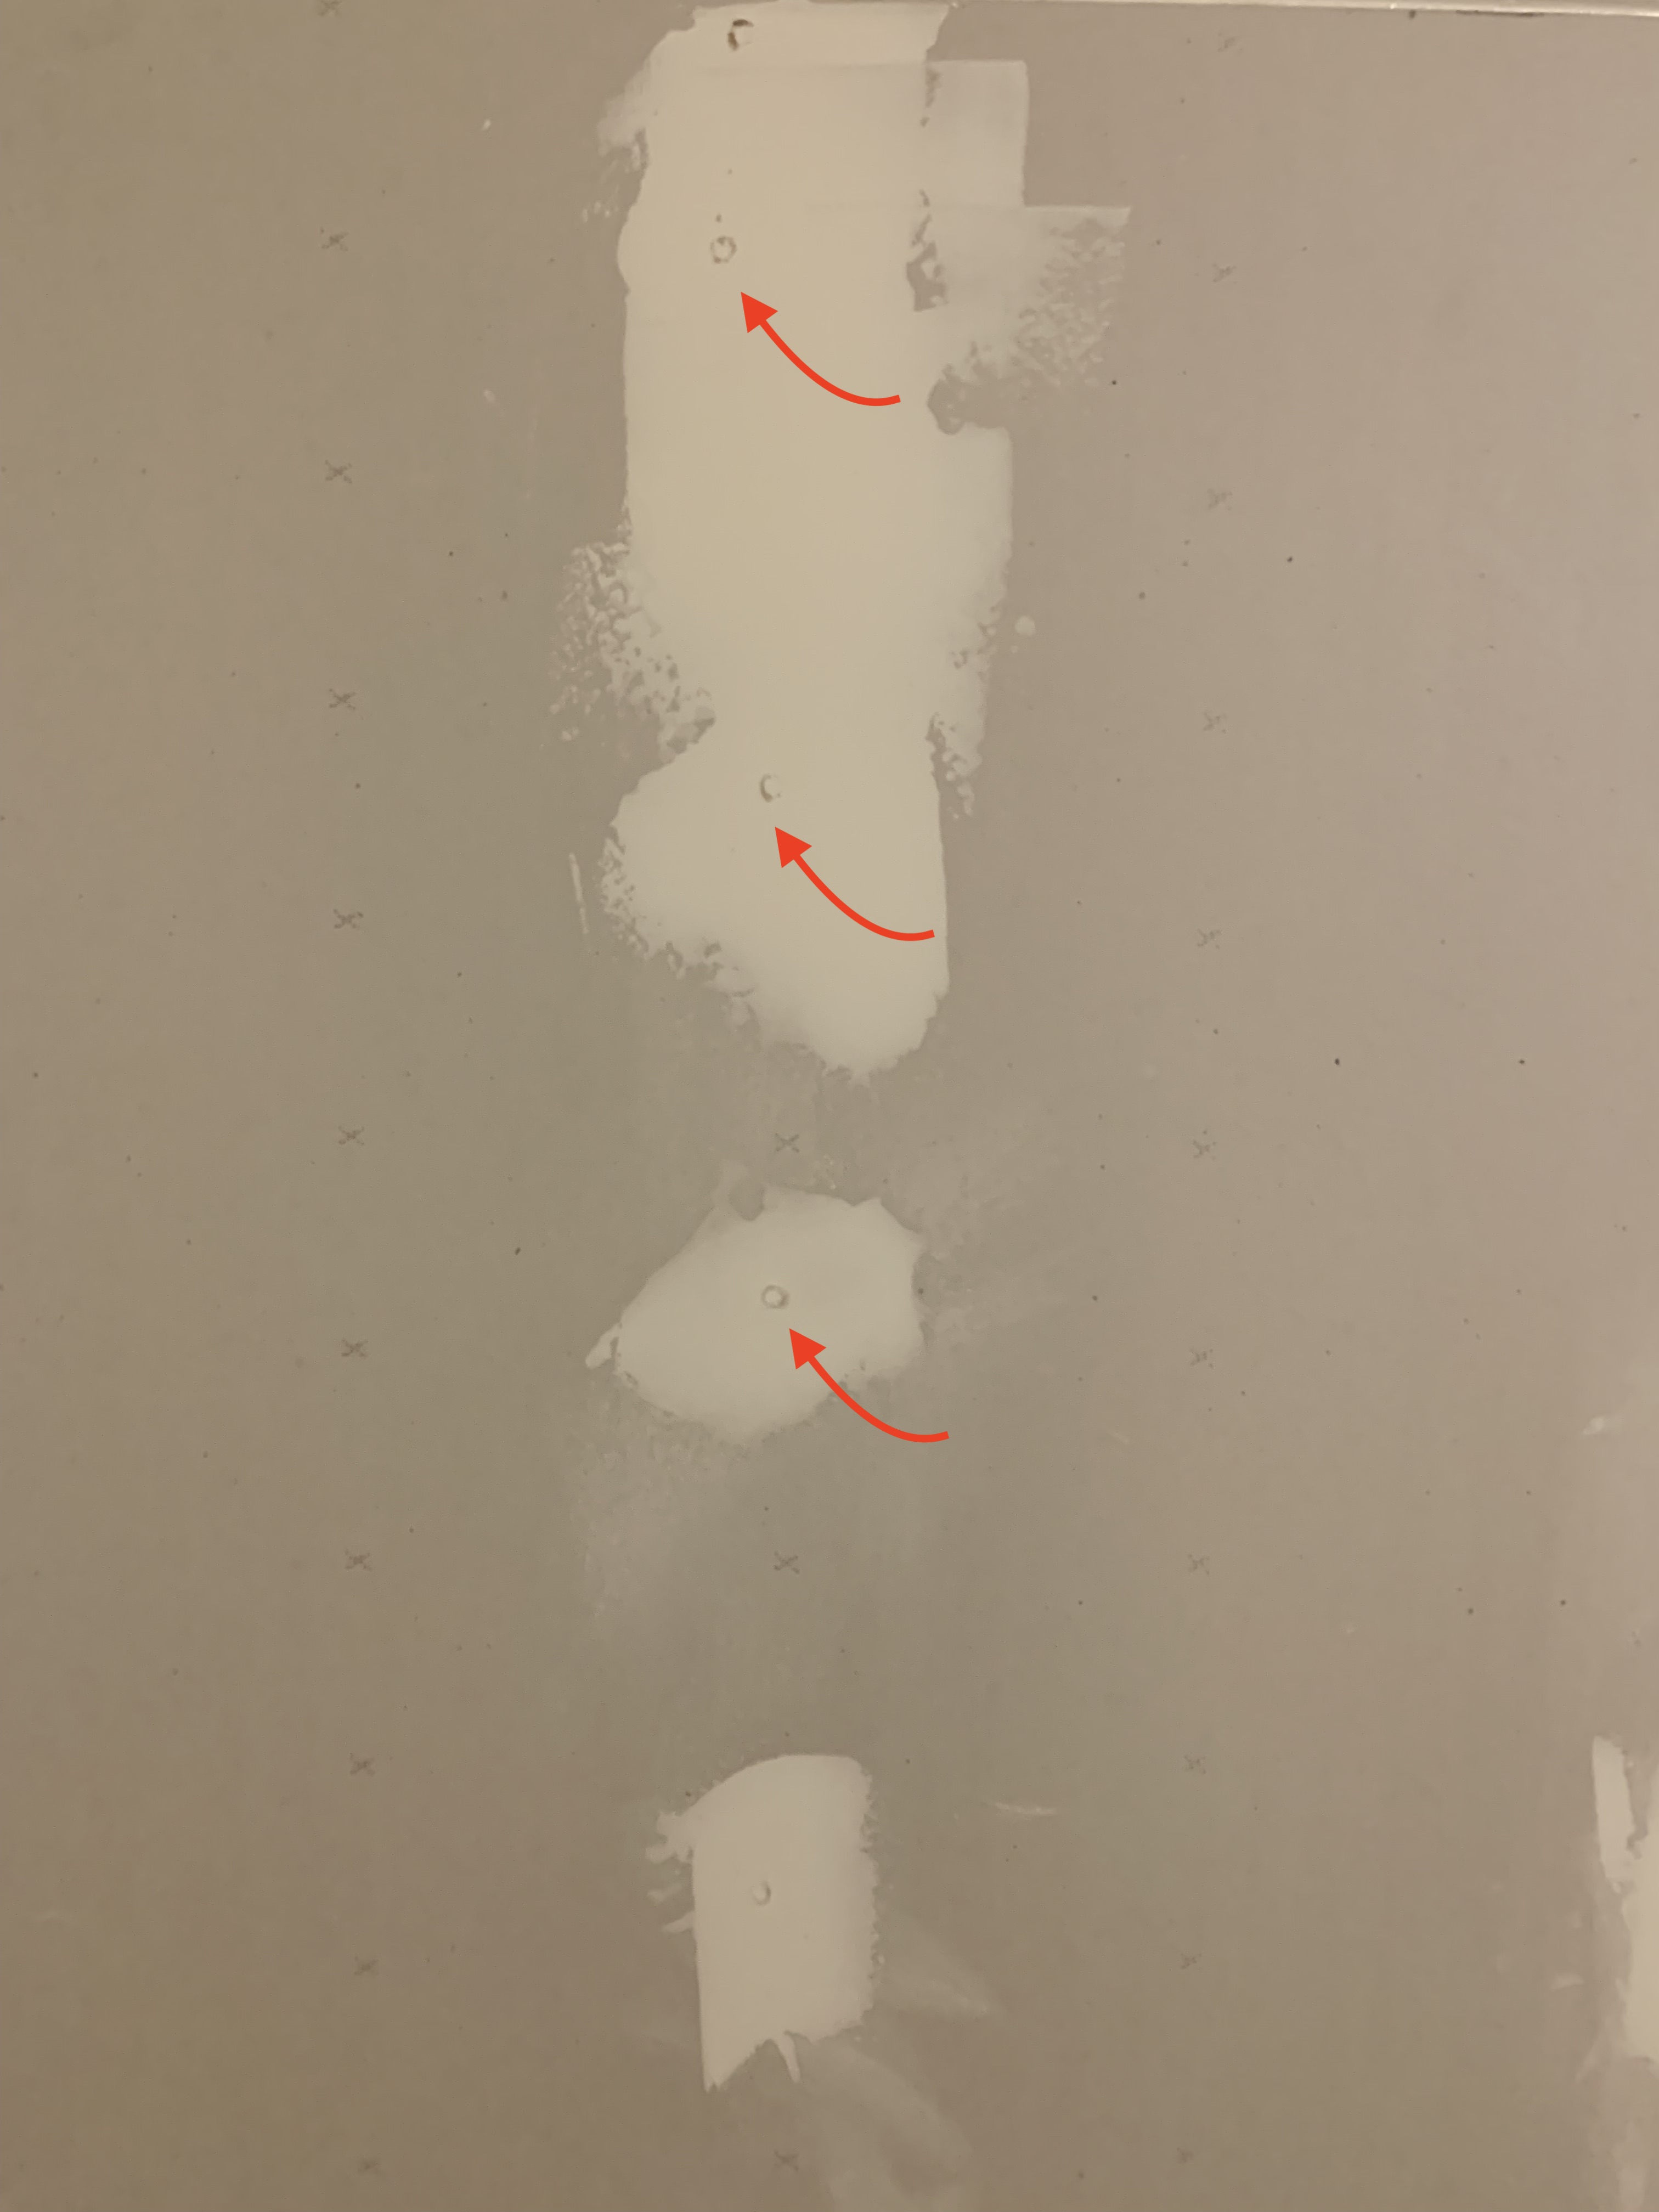
I used wrong screws for the drywall. I didn't realize that the screws are wrong until the job was done and I started to put mud on the walls. After putting the first layer and doing some sanding, I realized that screws are still way-way too visible. I am trying to correct my mistake in some way and am looking for suggestions on how to fix this. Can somebody suggest something?

I was thinking to put a layer of paper tape to hide this mess before putting a layer of mud again. Is this a good idea?

enter image description here

2 Answers 2

1

It's hard to give advice that will result in a good solution without knowing the type of screw you used. And in addition to the type, whether or not they were set correctly (with the face of the screw slightly below the paper surface of the drywall).

As Solar Mike mentions, drywall screws are coated to prevent rust from bleeding through the finished surface and staining your wall. They also have heads that are tapered on a curve so they can penetrate deeply enough to sit correctly (slightly lower than the face of the drywall) without punching through the paper, but still provide enough tension that they stay put, hold the drywall still, and don't exhibit nail pop (by cracking the mud you put over top of them to cover them up).

You can certainly put more mud over the screw heads and sand, then repeat until they're hidden. But you may still risk rust stains showing up over time (sometimes long after you've painted the wall and considered the job done) or nail pop from the incorrect screws moving due to changing conditions (temperature/humidity) over time. Putting squares of tape of the screw heads will stabilize the mud a bit and may help reduce the chance that they'll pop through over time, but it won't really help if your screws rust and stain the wall.

Screws of any type, right or wrong, set with the heads above the surface of the drywall, will prove more difficult to hide correctly. You'll end up building a thicker layer of mud over them and the resulting high spots will almost certainly be visible after the wall is finished unless you feather them well over a larger-than-you-might-think area.

Another option would be to drive new (correct) screws in between your existing screws, then back out the incorrect screws and remove them. Treat the resulting holes as you would the screws themselves, cover with mud and sand.

Also, worth noting that it's normal for the mud to shrink as it cures and there will almost always be dimples above every screw head after you've sanded the first coat. This is why a second and/or third coat is pretty typical.

2
  • The screws I used are for wood and thus the surface around the screw is not looking good. I made sure that screws are not too deep in the wall and are not popping up also. The problem is specifically with the grey circle around each screw that I assumed would disappear after first layer of mud and good sanding but that didn’t happen. Should I just keep putting mud and do more sanding? Commented Apr 17, 2019 at 18:46
  • A plain wood screw with a countersink head will tend to bulge the drywall paper which is what you're seeing as circles around the screw head. You may be able to hide them with more mud and sanding; you'll have to feather the mud much further out from the screw than you are now. A properly applied drywall screw may end up with a fairly thin patch of mud that's maybe 4-6" across (about what yours look like), a big bulge protruding up from the surface may need to be feathered out 12-18" to get the appearance of being flat once the wall is finished.
    – dwizum
    Commented Apr 17, 2019 at 18:56
0

Usually the screws are set so they are just below the surface, then each one is individually filled over to form a smooth surface with some sanding as necessary.

Then, the first surface coat is applied across the wall as normal - after that coat has dried the screws are not normally visible.

Note, the type of screw used is also important - they are treated to prevent rust so that discoloration is prevented as that can bleed through the plaster coat...

3
  • The problem in this case is that I already know that I used the wrong type of screw given that after first layer the screw is still visible. However, I still want to fix this somehow. Should I put mode mud on this area or cover screws with tape and then mud over them. Or may be at this point it would be pointless? Commented Apr 17, 2019 at 16:32
  • you probably can drive them in further with a screwdriver bit; if not, you can probably back them out and put in new ones, thats probably easier than building up mud to feather it back down.
    – SqlACID
    Commented Apr 17, 2019 at 17:21
  • The screws are not really popping out or are too deep. I think I made sure of that. Because I used the wrong screw the circles around are still visible after the first layer of mud. I am trying to see if those circles could be hidden somehow? Commented Apr 17, 2019 at 18:51

Your Answer

By clicking “Post Your Answer”, you agree to our terms of service and acknowledge you have read our privacy policy.

Not the answer you're looking for? Browse other questions tagged or ask your own question.