6

I have recessed lighting in my living room. One of the bulbs went out. I tried replacing it with a fresh one, but no luck. There is electricity flowing to the socket, but the socket appears to have gone bad.

I bought a replacement socket at Home Depot, but upon disassembling the light, I realized that I might not be able to replace the socket alone.

I have a Lightolier Lytecaster 1102 Frame-In-Kit. Details here:

http://www.lightolier.com/MKACatpdfs/1102D1.PDF

http://www.lightolier.com/MKACatinstr/IS_1102.PDF

It doesn't look like the socket can be removed from the porcelain socket housing. Does this mean I have to replace the entire framing kit? I tried calling Lightolier support, but so far I've only gotten an answering machine.

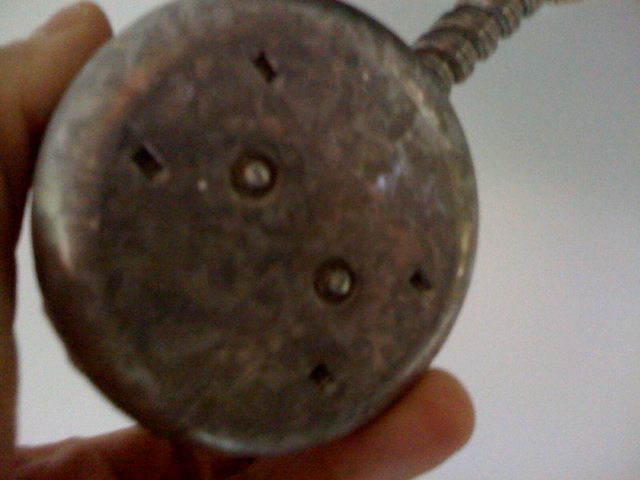
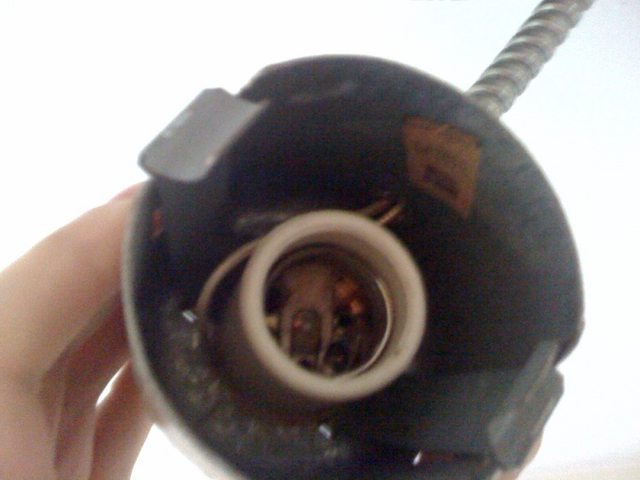
Here are photos of the enclosure:

enclosure

And how the socket is fastened:

fastened

SOLVED: See Dan's answer below. I don't know how I missed it, but inside the socket there are screws. The socket is not riveted to the enclosure. Alas, I did have to buy the whole Frame-in-Kit to get the correct socket, but at least I didn't have to remove the entire frame from the ceiling. I just unscrewed the socket and screwed in the new one.

2
  • 1
    Have you tested the socket with a volt meter to be sure it's the socket? Commented Sep 30, 2011 at 14:33
  • I'm not getting a reading from the socket.
    – Rob Sobers
    Commented Sep 30, 2011 at 14:45

5 Answers 5

4

That socket can be replaced. It has two tiny screws from the back side to hold it in. The trick here is to get the right socket and get one that is pre-wired with lengths of wire to feed down the 3/8" flex whip to the junction box on the light.

I am looking for that same exact socket, in large numbers.

Good luck

5

Good question. Yes, it's likely that you have to replace everything. This is one of the downsides of recessed lighting... most of the time the wires from the service tie-in are contained inside a housing or inside of a conduit. It's not weird at all to have it be like that... there are very few can light fixtures where this is not the case (due to fire concerns).

Can you access the fixture from above? If so, it's easy to remove. It's a little more complicated if there's no attic access to the fixture --- although there should be, because that fixture does not seem to be suited for insulated cavities. If that fixture has insulation touching it, you want to replace it (and all your others where they touch insulation) regardless of condition with an IC-rated fixture.

3

This happened to me. The socket had power but was not lighting up the bulb. It turned out that the center connector had been flattened by the old bulb and was not making connection to the center connection on the new bulb. Turned off the power and pulled the center connector down so that it was now well off the base of the bulb receptacle and hey presto all was OK again. I think different bulb manufacturers have different tolerances on the solder height of the center connector.

1

Bad news, the socket is riveted in, so unless you're prepared to drill the rivets out and a socket that hasn't already been riveted, you're hosed.

The A/C looks attached to the housing, which is weird - but I can't be sure. However I cannot imagine a safe and legal way to disconnect the housing from the armored cable and connect the new one that wouldn't create a hidden junction.

Looking at the PDFs, you MIGHT be able to detach the ... I guess it's the transformer? and socket housing from the frame mounting and replace it.

3
  • 1
    Actually, the "hidden" junction is allowed in this case because (in theory) you a) know where it is, and b) can remove it in case it shorts out or something. This is true even for cold ceilings. I don't know which portion of the IEC allows it, but I've never heard of one not passing because you can't get to the actual junction point. Commented Sep 30, 2011 at 17:03
  • Hmm. Well then in that case, the OP could cut the armored cable from the new and the old fixtures and splice them together, could he not? Commented Sep 30, 2011 at 17:11
  • 1
    In theory, yes, but that's not really a solid repair, and I'm mainly worried that he has non-IC cans used with insulation... which is really really super common. If he can get to it from above (attic) then it's really, really best to replace it. Commented Sep 30, 2011 at 17:20
0

I've done it twice, in 2008 and just now. Several problems: 1) old socket is riveted; 2) tight space to rewire.

I drilled the old socket out (through the rivet).

Next cut off any remaining rivet bur for a smooth flat surface.

Buy a replacement ceramic socket for a ceiling light. The one I bought had both black and white wires attached to the socket and a few inches of wire to work with. This is better than a replacement socket without the lead wires as it is very difficult to attach the black and white wire coming out of the pot to the replacement socket.

Detach the mounting bracket that allows you to screw the socket onto a threaded post. You don't want it because it will bring your socket down an inch or so and you wont get your end cap back on the fixture.

That mounting bracket was secured by a small screw. Find a larger sheet metal screw narrow enough to go throw that hole. Also make sure the head of the screw is small enough to fit in the recess area of the replacement fixture.

Drill a hole into the top of the ceiling pot, the right size to securely hold the screw. When I just recently removed my socket there was a black circular washer spacer attached to the top of the pot used as a buffer against the old socket. There was a center rivet (which I had cut out) but at 12, 3, 6, and 9 o'clock positions there remained marks (I guess from the four screw hold openings of the old socket). One of these had been drilled but it was too big for my new screw. So I drilled a smaller hole in another position.

Secure the socket with the new screw.

There is only one place for this new screw so it will make for a lopsided attachment. That is the socket wanted to lean towards the side where it was attached by the screw. To solve this I added three tiny washers to the top side of the screw. This way the socket was not leveraged to that end when tightened. Plus if I wanted to position it back a little the other way I could.

Anyway. it works.

1
  • 1
    Working and being code complaint or safe can often be two different things. Hacking together a light in such a way will most definitely create a no longer UL listed assembly, if you care about such things. Commented Jan 12, 2015 at 20:27

Your Answer

By clicking “Post Your Answer”, you agree to our terms of service and acknowledge you have read our privacy policy.

Not the answer you're looking for? Browse other questions tagged or ask your own question.