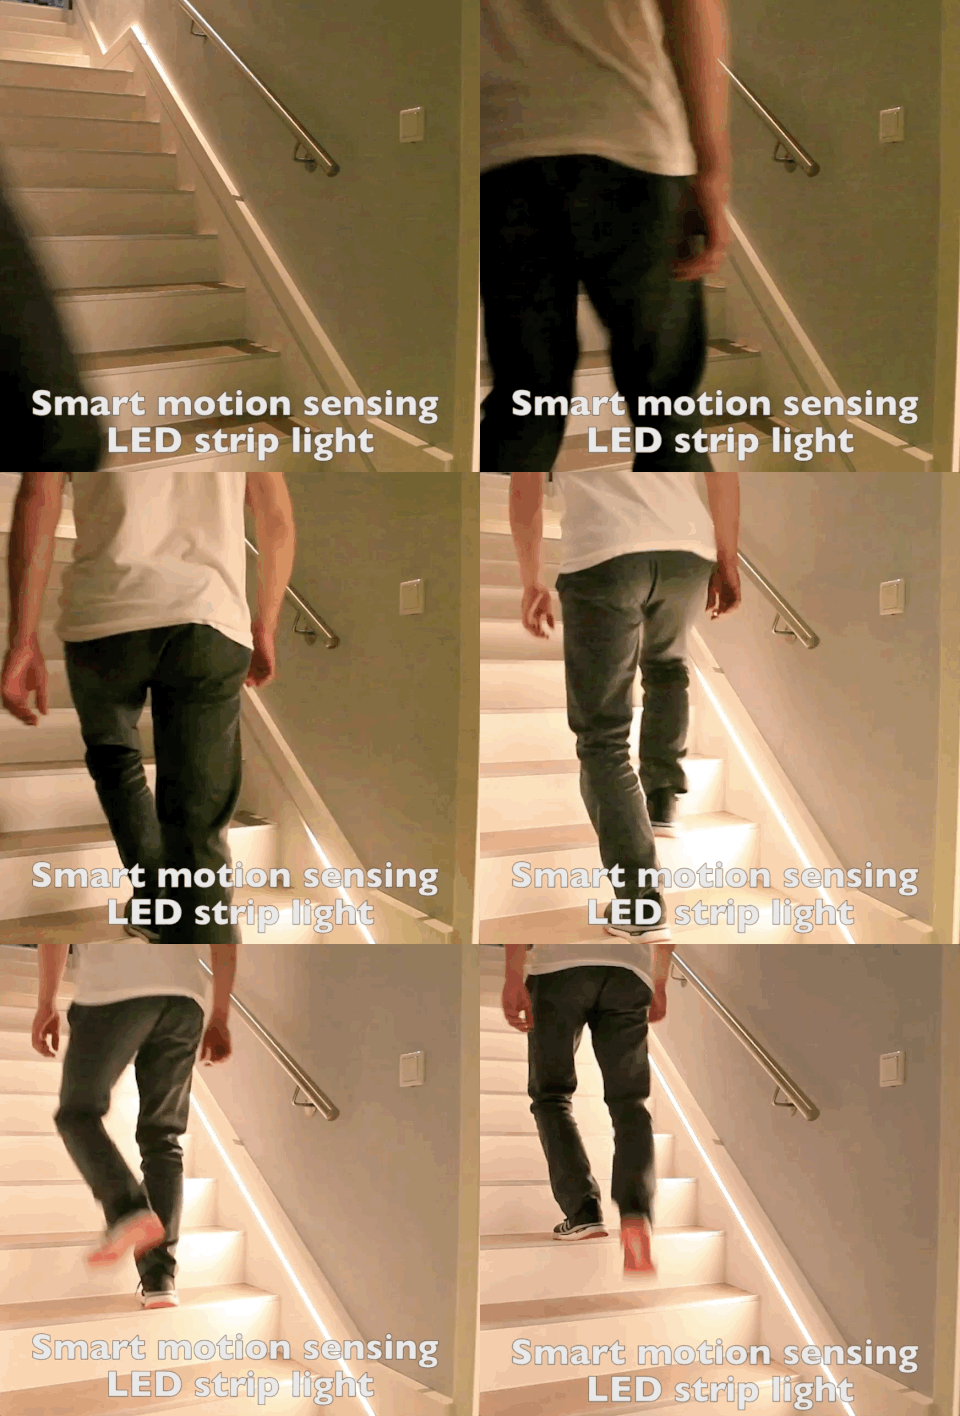
Here is a gif showing it in action, once the motion is detected, the strip slowly lights up directionally from bottom to top, how is this achieved? I can't seem to find how this is done: Looping GIF link
-
the LED strip may do that on its own ... all it needs is power to be applied .... it may also be an addressable LED strip that is controlled by a microcontroller– jsotolaCommented Feb 17, 2020 at 22:52
-
2Here is the website that the video came from. tinker-fun.com/DigitalLEDStairlighting This DIY project requires electronics and software knowledge.– Mattman944Commented Feb 17, 2020 at 22:58
-
@Mattman944 Amazing!! I've been searching everywhere for where it came from! Thanks so much. Put that as an answer and I'll mark it as such. Thanks!– v15Commented Feb 17, 2020 at 23:00
-
if you can live with color (RGB) LEDs instead of those white ones, you can do this for FAR cheaper. the video shows hundreds if not a thousand USD worth of kit, a modest RGB version could be done for under $50 USD...– dandavisCommented Feb 18, 2020 at 18:59
-
It would appear it requires the addressable kind of strips, I wonder if that’s why the added costs.– v15Commented Feb 18, 2020 at 19:21
2 Answers
Here is the website that the video came from.
tinker-fun.com/DigitalLEDStairlighting
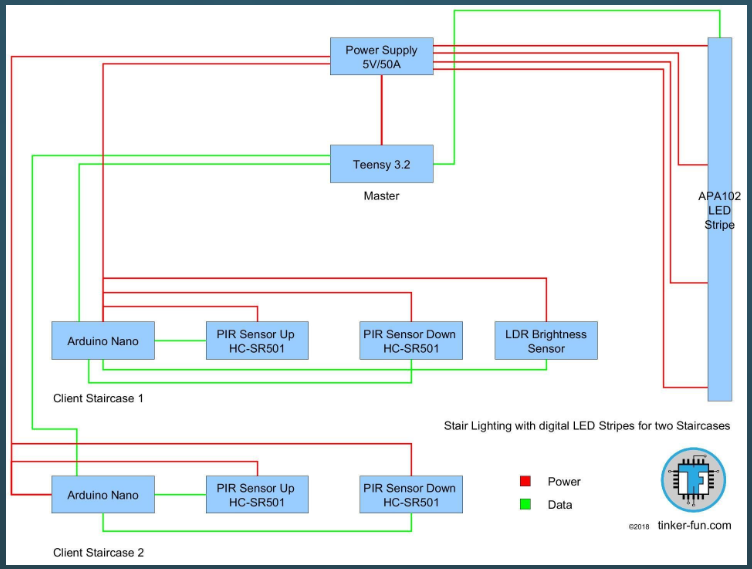
Note that this DIY project requires electronics and software knowledge. The website has fairly detailed hardware instructions. The designer has not posted the full software yet. Pieces of the software are available from various open sources.
The important part is the sequencing
What makes the light "run up the stairs" is the use of individually addressable LEDS. That means each LED on the strip has a microprocessor that can be called up and say "hey, you, turn on at this RGB value: 0x999999". That adds a bunch of complexity. Not least, the microprocessors that monitor the PIRs and sequence the LEDs in the direction being traveled.
However, there's no end to the cool: the processor could roll pulsing light up or down the stairs... or it could even do rolling rainbows of color, like Boeing Dreamliner or something, because virtually all these "individually addressible LEDs" are RGB color type. It's there; the poster just hasn't unlocked it because the limiting factor is software (you have to write it).
It also forces the installation to use 5 volts DC instead of 12/24 volts DC. This means the power supply must be heavier, and the wires must be much heavier. Parts list is:
- 5V power supply
- 2 PIRs
- Individually addressible LED strip
- Arduino or Raspberry Pi
- Lots of wiring
- Software code
A lot easier with simple on/off control
You can do the kaboodle on 12V or 24V, and so the wires get a lot smaller. You can drop the microprocessor altogether, and simply use 12/24 volt PIRs wired in parallel. (i.e. whichever PIR sees a customer turns the lights on, and the lights come on when either PIR asks for it, and the PIR auto-times out after a time.)
You can also use simple, cheap 3528 monochrome LEDs in your choice of color temperature.
Most 12 volt PIRS will happily run on 12V or 24V. So will dimmers. So you just get 12V or 24V LEDs to suit. Your parts list is:
- 12V or 24V power supply
- 2 PIRs
- LED strip
- Much less wiring
-
This is a most excellent response, thank you! Yes it did occurs to me a non-directionally lit setup would be far easier, I just love the look of it lighting up in the direction you’re going. A ton of work, YES, worth it? Maybe after the simple set up first :)– v15Commented Feb 20, 2020 at 3:36


