5

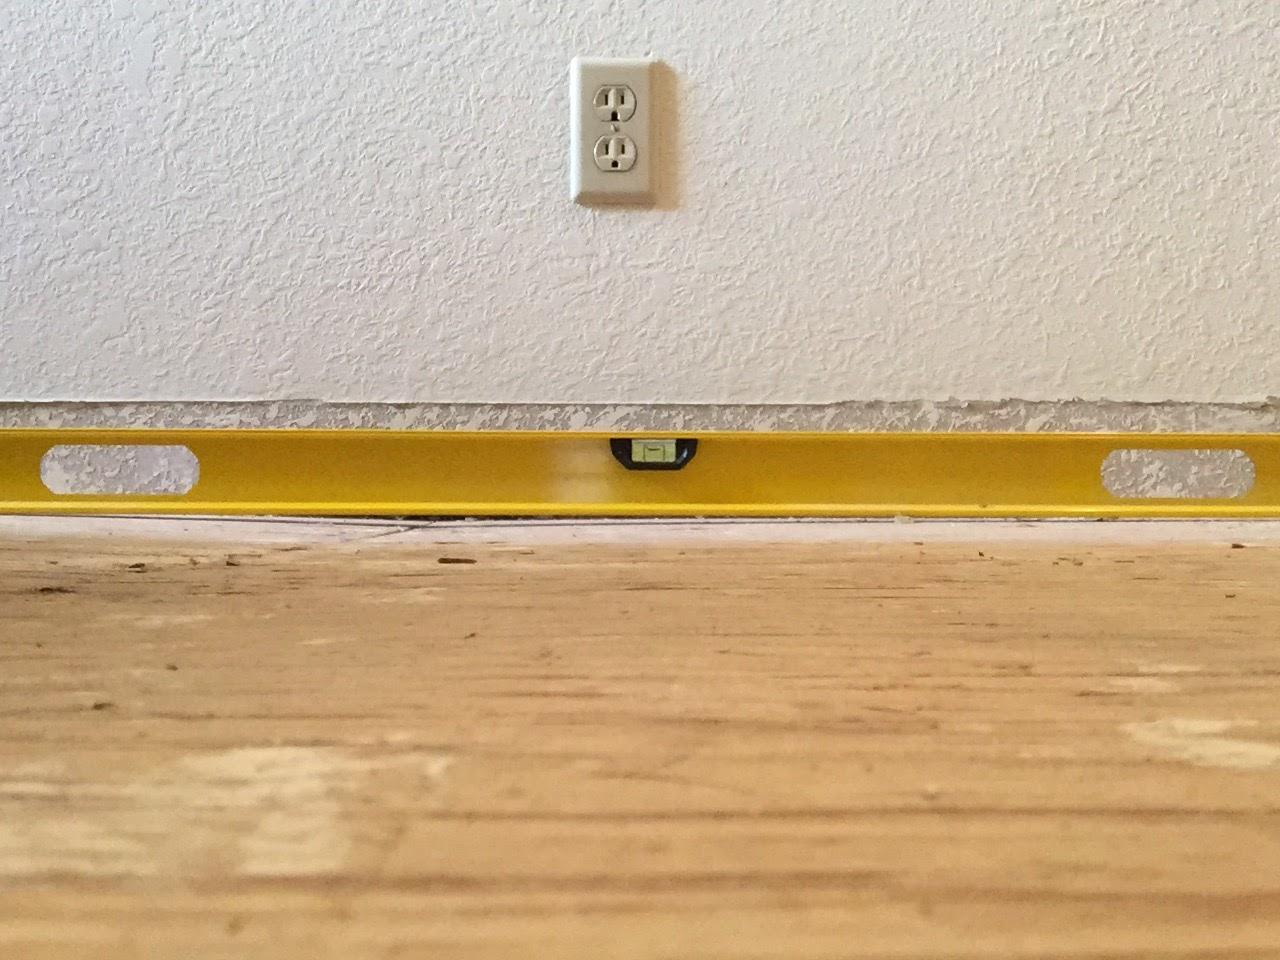
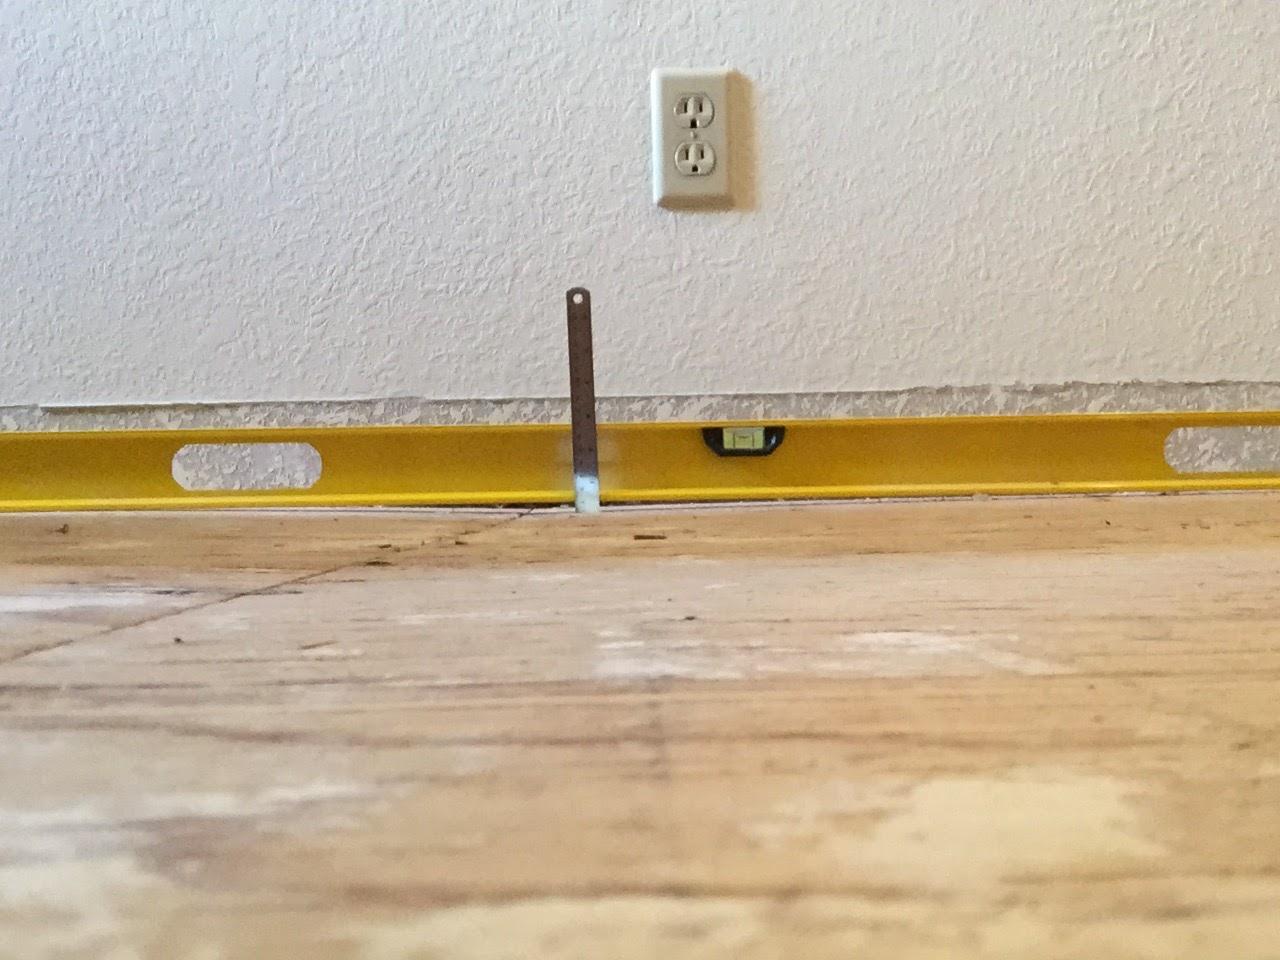
I am doing an installation of 1/2" engineered hardwood on the second story of my home. Checking the plywood subfloor for true and level, I found a pretty big dip (1/2")

enter image description here

Is this scenario an appropriate use of self-leveling compound? If so do I need to tape the seam so it doesn't leak through or is viscous enough and doesn't matter.

Could this be made level with stacked pieces of 15# felt or is this not appropriate? I read that online, but am not sure if I want to trust it.

enter image description here

5 Answers 5

6
+200

That looks like an almost non-issue (especially if the flooring will run the same direction as that level, if not you'll need to do something about it). If it's a low traffic area it might not concern me in the slightest.

I HATE, quote, "self leveling" compound. It should called: aww crap, now what? (you had better know how to trowel concrete) And if you're going to use nails instead of glue, then leveling compound is out of the question. It will crack when you shoot nails into it and the flooring won't sit right on all the crumbs.

I'd either floor right over that, or lay down a new 3/8 plywood sub-floor over the whole thing (with none of the old seams lining up, and nowhere shall four corners meet; T junctions only).

I would not use felt and I wouldn't worry about having to tape that seam if you're going to use leveling compound. But you could try using strips of luan (1/8" plywood), cut to fit that gap as large as possible, so long as they're still underneath your level (a high spot would be worse IMO).


I've never glued a hardwood floor down, but if you're going to, then this probably would be an appropriate use of self-leveling compound. However I recommend neither process.

2
  • Thanks! Will award bounty in 24 hours when the site lets me :-)
    – Matt
    Commented Jan 26, 2016 at 2:31
  • 1
    @Matt - You paid well for an answer. Take your time. I will in no way feel remiss if I don't get it.
    – Mazura
    Commented Jan 27, 2016 at 4:31
3

This is the exact sort of thing that you should use self leveling compound for. A quick prime and then a self-leveler the next day (literally 15-20 mins of total work). Your leveling doesn't have to be perfect but I would fix the dip. This is very very easy. Self-leveling compound cannot seep through the plywood unless you put way way too much on. If you are truly worried about that you can use something like redgard but I think that is total overkill.

Also levelness does not matter, it is flatness that matters.

(Felt would be used to ramp up to an area but not flexible enough to handle this kind of issue)

And a note about your baseboards. Awesome that you took them out already. However I noticed that you haven't scored the bottoms. I suggest if your walls are drywall that you score the bottom inch so that this can serve as the expansion gap. Therefore no need for quarter round.

And another note: If you replywood it is quite likely you will end up with the same issue and that could take a lot of time and money. If you do nothing you will spend tons of money on new floor and tons of time following install instructions - and at the very best you will have a very spongy section of floor and at worst a part of the floor that will eventually fail or crack. Buy some primer and leveler - spend $20 and 20 minutes and do it right. When your floor feels flat 6 months from now you won't care at all about the extra step.

3

I've tried self leveling compound once, and it broke into pieces with each nail. The crumbs don't move much, at first, but with movement of the new flooring (slight, over time) I"m doubtful that it'd work well over the long term. I took it up (small area/dip). I've since used 15 or even 30 lbs felt, which was used long ago under hardwood floors to minimize squeaks against the subflooring. I cut pieces for dips, small, than ever larger, checking each layer or two with my level, and judging that there'd be a leetle compression of the felt so I layered it up just a tad over, but very, very little. The felt itself is already compressed, but the layers can compress a very small amount. Given the strength of wood flooring, a little dip the depth of a few sheets of paper, won't affect anything or show.

So I suggest layers of felt. Placing some very small brad nails (with flat heads) here or there on the felt holds them in place from wandering or shifting over time, just 3 or 4.

1

Agree that the term self levelling is a bit of an oxymoron. Sure it self levels within itself, but it doesn't know the level of the surrounding areas! Confirm also that level is irrelevant, flatness is all.

Also agree that if the long joints are crossing this dip at 90 degrees it's less important (I'd still pack this one though). Dips up to 1/4 inch (across the long joints) are generally not noticeable. Sometimes I've doubled up the underlay or packed using flooring grade cardboard on marginal areas. Dips that run with the long edges can be more noticeable and problematical and should be avoided.

If you go for the S.L.C you'll need to ensure you get a flexible one and be prepared to 'help' it along with a trowel to ensure it ends up where you need it. You can even drag a straight edge over it quickly, it will 'repair' itself and then you know it's not going to end up proud (big headache). There is a special 'file' to remove any high spots afterwards if absolutely necessary.

Otherwise I've seen this kind of thing done many times with thick cardboard underlay in widening layers, 2" wide strip, 4", 6", 8" and so on, which feathers out nicely. Even done it in circles to correct a dip in a conc. floor in the sticks on a short notice/time sensitive job for another contractor.

2
  • what is "flooring grade cardboard?
    – Grammer
    Commented Oct 18, 2021 at 17:31
  • Apologies, "flooring grade cardboard" was a poor description! What I meant was really a cardboard underlay or just the thick cardboard, sold on a roll at most floor covering suppliers.
    – handyman
    Commented Oct 19, 2021 at 20:01
1

Go get a bundle of cedar shakes. Rip them down to 3" shims. Then shim the new flooring up to meet a flat spanner that rests on another piece of flooring on the other side of the dip. (tacking this row down with a couple finish nails will give you better results) Then shim, and nail through them. Spacing as you normally would. Then cut the shims, and repeat until you clear the dip.I know it's a lot of shimming. And make sure to use 2" staples/nails.

Your Answer

By clicking “Post Your Answer”, you agree to our terms of service and acknowledge you have read our privacy policy.

Not the answer you're looking for? Browse other questions tagged or ask your own question.