1

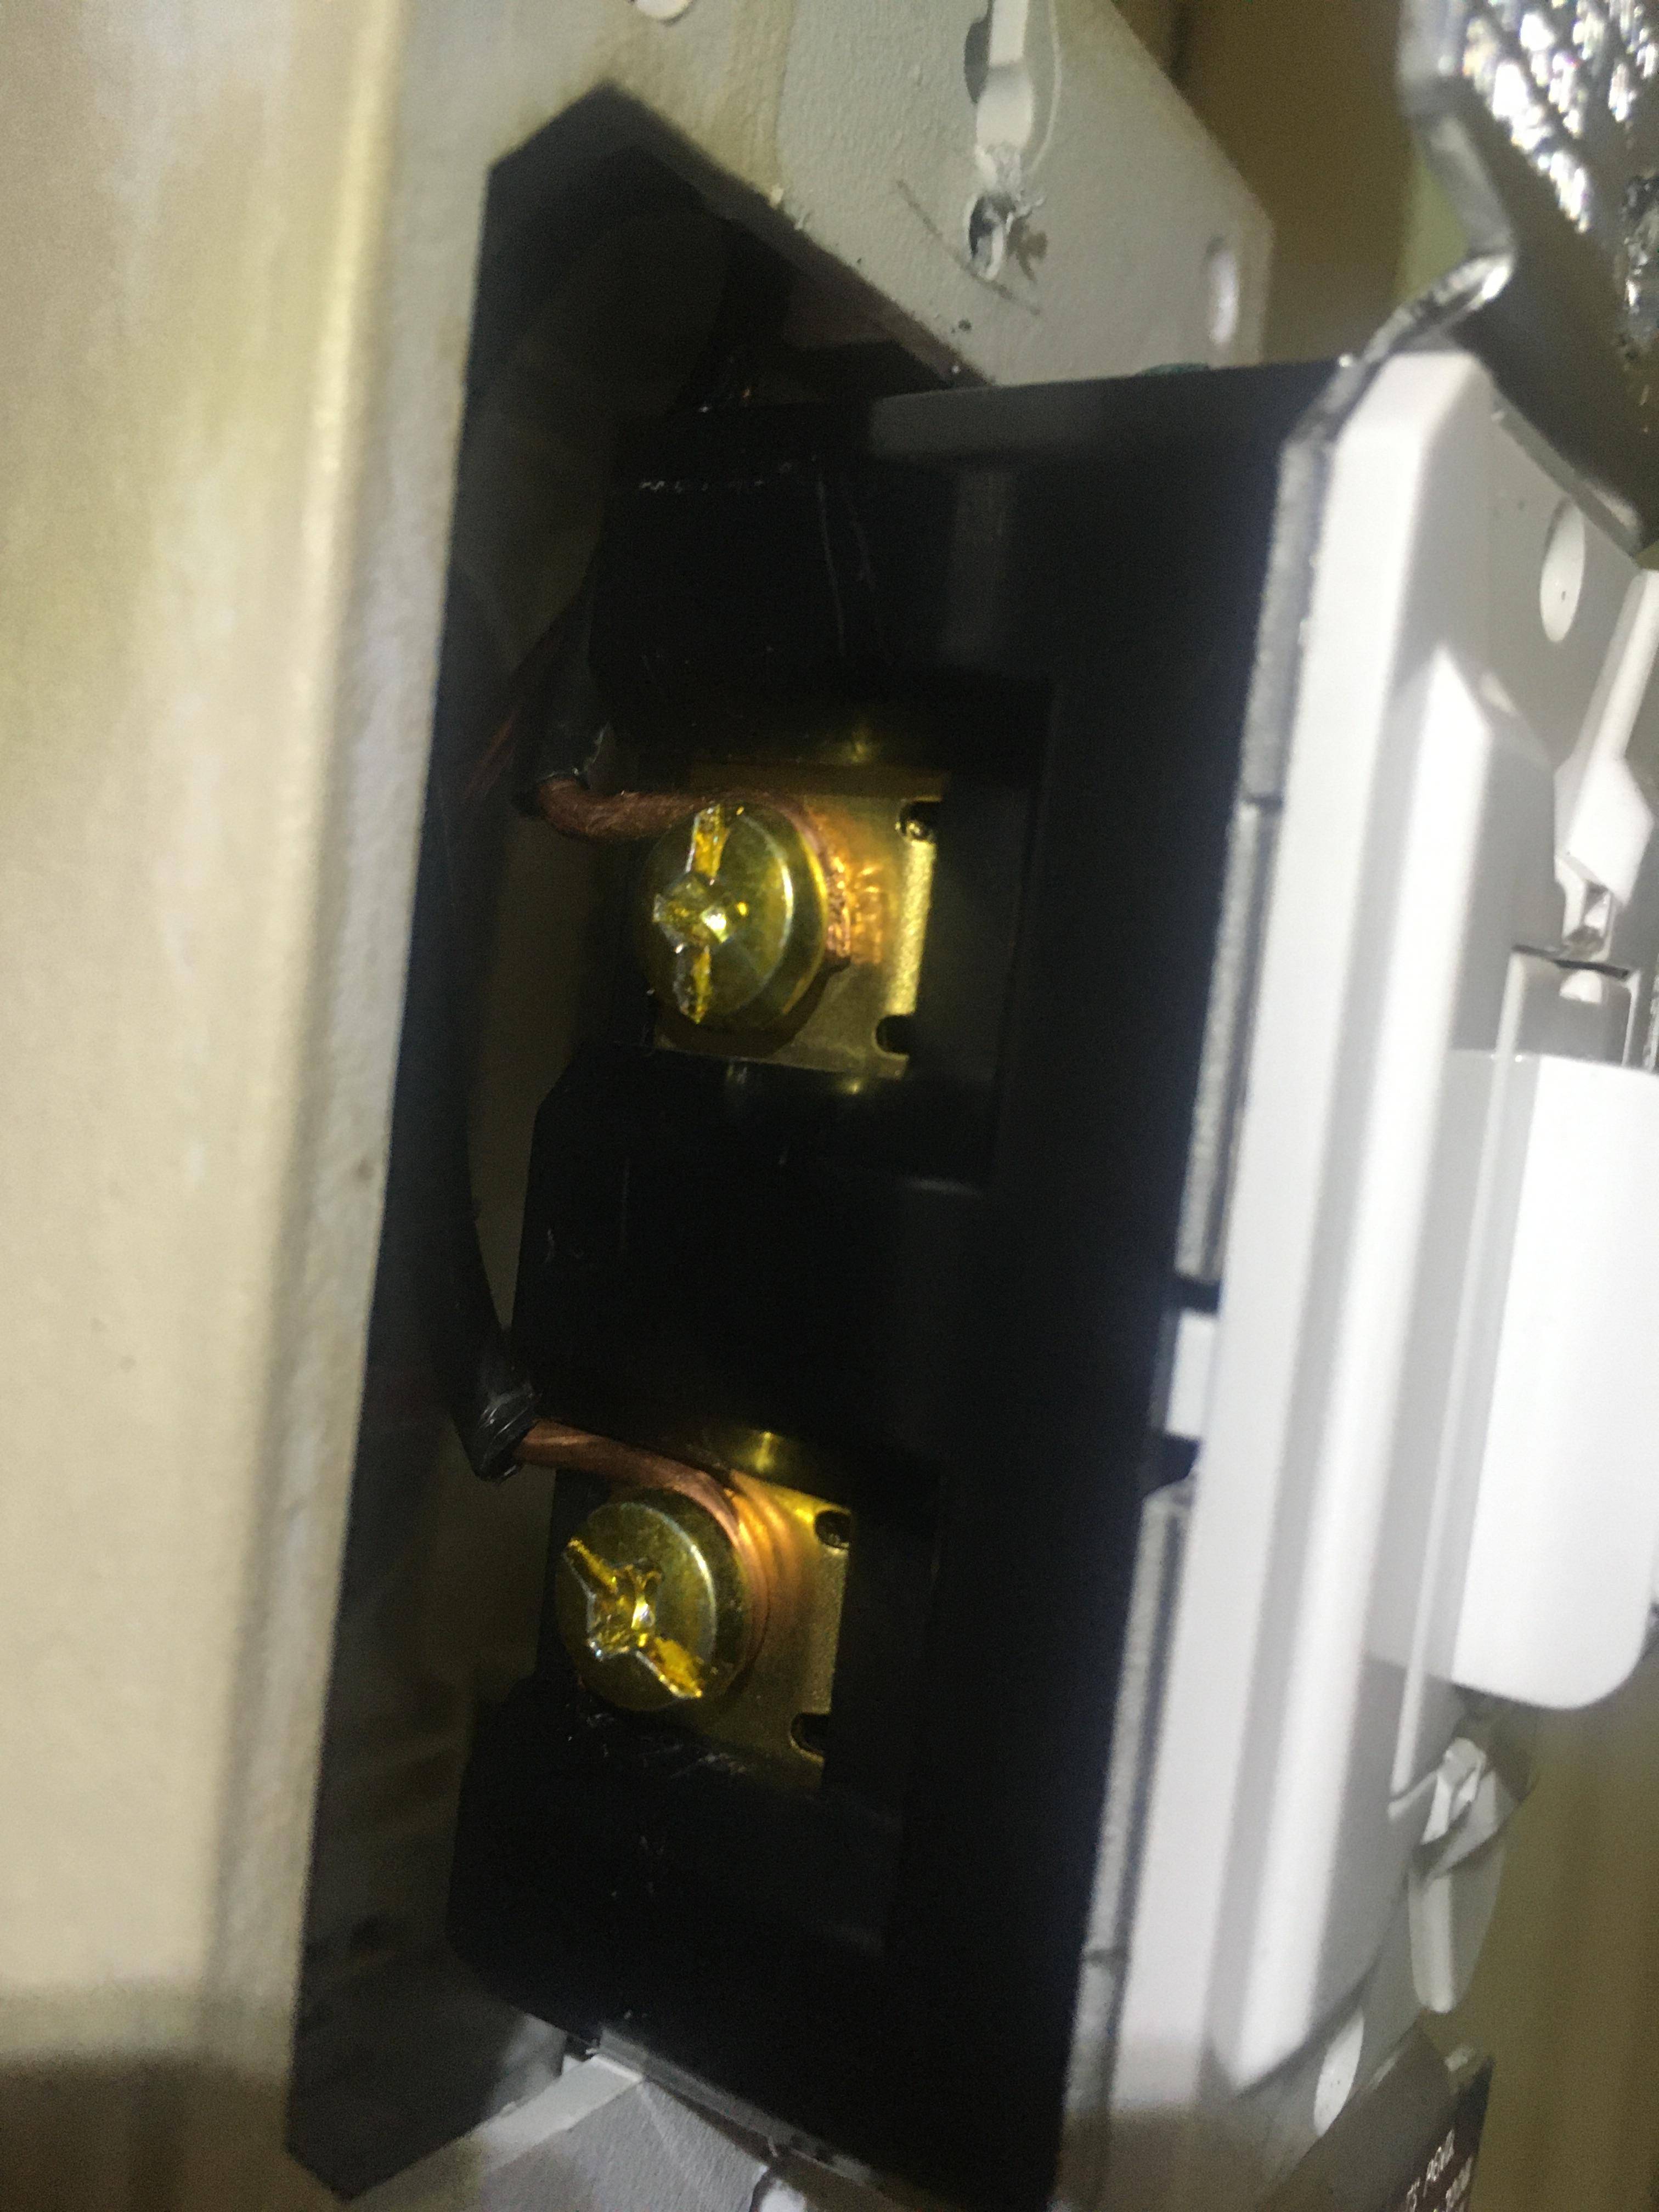
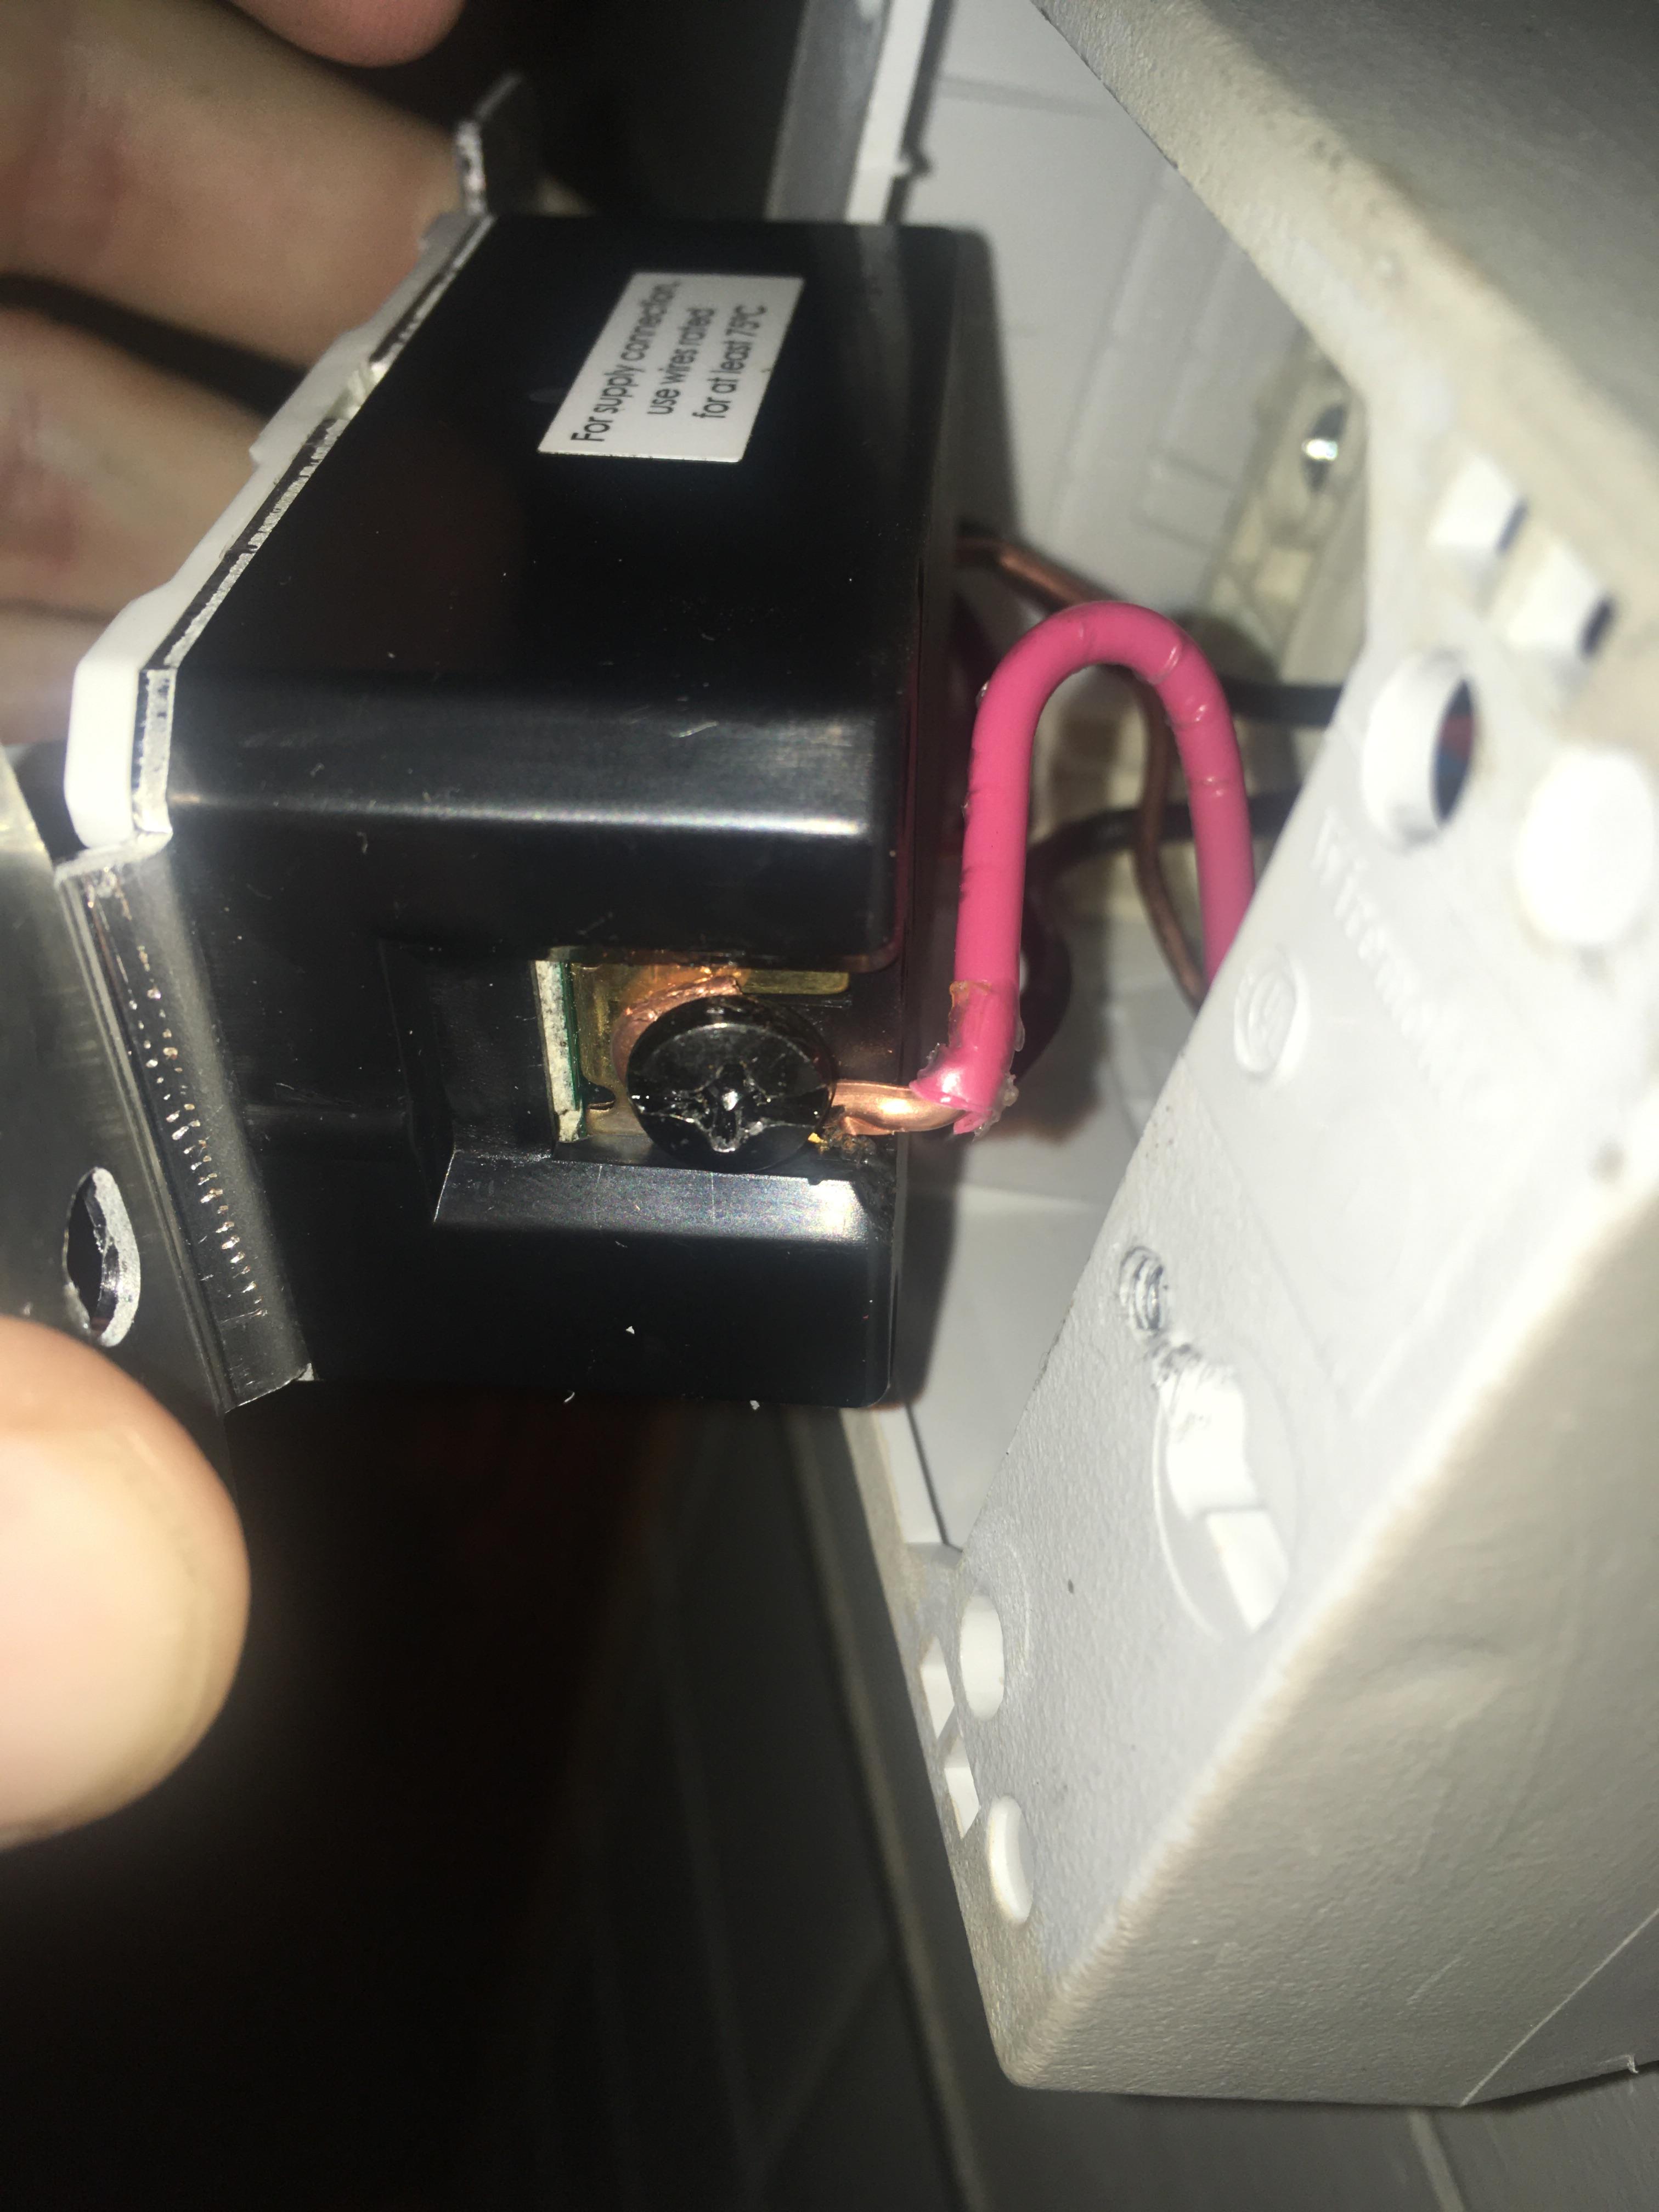
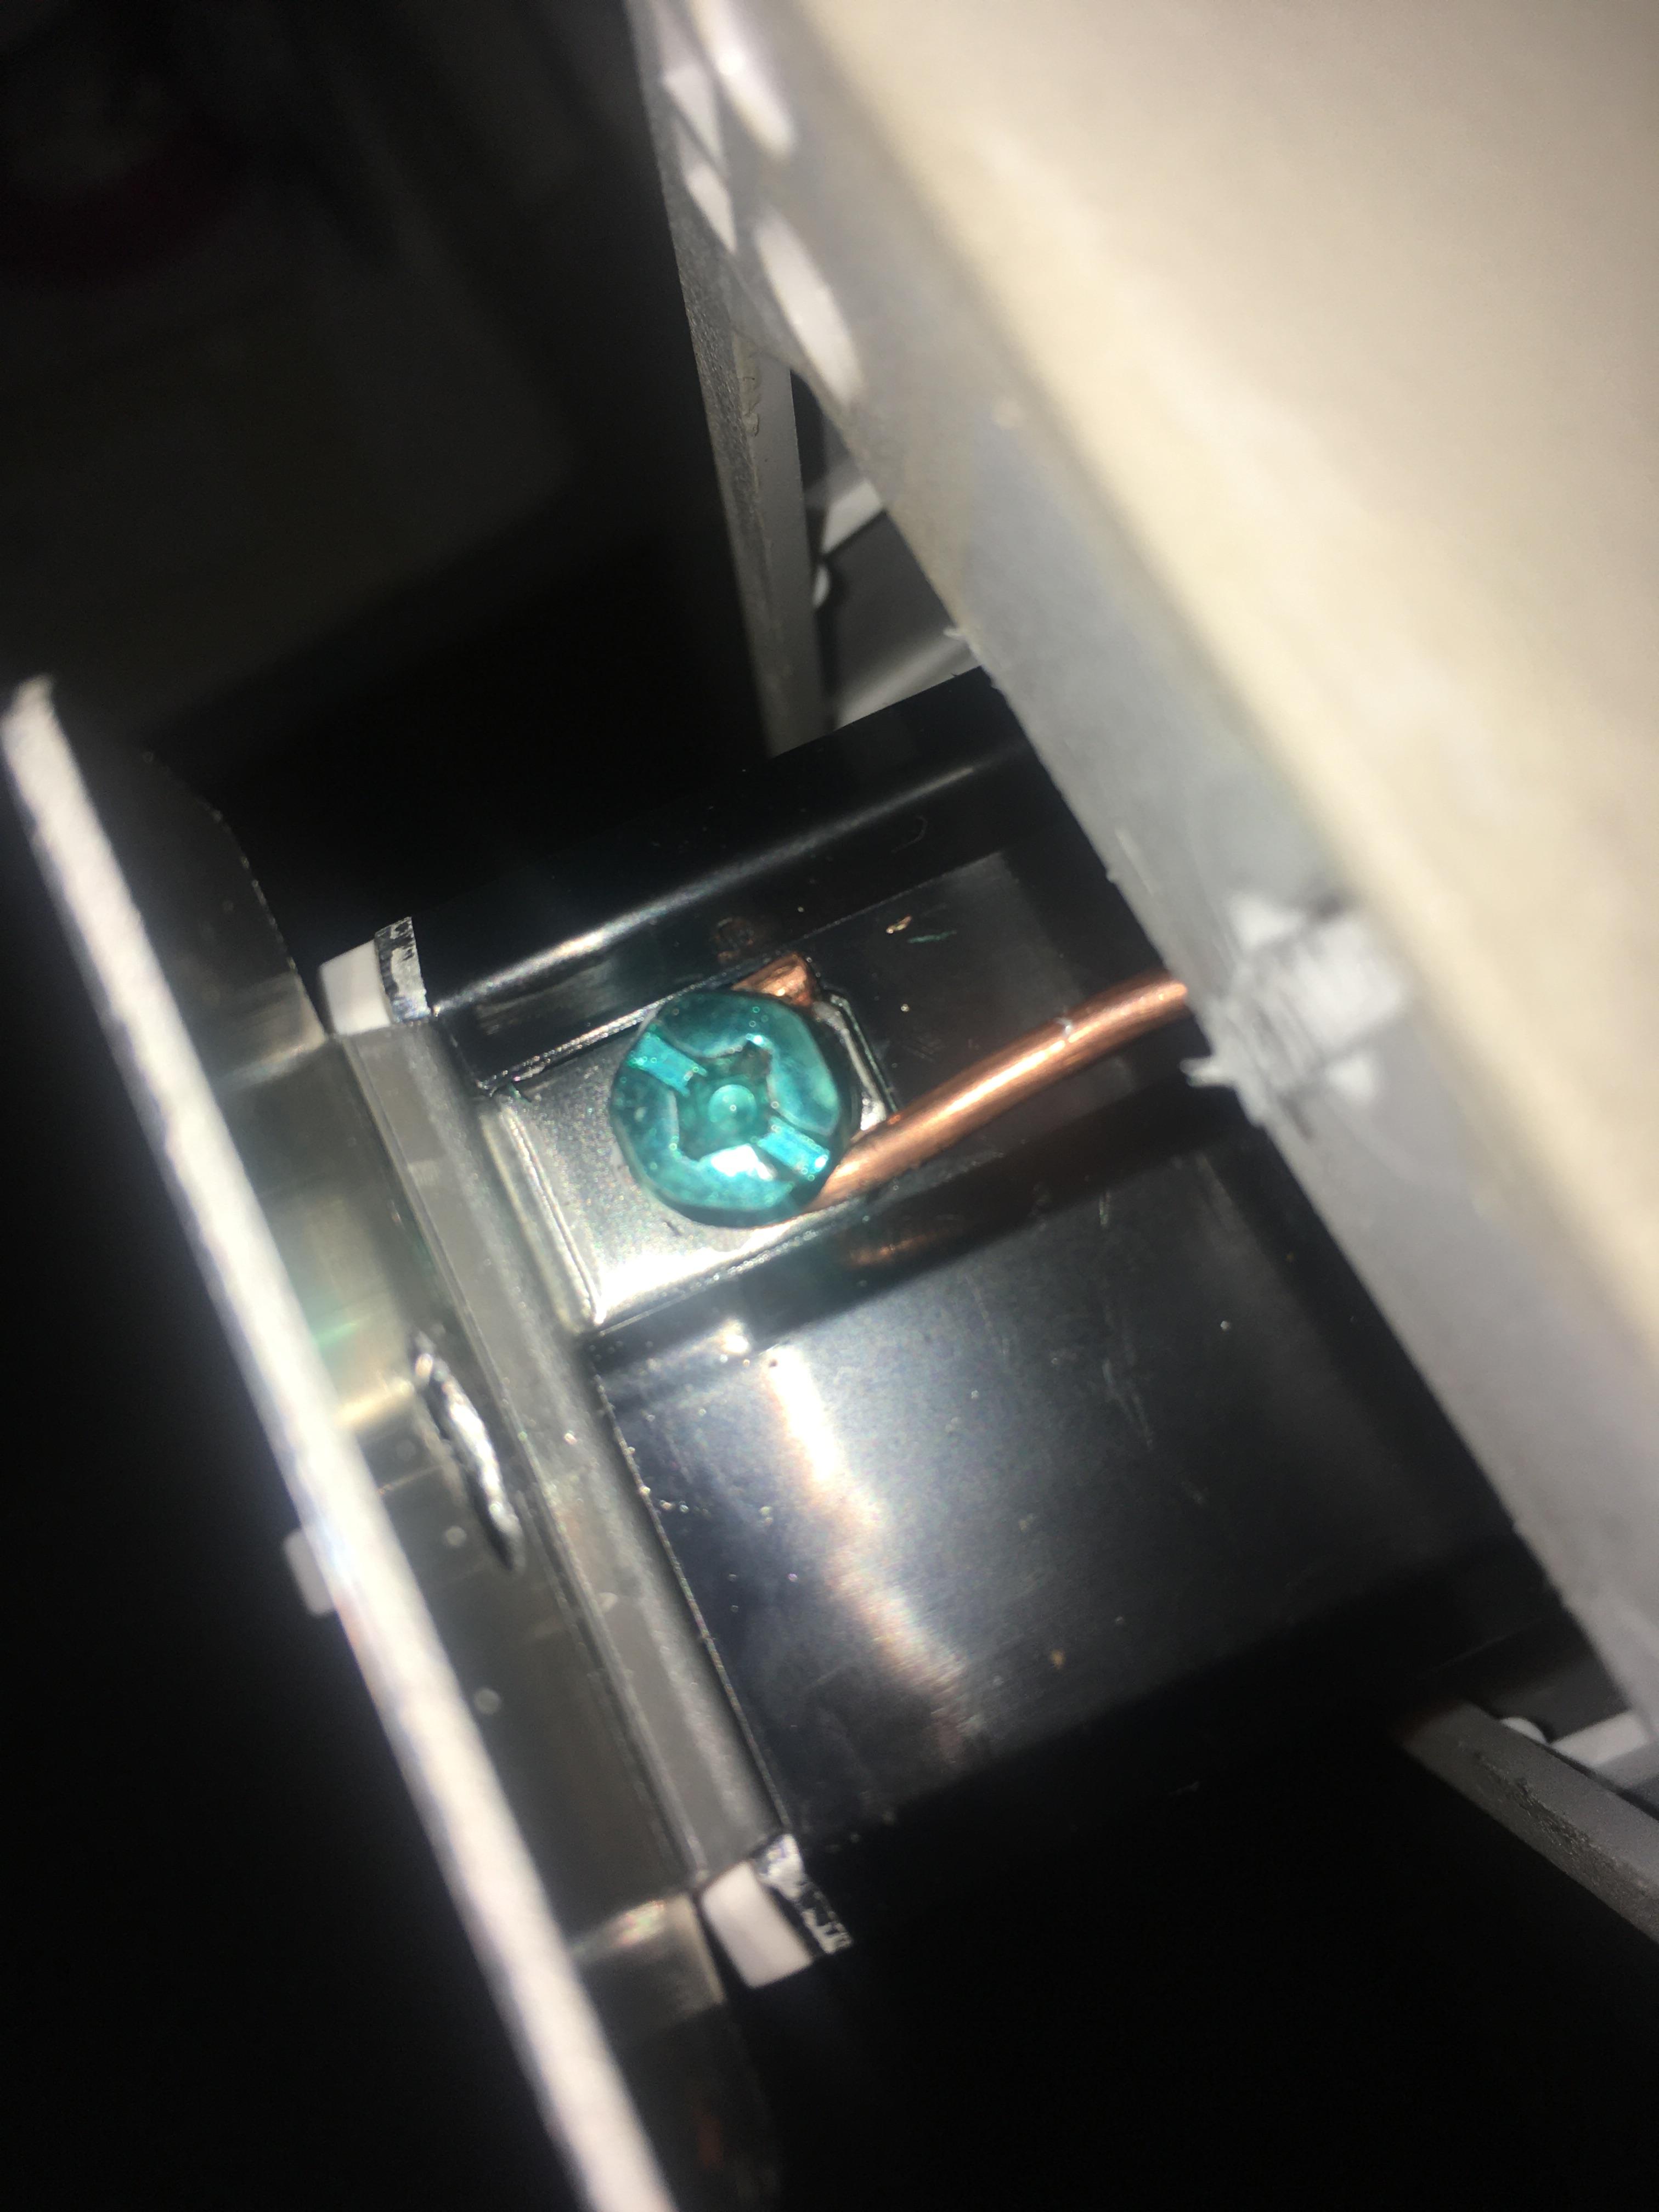
enter image description hereenter image description hereenter image description hereenter image description hereI was installing an LED dimmer switch in what was previously a working light switch. Got it on ok and it worked fine for an hour, and then, dumbly, I later decided to put the faceplate screws into the dimmer switch box itself when the power was on. Cue to one scary pop, and all 3 lights went out. The screw has some black where it was inserted. The other switch that controls these lights also no longer turns them on. I checked the power w/ a multimeter at both switches and nada.

Breaker is fine, there is power going to it (and other outlets in that zone).

I'm guessing I need an electrician at this point, and that I have blown the wiring in some way? For what it's worth the wiring would not be super hard to access (I can see the long cases that the wiring is in along the ceiling/wall).

I want to make sure there is not something simple (like replacing the switches again) that I'm overlooking before I call in a pro. To note, the wiring was freshly installed a couple months ago, and yes I will now only be working with that breaker off...Just bought this house and learning lessons quick.

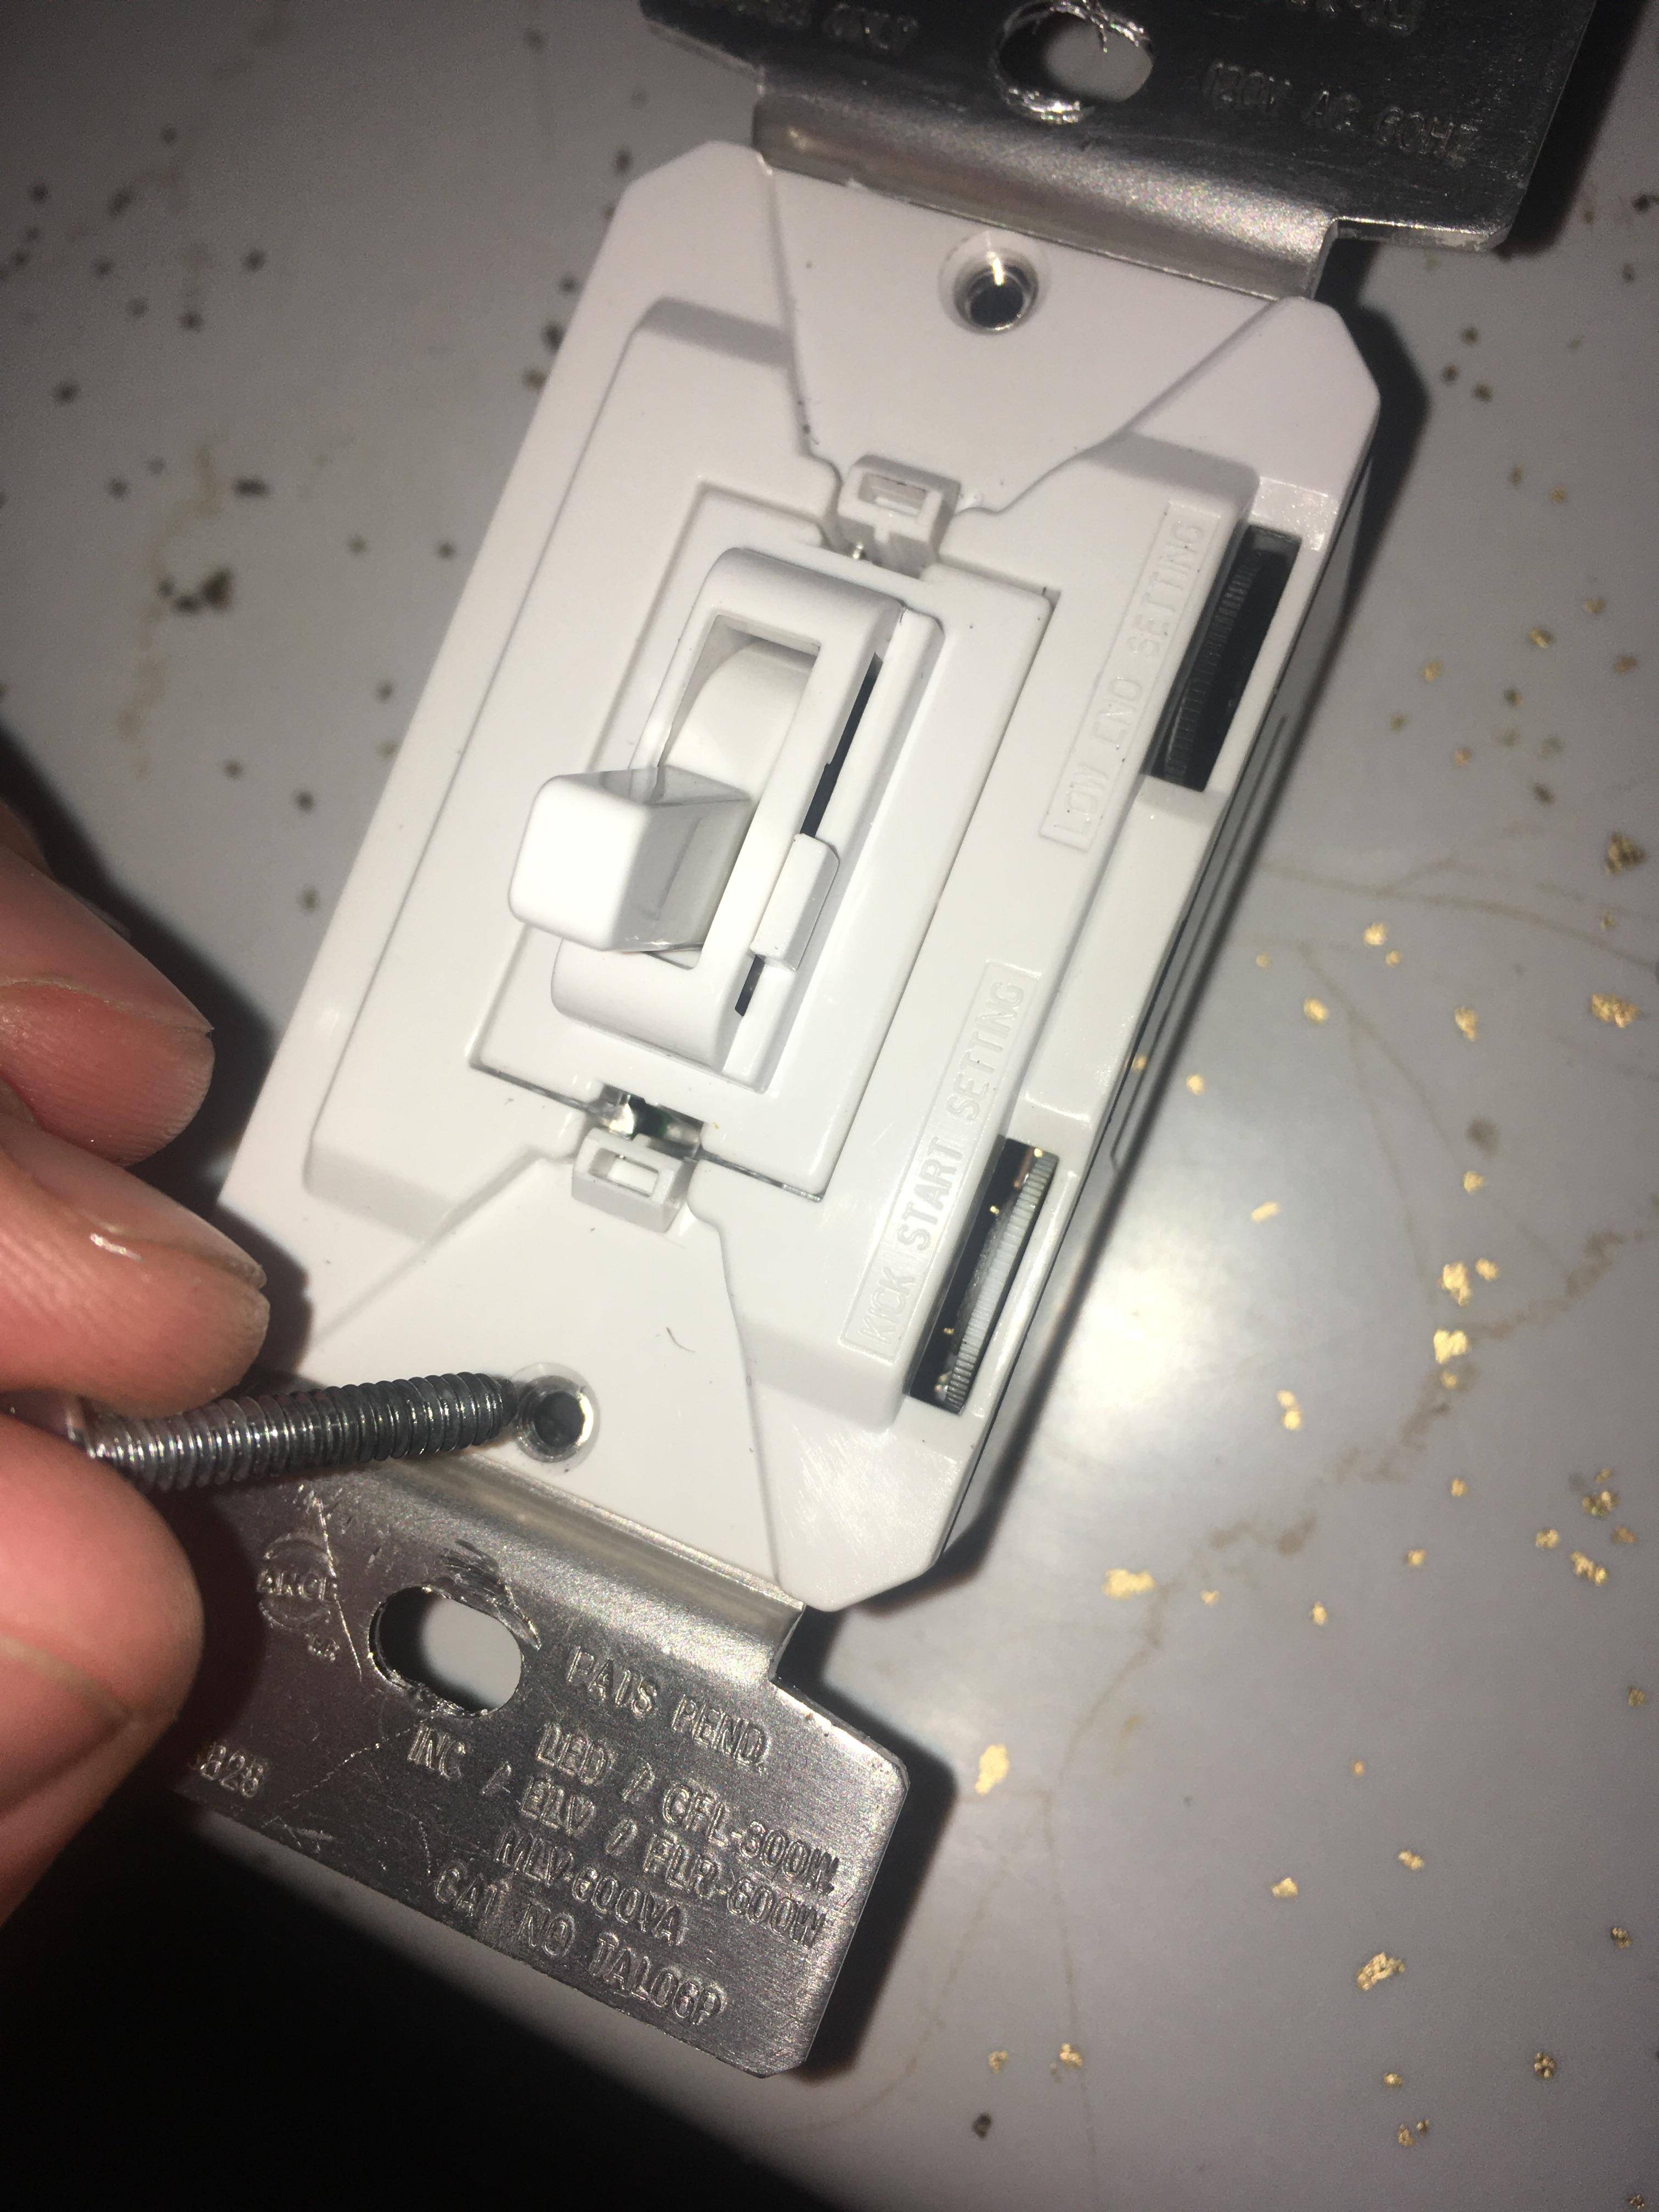
edit I have uploaded pictures, the first one shows where I tried screwing in to the plate. I didn't have the right size face plate yet, I was just screwing them in so I didn't lose the screws...you can see the black end where it burnt up on me.

6
  • 3
    By faceplate you mean the plastic cover? Usually that is one job you don't really need to turn off the power. Mounting or unmounting a switch from the box is different. Picture/s of the switch might help.
    – crip659
    Commented Aug 4, 2021 at 13:53
  • 1
    Screws. In the box. Sounds like something was shorted. That may have fried the switch or a connection. Try a new switch.
    – isherwood
    Commented Aug 4, 2021 at 13:54
  • 2
    Were you using that screw you are holding there? That is WAY TOO BIG. Faceplate screws are tiny. Commented Aug 4, 2021 at 19:25
  • I have to agree with @manassehkatz-Moving2Codidact, if everything else is working, the OP probably fried the dimmer with the oversized screws. Still like Harp said, there may be a fried back stab outlet that fed the dimmer. All you can do is WITH THE POWER OFF, pull outlets and switches on that circuit and look for damage. Commented Aug 4, 2021 at 21:24
  • Any GFCI outlets around that you mighta tripped??? Check the kitchen, bathroom etc....
    – Kyle B
    Commented Aug 5, 2021 at 5:31

2 Answers 2

3

TL;DR You Killed Your Dimmer Switch (and fortunately ONLY the dimmer switch)

Based on the picture (and if I'm wrong, I will delete this answer), you put a long screw, typical for attaching the switch to the box, through the screw holes meant for the faceplate. The long screws go through the oval metal holes in the top and bottom of the switch (the "yoke") and go into holes in the box (in your case, the white plastic box) that is in the wall.

Faceplate screws are tiny. For example, this Leviton faceplate, which I picked because it is the first one I found lying around in its package so I could measure the screws, but the screws are always the same size:

Leviton plate

has screws that are 5/16" long, including the head. If you put in screws even a little bit longer, you will puncture the electronics and/or power wires/contacts. Frying the dimmer and, if you're lucky, tripping the circuit breaker before starting a fire or hurting you.

According to one site, the screws are generally standardized at either 5/16" or 1/2" depending on the style of faceplate. So in your case (single standard toggle) they will likely be 1/2" long. But most importantly:

Faceplates come with matching screws. That is partly cosmetic - white top screws with white faceplates, ivory with ivory, etc. But it is also functional, as the style of device determines the faceplate type (Decora vs. regular toggle vs. duplex receptacle, etc.) and the screw length. The screws that come with a switch/receptacle/etc. are for attaching to the box through the yoke, and not for the faceplate.

There may be another problem. Based on pictures plus the instructions (Eaton TAL06P - manual for at least one model here, your wiring looks like it is correct for a 3-way switch installation (total # of wires). But that can get tricky with dimmers, and there is no standard for where travelers vs. hot vs. switched hot are connected, so you want to double-check everything carefully when installing the replacement.

2
  • Thank you, that seems quite likely to me. Quick follow up question though: why is the other switch that controls these lights also no longer working? I would love for the fix to just be "replace switch", and will certainly give it a go, but should I replace both?
    – Nate Peck
    Commented Aug 5, 2021 at 14:10
  • The way it works with 3-way switches is a little bit non-intuitive. It is not: Power -> switches in parallel -> light. If that were the case, one switch fried would still let the other one work. However, it would also not let you "turn on with one switch and turn off with the other switch". Since most people want that flexibility (e.g., go in through one side, turn on light, leave through the other side and turn off the light on the way out; all the more so with lights over stairs), it is a series connection: Power -> Switch 1 -> Switch 2 -> Lights. Either switch dead, nothing works. Commented Aug 5, 2021 at 14:23
1

Probably one of the fuses in a "back stab"

The fact that it was wired recently, not by you, suggests to me a builder. Builders like to use the "back stab" connections on switches and receptacles, because it takes 1 second to jab a wire in, instead of 30 seconds to attach a side screw.

Unfortunately, the backstab connections have "fuses" in them. Well, not literally. What they have is 50 years of product evolution with UL pressuring the industry very hard to design so they fail "hard open" (like a fuse) rather than the alternative -- destructive arcing that will start fires.

So most likely, the power reaches this dimmer via a chain of other receptacles or dimmers, and one of those has "blown its fuse".

Your best bet is to go to each receptacle and switch in the circuit and convert any backstabs to side screws. Be sure to read our Q&A here called "First time changing switches and receptacles, anything I should know?" And also read up on doing side screws correctly.

If you have an instance where you need to put 2 wires on a screw, they make "spec grade" receptacles and switches which have a "screw and clamp" back-wire system that does that. These are $3 instead of 75 cents.

Your Answer

By clicking “Post Your Answer”, you agree to our terms of service and acknowledge you have read our privacy policy.

Not the answer you're looking for? Browse other questions tagged or ask your own question.