18

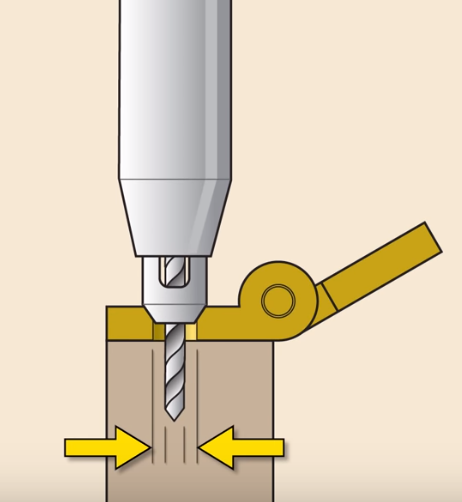
When fitting hinge screws I've noticed that, unless the pilot holes are centered exactly on the holes in the hinge and at a precise (within 2-3 degrees) horizontal/lateral right angle to the hinge plate, the edge of the screw head is always misaligned with the hinge hole by the time the two come in contact.

In this case, the countersinks in the screw heads and hinge holes are a close size match, so even small discrepancies in position/angle end up with the head displaced to one side by up to a millimeter.

Driving it to resistance forces the head into the center position (I presume either by the metal bending or, possibly, the screw thread giving way slightly) but it still ends up tilted in its final position.

In DIY videos concerning hinge installation, instructors, DIYers and professionals often drill pilot holes, almost casually, at funny angles, and drive the screws straight in without thought to position. I'm thinking they must have the same problems but aren't bothered by it or using a method unknown to me.

Is this just me being needlessly perfectionistic? If not, can my technique be improved?

I'm also interested to know if it's usually the (stainless steel) screw bending or the thread (in hardwood) giving way that repositions the head of a misaligned screw when it's driven to resistance.

3
  • 4
    If you have a soft wood (pine) door jamb the screw will usually push the wood grain aside as the screw head encounters the hinge plate countersink. In the case of a hardwood jamb the wood usually will not give and the screw will bend and in worst case twist off. Breakage of screws in hardwood is a particular issue with brass screws. This is where the self centering device I show in my answer below really shines.
    – Michael Karas
    Commented Feb 18, 2020 at 8:43
  • 3
    If you don't want to buy one of the gadgets in the answers, I find that I get better results if I use a 1/64 bit as a pre-pilot. It's an extra step but it larger bits can tend to wander before they start to cut the wood. There are also bits with a smaller pilot tip that do the same thing. Once you've got a dead-center starting hole, the larger bit will follow effortlessly.
    – JimmyJames
    Commented Feb 18, 2020 at 21:16
  • @MichaelKaras There was a time where I'd only use steel screws on a low-speed setting in hardwood for exactly that reason. Turned out later there are more ways to skin a cat... As Jimmy says, pre-drilling helps. Pre-drilling helps with a lot of wood-nuisances come to that.
    – Mast
    Commented Feb 19, 2020 at 20:47

4 Answers 4

32

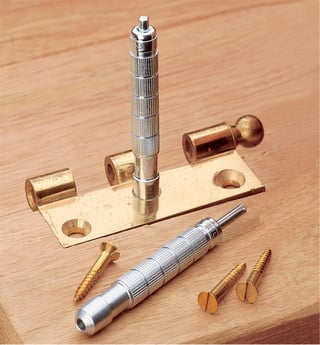
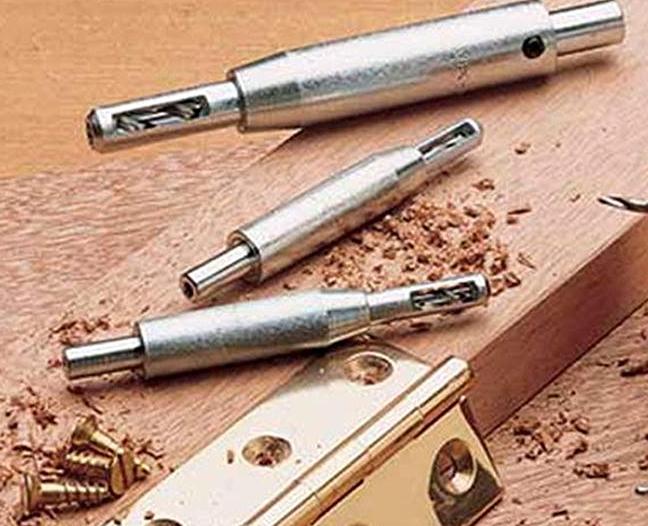
As you are a perfectionist for installing hinge screws perfectly it turns out that there is a product made just for this purpose. It is a self centering pilot drill that aims the pilot drill bit right on center in the hinge hole.

There is a spring loaded sleeve around the drill bit that pushes back as the bit bores the hole. The tip of the sleeve centers in the counter sink of the hinge hole.

These are often sold in sets for the range of hinge screw sizes that you are likely to encounter.

enter image description here

Picture Source

enter image description here

Picture Source

8
  • 2
    If you drill at an angle, even if the starting point of the pilot hole is centered in the hinge hole, the screw will also go in at an angle. The result will be a screw head that is not flat with the hinge face. Keep in mind that when using a self centering drill bit that it is much easier keep the drill positioned so as to keep the drill bit perpendicular with the hinge.
    – Michael Karas
    Commented Feb 18, 2020 at 16:56
  • 3
    Worth noting that drill bits are commonly known as "VIX bits" Commented Feb 18, 2020 at 23:31
  • 1
    I have these ànd so good - use the correct tool for the job. Plus 1.
    – Solar Mike
    Commented Feb 19, 2020 at 4:45
  • 1
    The tapers don't look like they'll self-cenre in the countersunk holes in the hinge. Also it appears quite easy to start them at an angle, thus defeating the objective. What have I missed?
    – Tim
    Commented Feb 19, 2020 at 8:02
  • 2
    This is exactly the answer I was going for as I started reading the question! I've got a set (somewhere) and they are fantastic, not only for hinges, but for centering a pilot hole in any mounting plate of any sort.
    – FreeMan
    Commented Feb 19, 2020 at 13:49
16

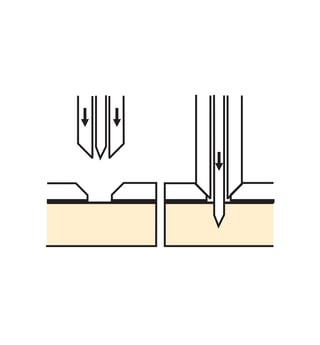
In addition to the other answer, there are self-centring punches (often explicitly intended for locating hinge screws). You could also use an appropriately sized transfer punch.

enter image description here enter image description here

[image source]

1
5

It's overly perfectionist for the hinge screws, but for the strike and strike plate screws, there is no level of perfection that you should not attempt to achieve.

Usually doors only have one set of hinges in their lifetime. If I don't need toothpicks for the 5th time I'm changing the lock, then you did it right: pre-drilled with a bit that's not even as large as the screw shank, and that hole pre-pre-drilled with a bit that's as small as possible without you breaking it. Jimmy suggests using a 1/64; that's too small for me.

4

I've hung a number of residential passage doors, some with custom made, modified, or rebuilt jambs. And changed the swing direction a few times. I'm not a pro nor an expert but this is the technique I've used to get them to work well.

Tips & steps:

  • Get the hinge mortises as accurate as possible. Doing this takes some pressure off getting the screw location exact (explained below). I use a router template and measure as accurately as possible for new mortises. Actually when possible I don't measure at all, but transfer marks between the door & jamb directly, using an appropriate spacer at the top.

  • Initially do a minimal installation - top & bottom hinge only, and one screw each.

    For these first screws I tend to err on the side of locating the screw closer to the mortise - when the screw is driven in this pulls the hinge into the mortise nice & tight. I eyeball an awl (or nail) into the center to get things started. Drilling a pilot is not essential in softwood, many hinge screws have a cutting edge.

    The accuracy of the mortise pays off at this step. The screw & wood will flex just enough to seat properly. (Assuming no gross error in positioning the screw). Analogous to how pinned mortise & tenon joinery can be done with the wooden pins driven through intentionally offset holes.

    I agree that if the screw is not 90 degrees this may be visible. But probably not a functional issue.

  • Hang the door on just the 2 hinges / 4 screws. This helps to align the hinge halves with each other and also aligns the top & bottom hinge barrels.

  • Add any remaining middle hinges, one screw only

  • Add all remaining screws. I like to get ideally one screw per each hinge through the jamb into the framing. Careful not to warp the jamb though, this needs a shim.

Caveat - I think this would work even for a really heavy door, but use common sense.

If you can do all this at the workbench, that's fine, but it works for existing jambs also.

A lot of times if you are modifying an existing old door I particularly like the flexibility of this method. It helps to work around defects in the wood especially, like old screw holes which are almost in the right place but not quite which prevent the screw from being in the perfect spot anyway.

If you are doing fine joinery or working on a small scale, maybe this technique would not be appropriate.

Your Answer

By clicking “Post Your Answer”, you agree to our terms of service and acknowledge you have read our privacy policy.

Not the answer you're looking for? Browse other questions tagged or ask your own question.