3

I've had 5 pieces of iroko machined for creating a top to my DIY TV lift, complete with a lid for the TV to pop up through:
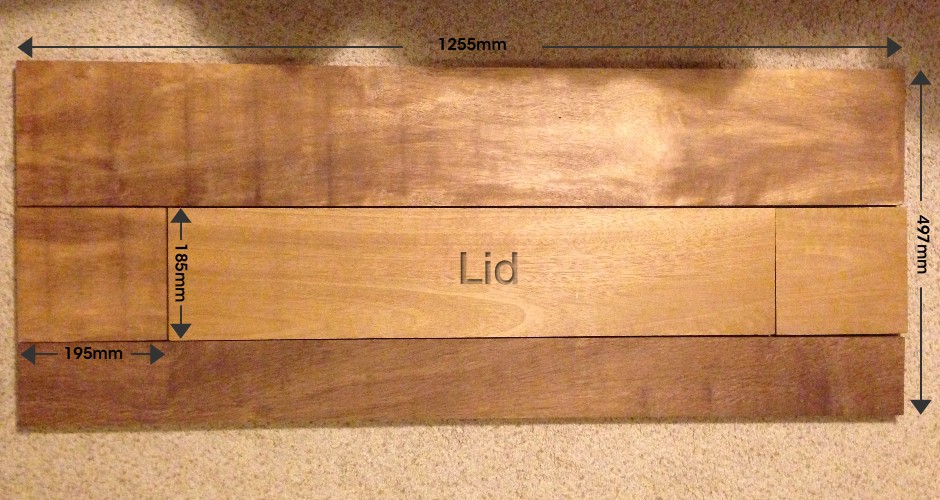
enter image description here

The dimensions are based on the pre-existing cabinet, and the lid size needed for the TV to rise up. I was originally taking my cue from this YouTube video wherein he joins his (very long) pieces with biscuits; however now I have my pieces I'm concerned that:

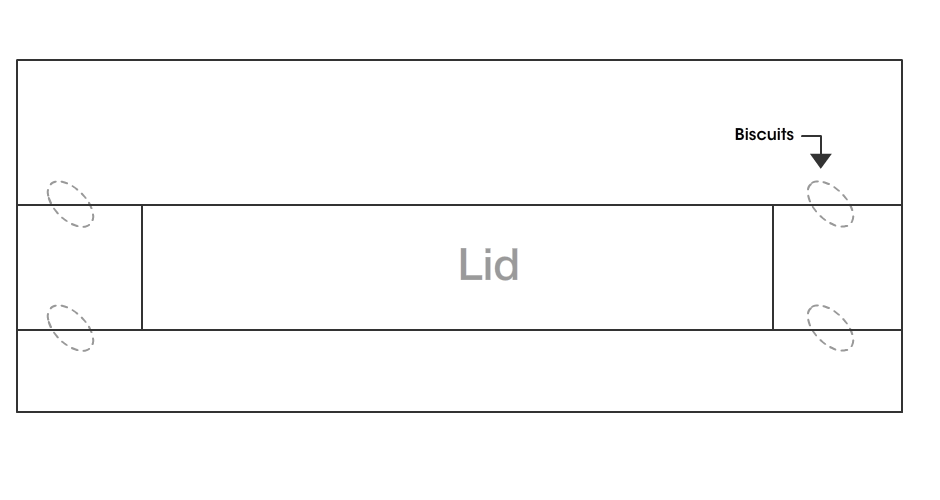
  1. The two sides are too slim to really hold the whole thing together with any strength (as I imagine I could only use one biscuit on each side);
  2. The boards may be relatively slim (20mm) and as such need small biscuits or dowels, compounding point 1.

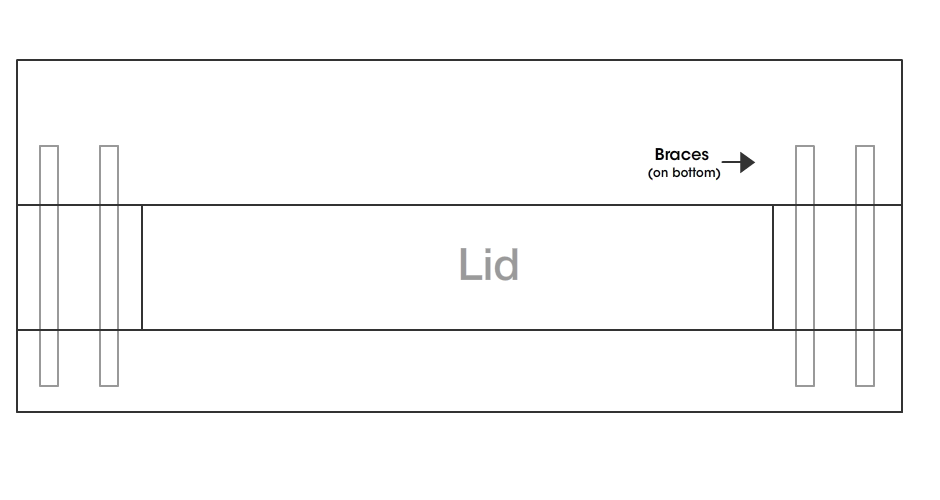
Bearing in mind that a) I'm a total novice, and b) I don't own a biscuit-cutter, I was wondering whether a far easier solution might be to use one or two 'braces' (apologies if this is not the correct term) running on the underside of the lid, on either side, joining the front and back pieces and spanning the shorter side pieces. These would be hidden inside the unit once the lid is in place, so it shouldn't affect the look.

Although the top isn't structural, it should still be solid and sound, and most likely need to at least bear the weight of a graceless cat who will hurl his body at any piece of furniture like a sack of potatoes.

TL;DR Illustrations

Biscuits: enter image description here Braces: enter image description here
3 Answers 3

2

Honestly for solid wood boards (hardwood in your case) just applying wood glue and clamping would provide more than sufficient strength to hold the weight of a cat. Simple glue joints are used to make table tops without additional fasteners. The strength of the glue joint is generally stronger than the wood itself and since your boards have already been machined they provide great gluing surfaces. Just don't clamp so hard you squeeze out all the glue.

20mm (a little more than 3/4") is plenty thick to use most fastening systems including biscuits or dowels. Biscuits you need a special bicuit cutting tool which can be expensive. Dowels benefit from a jig to get them to line up properly. My personal choice is to use pocket screw holes for applications like this.

A Kreg Mini jig will suffice for your needs as long as you have a power drill and only costs about $13 and you don't need expensive bar clamps as you would with glue alone but a face clamp would benefit to keep everything flush. You can also just use standard quick clamps though. I use mine frequently but there are more advanced models that make positioning easier. I have comparisons of the different Kreg Jig models on my site.

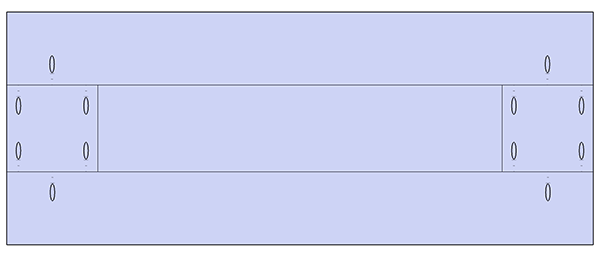
The way I would do it is to drill the pocket screw holes on the undersides of the boards using 3 screws on each side, 1 of which is screwed onto the long board. 2 screws per side would be adequate but I like to have some on the alternate board for glueups like this.

enter image description here

2
  • Thanks for this, and the helpful diagram. These were all good answers, and although I was erring more towards the bracing method, I realised that they may not fit given the dimensions of the unit sides (as the top also has some overhang). I hadn't considered pocket screws, but they do look quite promising. Now I've just got to find a jig and maybe practice a couple of times first.
    – indextwo
    Commented Feb 21, 2015 at 14:52
  • @indextwo Best thing about pocket screws is you don't need a lot of clamps compared to other methods and they're really easy to use. You still have to clamp the pieces down while screwing to keep the faces flush because sometimes the force of the screw makes them shift. The face clamp is good for that. Commented Feb 21, 2015 at 18:16
2

Part of it depends on what material you're using for the top. If it's hardwood or plywood, a good quality wood glue and biscuits / dowels / pocket screws will likely hold it together just fine.

If it's something like MDF or OSB, then I'd want some additional joining mechanism such as dog bone fasteners.

Braces below are fine, as long as they don't interfere with the attachment of the top to the cabinet. Rather than thin braces, though, you could do wide flat ones, and glue, preferably with nails and/or screws. That would give you lots of surface area for the glue to adhere to.

I'm a belt and suspenders kind of guy, I typically glue + screw or glue + pin nail things together.

1
  • The pieces for the top are iroko, which is a hardwood. I haven't heard of dog bone fasteners, but after finishing my illustration I was thinking that maybe a single wide, flat brace on either side might make more sense. Funnily enough over here the expression is belt & braces :D
    – indextwo
    Commented Feb 19, 2015 at 19:26
0

As you surmise, the biscuits offer very little in added strength in a construction of this sort. The primary strength in a biscuit construction is in the overall glue joint, and on a thin piece, that is problematic. This is even more problematic when the piece is horizontal rather than vertical and when some weight might be applied, stressing the joints. Not just the cat, but an occasional hand leaning on the top.

The braced approach is much more stable, especially if the joints are glued and the braces themselves are glued and screwed.

You do need to give yourself a bit of spacing between the lid and the frame to allow for a modest amount of dimensional shift due to humidity changes.

Your Answer

By clicking “Post Your Answer”, you agree to our terms of service and acknowledge you have read our privacy policy.

Not the answer you're looking for? Browse other questions tagged or ask your own question.