3

I have a Broan Micromate range hood model 12000. The switch for the light broke. They don’t sell them anymore. I don’t want this to be the reason I have to replace the whole thing, but I’m stumped for reasonable next steps.

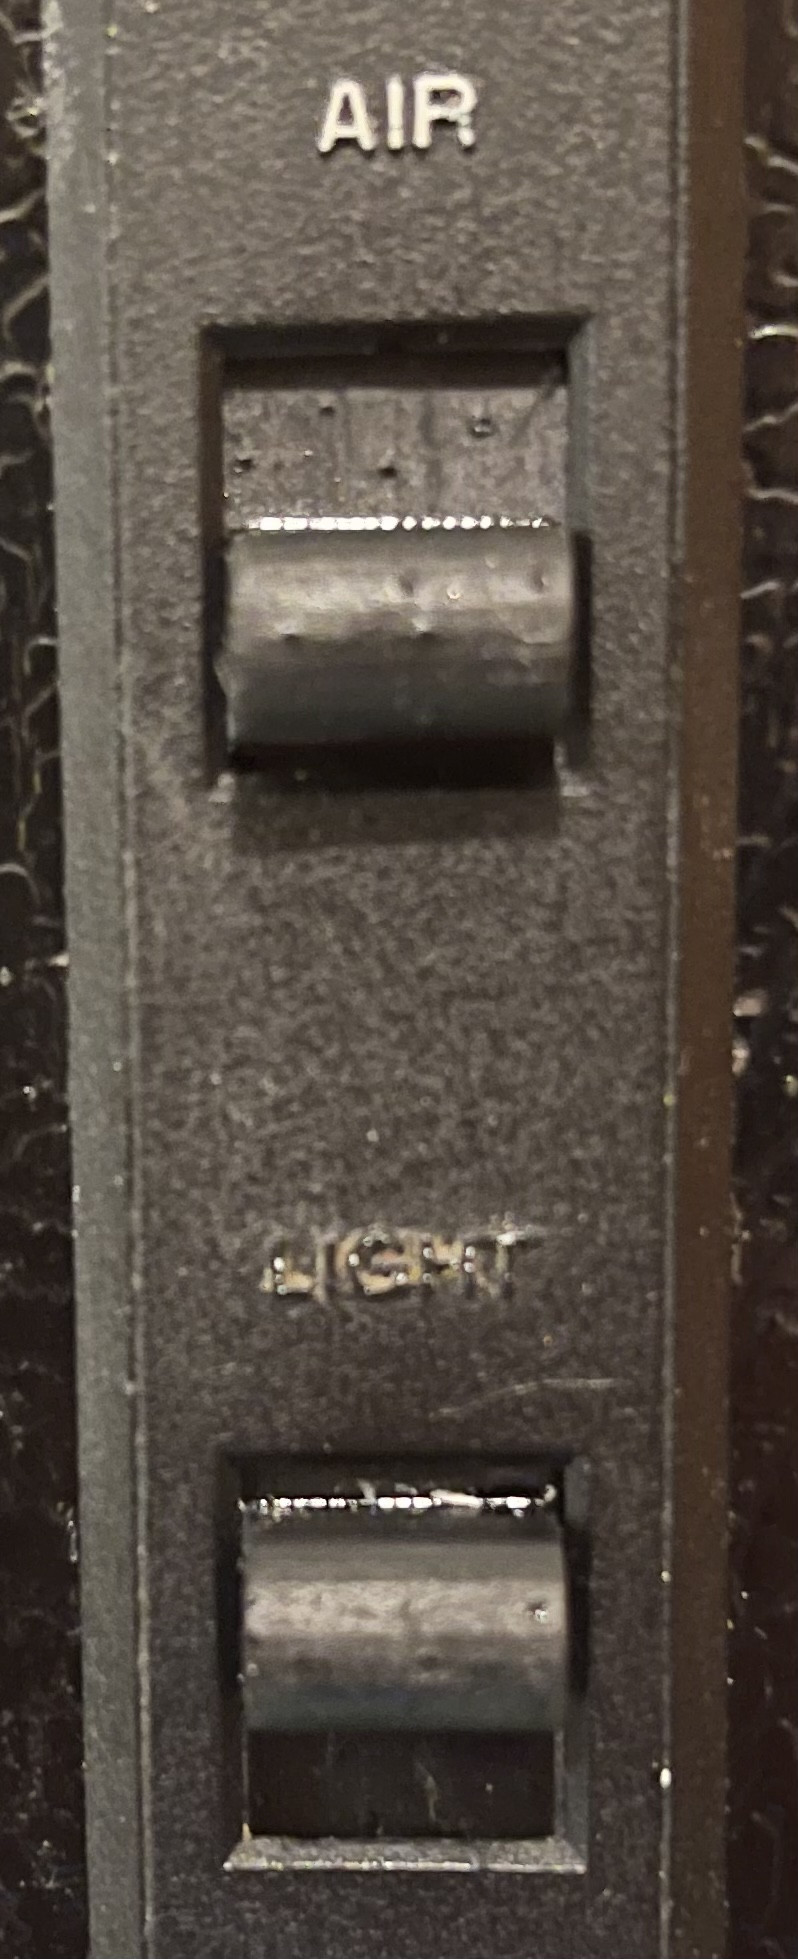
Here’s the panel with the broken switch. enter image description here

Here’s what the switch ought to look like. One of the plastic paddles on the back snapped off: enter image description here
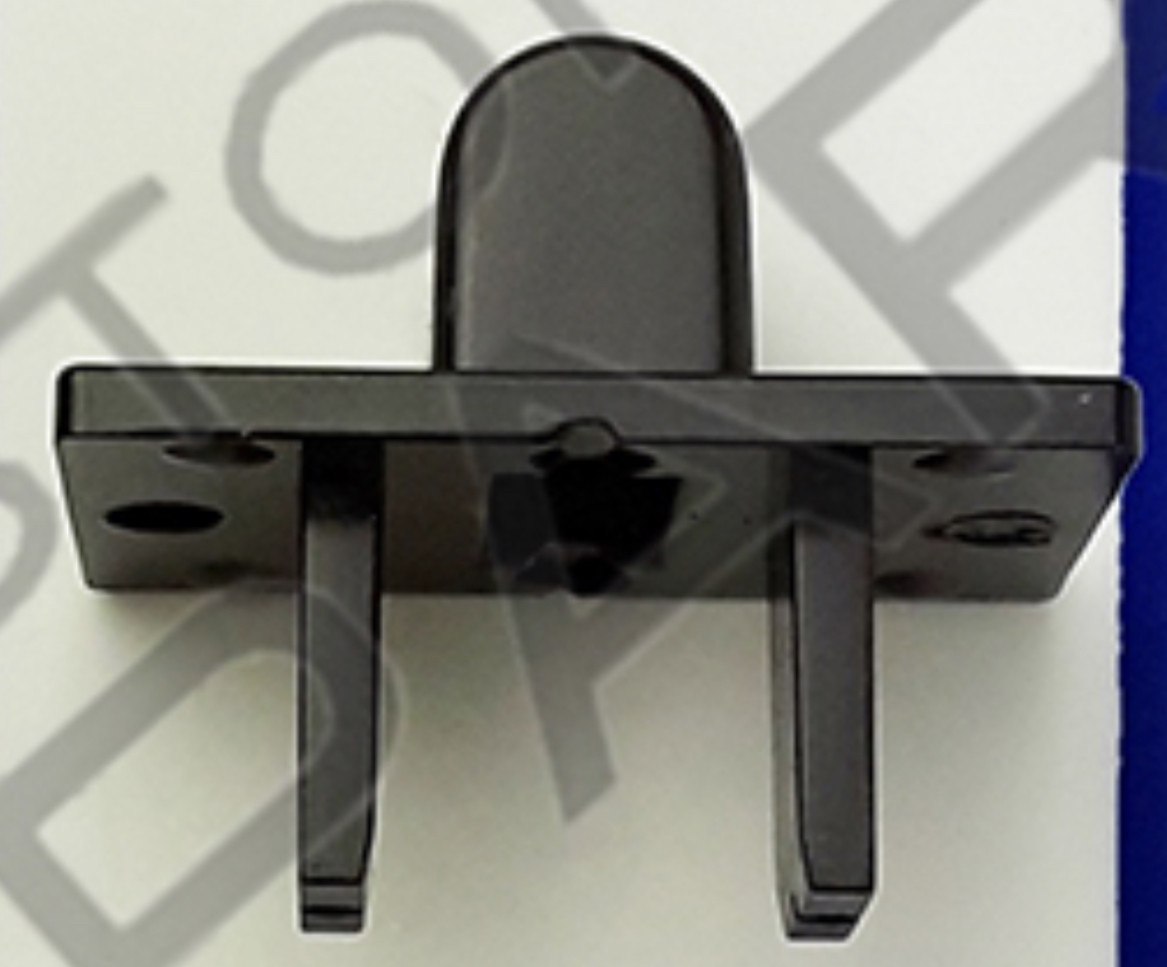
The range hood has 2 switches, so I have a good one. I don’t own a 3D printer and it’s not worth it to me to try to print one myself. I couldn’t find any online services.

The switch cover goes through the faceplate, and straddles the actual switch shown here. The way this control board is mounted, you can’t reach these real switches without the broken switch cover. And the switches are super stiff.

The top of the picture is where the plastic piece sits. enter image description here

So since I can’t buy a replacement switch for a few bucks I’m going to have to spend at least $400 to replace this with a new microwave vent hood. Any ideas???

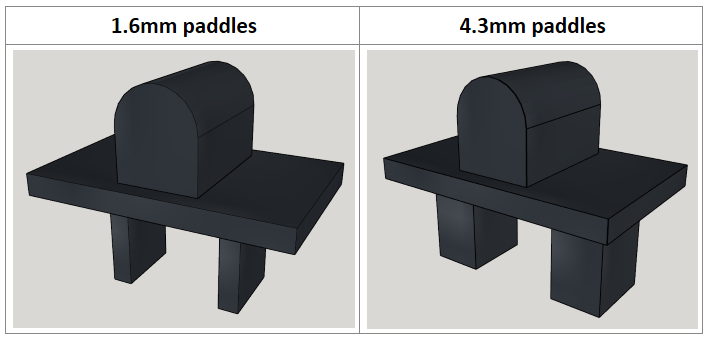
Update So I got out the calipers and measured the existing switch, and this is my best guess at how much I can add to the paddles and still have it fit the openings. I have a SketchUp file, exported it to .stl, and I'm attempting to have someone on fiverr print it for me. Fingers crossed!

enter image description here

Final update: The 3D printed switches came and work. One of them had to be shaved down a little further, but they are so much beefier I expect them to last a good long while!

enter image description here

enter image description here

5
  • What operates the electric switch? Is it the broken paddle? Or does the switch stick into the recess in the back of the handle?
    – jay613
    Commented Jun 16, 2023 at 10:51
  • That's a poor design (or a great design for planned obsolescence ;^) but the part could be easily made by a number of techniques considerably more likely to stay intact than 3D-printing that shape. So throwing your hands up and buying a new hood just for that is silly.
    – Ecnerwal
    Commented Jun 16, 2023 at 18:59
  • you can get a 3d printer for less than $400, and maybe use it for something else one day...
    – dandavis
    Commented Jun 16, 2023 at 21:23
  • @jay613 The paddles operate the switch, not the recess.
    – TheRizza
    Commented Jun 27, 2023 at 2:43
  • @dandavis It is tempting to use this as a reason to get a 3D printer. I just don't have the space at the moment!
    – TheRizza
    Commented Jun 27, 2023 at 2:43

4 Answers 4

5

If there is room for it, you could get a small angle bracket, saw/file it to size, and glue it to replace the broken paddle.

OR

Build out a big rectangular chunk around the back of the plastic handle using two-part epoxy, incorporating the remaining paddle and the recessed part to give it strength. File it down to size around the edges so it fits in the available space, and file down a channel in the middle to operate the electrical switch.

OR

You could get it 3D printed.

  • Look for a Maker Space near you and offer a club member money to do it.
  • Look for a teenager with a printer and offer a commission. If you know any local teenager ask them to post something at school, otherwise join a Facebook group of local moms and post the offer there.
  • Look on eBay/Etsy/Fiverr etc for 3d printing services.
5
  • That's a shape that is not going to lend itself well to 3d printing if you want any durability -- those legs that move the switch are going to be prone to snap off
    – Tristan
    Commented Jun 16, 2023 at 18:26
  • @Tristan I have no experience and OP may not either. Aren't there 3D printers for materials with various strength characteristics? What if he 3D-prints this with a solid block where the two legs (paddles) are and then files down a channel just the right size for the switch? (I guess he may as well just try using epoxy!)
    – jay613
    Commented Jun 16, 2023 at 18:58
  • @Tristan a 3d print would work fine if printed on it's side so the layers went left-right when viewed in-situ.
    – dandavis
    Commented Jun 16, 2023 at 21:22
  • It'll also barely cost more to print a dozen and just swap in a spare if it does break again.
    – Bob
    Commented Jun 17, 2023 at 5:53
  • @Tristan Yep. I think I can make them 3 times the thickness. Hoping that will help. I found a guy on fiverr who is printing some for me in SLA resin. No idea if that's good or bad, but we will see in about a week!
    – TheRizza
    Commented Jun 27, 2023 at 2:40
5

First thing I'd do is contact the manufacturer. Most of them sell replacement parts.

If replacements aren't available, and I had to fix it?

The two things in the bottom photo are the actual switches. And it looks like they're soldered to a circuit board. One solution would be to remove the switch from the circuit board, and in its place add a switch that's attached to the board by wires. Kind of tricky, but it could work. Another solution, potentially easier: leave the switch where it is, and permanently leave it in the ON position. Find the wires that go to the light (there should be 2). Cut one of those wires, and splice a new switch into it. You might have to cut a hole in the enclosure to put the new switch into.

1
  • Sadly, the switch is no longer available. I absolutely can leave the switch permanently on and install a new switch. I'm going to try to go the 3D printing route first, and if it breaks again, I'll go this route. Thanks for the idea!
    – TheRizza
    Commented Jun 27, 2023 at 2:38
2

Here's another off-beat idea: drill a couple small holes in the actual switch, fabricate some wire loops through the holes that the remaining "peg" on your broken switch cover will fit into. enter image description here

Or make a metal box that will fit around the switch that's big enough for the peg, and glue it to the switch.

enter image description here

Oh, also, shoot some silicone lube into the switch in case it's sticky, or your remaining peg may bite the dust too.

1
  • The holes are a clever idea, but I can't fathom how you'd get that installed!
    – FreeMan
    Commented Jun 27, 2023 at 18:38
0

I would consider gluing a plastic tube to the existing pin and that body.

If you heat and squash the tube slightly then you should have sufficient strength.

However, it all depends on the available space.

Your Answer

By clicking “Post Your Answer”, you agree to our terms of service and acknowledge you have read our privacy policy.

Not the answer you're looking for? Browse other questions tagged or ask your own question.