5

Our kitchen sink has been slowly leaking for several months, and as of yesterday, it is finally leaking so bad we can't use it until it's fixed. I'm generally handy, but when it comes to plumbing of any kind I feel out of my league. My wife and I are trying to save money here and fix this without having to call a plumber, but I'm really not sure where to start...

enter image description here

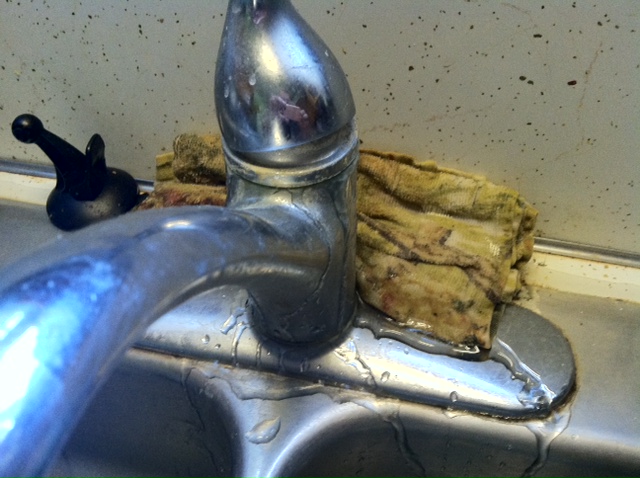
As you can see, when the sink is on, water is coming out of the seam just above where the faucet meets the base...

enter image description here

enter image description here

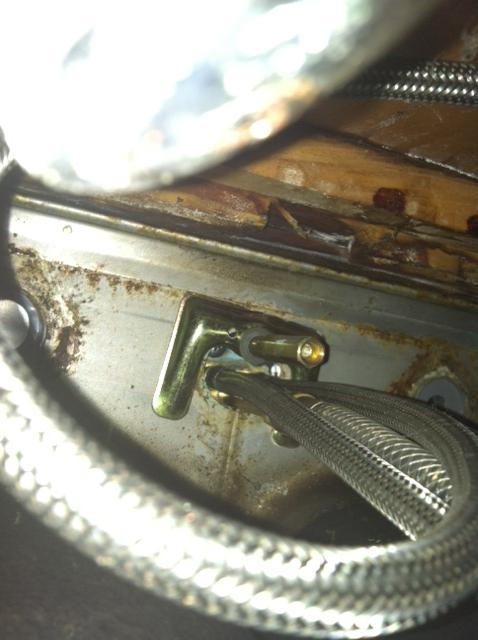
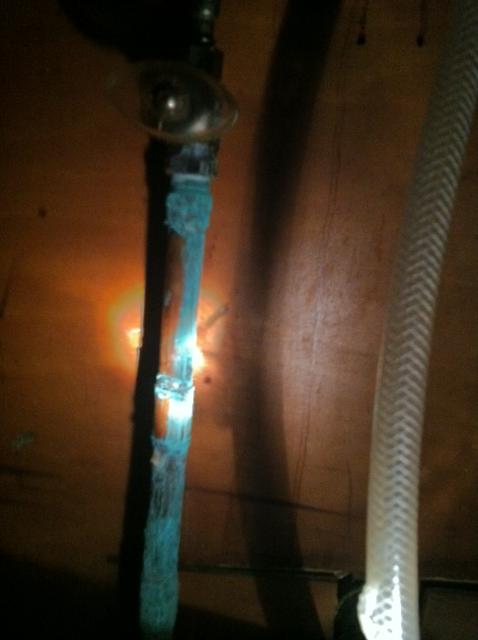
I believe this is also causing a problem underneath the sink, as you can see in the pictures, water is leaking from somewhere above and has been corroding the metal pipe the sink connects to.

I've searched high and low and I can't seem to find a make or model for this sink. If there is a place I should be looking please let me know and I'll update this question with manufacturer info.

I talked to a guy at my local hardware store and he lost me very quickly. Tried selling me on a "rebuild kit", whatever that means.

I feel like if someone could tell me exactly what I have to do, that I will be very capable of doing it. I'm just not sure of the following:

  • How to pull apart or open up the sink to begin diagnosing the problem
  • How to diagnose the problem
  • What to do about it

Any pointers in the right direction are greatly appreciated - thanks in advance!

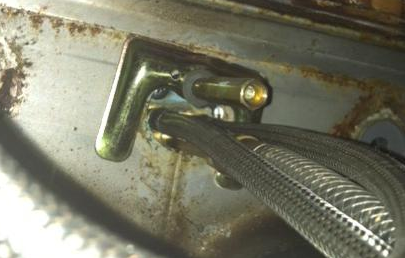
Edit: I have successfully shut off water to and disconnected both hot/cold supply lines. I am trying to find these "mounting nuts" but can't seem to find any. Below is a picture of the sink from directly underneath the area where I believe these nuts are. The only thing I see is a hollowed-out brass bar (about 2.5" - 3" in length) protruding down, but no mounting nuts. Any ideas? Thanks again!

enter image description here

4
  • 2
    Pro tip: Always cover the drain when disassembling sink fixtures. Use a stopper or an upside down plate.
    – BMitch
    Commented Aug 31, 2012 at 0:26
  • 4
    Just because @BMitch didn't explain why you need to cover the drain: Open drains are black holes for screws and other small parts that you might find necessary. Commented Aug 31, 2012 at 14:21
  • I used to live where we had very hard water and faucets were a problem. I found rebuilding to be a waste of time and money as you need specialty tools to change the seats and other parts and by time you by all the required parts you could have just purchased a generic faucet and replaced it. I never bought high end like Moen or American Standard because the hard water would ruin it in 2 years time. We had a water sofener but it was very expensive to maintain and also purchase the salt. After 13 years I made the decision to MOVE!!
    – Dennis
    Commented Aug 31, 2012 at 16:08
  • 1
    @zharvey, It looks like you need to loosen the brass bar. You can see that it is hexagon shaped, like a nut. Once it is loosened, you should be able to remove the 'U' clip which is what is holding the faucet down. Do you have a side spray?
    – pdd
    Commented Aug 31, 2012 at 18:16

6 Answers 6

11

For inexperienced DIYers; or any body not really comfortable with plumbing in general, the easiest option is to replace the whole faucet. While the faucet may be serviceable, stuck screws/bolts, proprietary disassembly steps, and difficulty finding replacement parts, make this a frustrating job for beginners.

The new faucet should come with instructions on how to install it, but here are the basic generic steps to remove the old faucet and install the new one.

Removing the old faucet

Turn off the water

Look under the sink, and you'll (hopefully) see something like this.
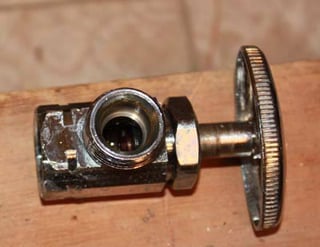
Shutoff valve

Actually, you'll see two. One for the cold water, and one for the hot. Turn the knob until the valve is shut. Then turn the faucet on all the way, just to make sure the valves are fully closed.

If you do not have valves under the sink; or the valves do not stop the flow of water, you'll have to shut the water off using another valve down the line or the main shutoff valve.

Disconnect the supply lines

Attached to each of the shut off valves, there should be a hose like this.
Supply line

In some cases a rigid or flexible copper pipe will be used as a supply line, instead of a flexible braided supply line.

Using a pipe wrench or tongue and groove pliers, disconnect these pipes from the valves.

Make sure you have a small bucket under the connection, to catch the water that comes out of the pipe. A small amount of water is normal, it's just the water that was left in the pipe between the shutoff and the faucet. If the water continues to flow or comes out under pressure, tighten the connection back up. This means the valve is not working or has not been fully shut off.

Remove the mounting nut(s)

If you follow the supply lines (the pipes you just disconnected) up, you'll find the tailpiece (a long threaded pipe) with the mounting nuts at the top against the underside of the sink. There may be two (one where each supply line connects), or just one in the middle depending on the faucet make and model.
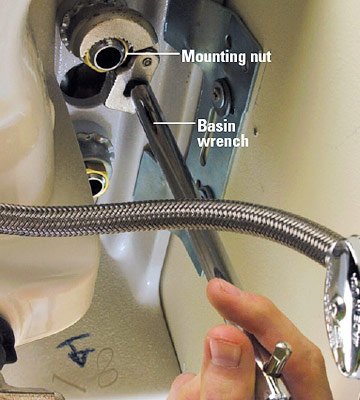
Mounting nut

A basin wrench makes removing these nuts much easier.

On some faucets, the supply lines are part of the faucet and cannot be disconnected. In this case the mounting nut may or may not be right at the end of the supply lines.

Once the nuts are removed and the supply lines are disconnected from the faucet (if applicable), the faucet should just lift away from the sink.

Clean up the mess

Once the faucet is removed, scrape any old plumbers putty from the top of the sink using a 1" putty knife
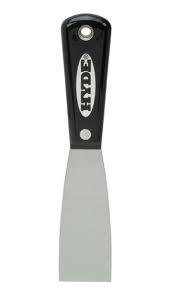
Putty knife

Install the new faucet

Now that you have the old faucet removed, it's time to install the new one. Follow the instructions included with the new faucet, or these generic steps.

Seat the faucet

Grab some plumbers putty, and roll it into a "rope" (about 1/2" or so around) in your hands. place the putty rope either on the sink where the faucet will sit, or around the bottom of the faucet itself. The plumbers putty prevents any water that may be near the base of the faucet, from leaking down into the cabinet below the sink.
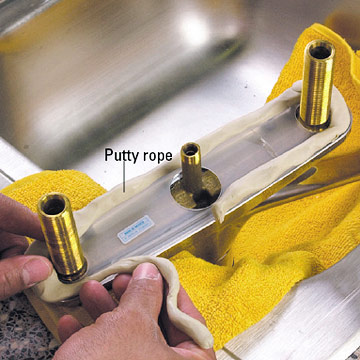
Putty rope

Do not use plumbers putty on natural stone (granite, marble, etc.) counter tops, use a bead of 100% silicone caulk instead.

Carefully put the faucet in place, and press it straight down (don't worry if some of the putty squeezes out, that's normal). If the faucet does not stand on it's own, get a helper to hold it for you. Go back under the sink, and install and tighten the mounting nut(s) on to the tailpiece(s) using the basin wrench again.

Remove any excess putty that squeezes out from around the faucet base.

Connect Supply lines to the faucet

If the old supply lines are still in good condition, you can reuse them. Otherwise, head to the hardware store and pick up new ones (if not included with the new faucet). Make sure to take the old supply lines with you, so you get the right ones.

Using the basin wrench again, connect the supply lines to the threaded tailpiece(s) on the faucet.

Connect the supply lines to the supply

Connect the other end of the supply lines to the shutoff valves, making sure to connect the proper line to each shutoff (you don't want hot water coming out when you turn the faucet to cold).

Check for leaks

Slowly turn the shutoff valves back on, and watch carefully for any leakage. If you see a leak, turn the valve off and tighten the connection where the leak is.

Turn the faucet on (testing both hot and cold), and look for any leaks.

Tips

PTFE tape

Use PTFE thread seal tape on all threaded pipe connections, to reduce the chance of leaks.

Lube helps nuts come off

If any of the threaded connections are difficult to remove (when removing the old sink), soak the connection in penetrating oil.
8
  • 3
    Wow...wow...wow. Go stackexchange! I knew this site was going to be awesome. Thank you such much for taking the time to give such a thorough, dummy-proof answer here. I wish I could upvote you more - I'll have a chance to tackle the sink project once I'm out of work this afternoon, I'm printing your answer out as we speak. Thanks again!
    – bfodder
    Commented Aug 31, 2012 at 12:52
  • 1
    The flexible supply lines typically have washers in them which creates the seal. I do not believe you are supposed to use Teflon tape and/or dope on these.
    – Steven
    Commented Aug 31, 2012 at 14:43
  • 1
    @Steven It's a broad generic statement, that may not apply to all situations. Even when washers are involved, PTFE tape will reduce the friction between the threads making it easier to tighten now, and easier to remove in 20-30 years. Besides, for ~$0.50/roll, why not use it?
    – Tester101
    Commented Aug 31, 2012 at 14:51
  • 3
    Don't use plumber's putty if your counter top is natural stone (granite, marble, etc.). Instead squirt a line of 100% silicone caulk instead of plumbers putty. Plumbers putty has oils in it that will leach out and go deep into the stone counter. I made this mistake in my kitchen (the faucet directions said it use plumbers putty) and I lamost had a heart attack the next morning seeing the big oil stain on my new granite counter.
    – auujay
    Commented Aug 31, 2012 at 15:31
  • @Tester101 - please see my edit regarding the mounting nuts. I believe the metal "protrusion" that I described in the edit is some kind of guard (or perhaps an electrical ground?!?), because I can see that there are two Phillips-head screws/bolts just past it. Can you confirm these are the screws I need to remove? Do I need to remove the guard/ground first? Thanks again!
    – bfodder
    Commented Aug 31, 2012 at 17:41
2

The first step is to find out where the water is coming from. From what you described, it might be coming from the connections where your flexible supply line meets the faucet, or it could actually be from the base of the faucet which would indicate a failure somewhere in the faucet. Does it only leak when the tap is on? If so the leak is past the supply connection point.

Dry everything off. Now turn it on and using a flashlight under the sink, look to see if any water is coming from the connections. If not, look above the counter - is it definitely coming from the base?

This type of fixture is usually secured to the sink by 1 or more large bolts that apply squeeze to the underside of the counter. Start by turning off the water and removing these bolts to detach the fixture from your sink. See if you can pull it up enough to see the bottom of the faucet. Turn the water back on but leave the faucet off - see any leaks? Now make sure its dry and turn it on - try to see where the water is actually coming from.

If it is not coming from an easily serviceable part then you can either try to disassemble the faucet and repair it, or just replace it. If plumbing "isn't your thing" then replacing it might be the best bet because its really simple to do.

If you want to try and tackle the faucet itself then you need to find out how to disassemble it. If you are lucky you might find the manual for it, otherwise you'll need to look for clues as to how to take it apart. Often the handle comes off with a set screw that is recessed in the handle.

Disassemble it and visually inspect the components for worn washers, lots of mineral build-up, etc. When you find the culprit you now have to find a replacement part. Take it with you to a plumbing supply store to see if you can find a match.

1
  • Thanks for such a fantastic answer @Steven (+1) - I'll try these suggestions out today and update this question with the results. Thanks again!
    – bfodder
    Commented Aug 31, 2012 at 12:33
1

It looks like a washer/seal needs to be replaced. Typically, you remove the handle to gain access to the cartridge, which you would replace.

Many manufactures have web sites that will try to help you determine what model you have by asking a series of questions like "one handle or two handle?". Here are links to Moen's and Delta's sites.

I would start by trying a few of these sites to see if you can find anything that matches.

As a last resort, you could remove the faucet completely and take it into a plumbing wholesaler where they should be able to determine what replacement cartridge you need.

1
  • Thanks @pdd (+1) - I'll try these suggestions out today!
    – bfodder
    Commented Aug 31, 2012 at 12:34
1

I would buy a new faucet and new supply lines if the faucet does not come with enough hose to attach. You can get a reasonable priced one, or for a little more get one with a lifetime warrantly.

1
  • Great suggestion - I'll make sure to measure how much length I need before I head in. Thanks again!
    – bfodder
    Commented Aug 31, 2012 at 12:34
1

I am an amateur but it looks to me like it just needs an O ring and new plastic ring like the video below shows.

under kitchen sink diagram http://static.ddmcdn.com/gif/how-to-repair-a-spray-hose-1.jpg

looks like it needs an "O" ring and silicone grease. http://citykitchensseattle.com/tag/kitchen-faucets-leaking-at-base

I had no experience at all and replaced the whole toilet at my house and all the guts of a tank in two toilets. I guess I am mechanically inclined from birth.

Laura

1
  • Best to start with the easiest repair (the O ring) and then escalate the repairs from there if that one does not work, especially if you are trying to save money.
    – Laura
    Commented Jun 20, 2016 at 14:19
0

enter image description here

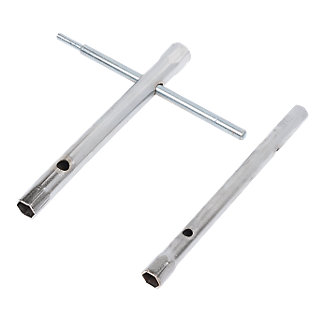
That's a typical monobloc tap (faucet) with a C-shaped washer and a retaining nut. You can cheaply buy special long tubular wrenches specifically designed for this job.

enter image description here

Double ended - fits four different sizes.


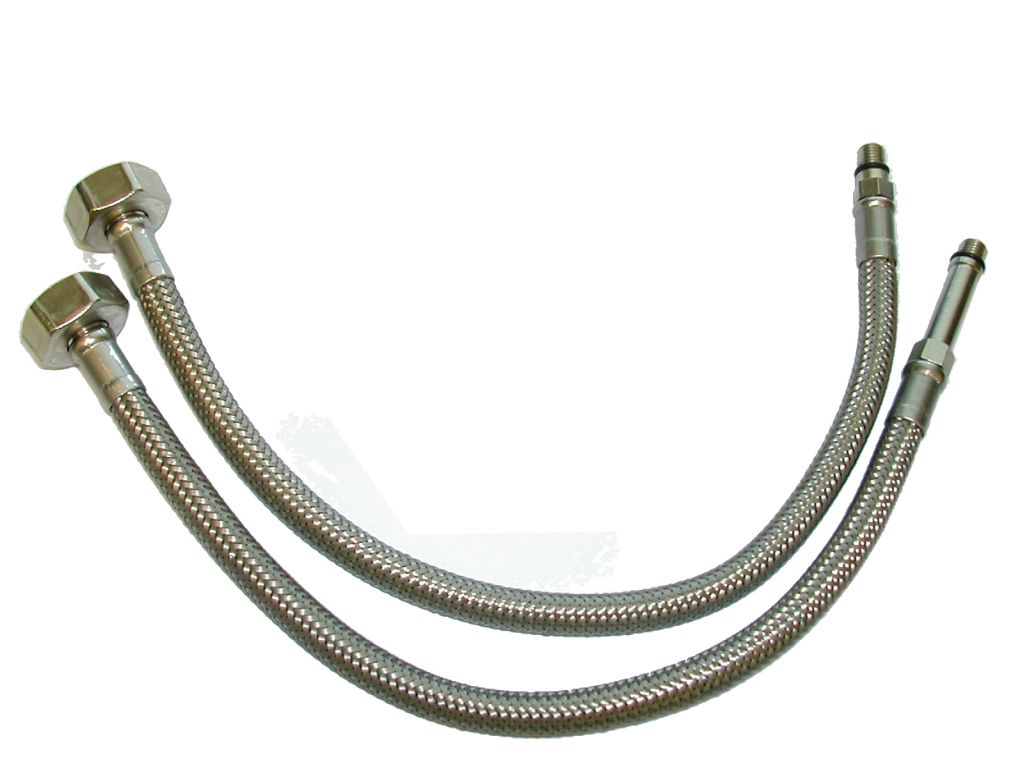
The connecting hoses usually have a small thread at the tap end with a rubber o-ring. They can often be unscrewed by hand once the lower end is separated from the supply pipework.

enter image description here

Note the difference in setbacks of the hex portions to facilitate unscrewing in a cramped space.

Your Answer

By clicking “Post Your Answer”, you agree to our terms of service and acknowledge you have read our privacy policy.

Not the answer you're looking for? Browse other questions tagged or ask your own question.