14

I am tiling my bathroom floor and don't soon have a full day to dedicate to the job. Is it ok to lay down a few tiles each day and come back to the job when I have time? I would only lay mortar for the tiles I have time to lay each day.

My concern is that the mortar wouldn't properly "join" to the previously laid sections of tile and cause an inferior result, but I'm not really basing this concern on any facts. That is what I'm hoping to learn with this question.

3
  • 5
    The big inefficiency stretching projects out like this is the set up and clean up/take down process has to be done each time. Something to consider.
    – DA01
    Commented Dec 2, 2015 at 5:21
  • 2
    @DA01, in this case ready-mixed floor tile adhesive would save some time every session (it's also easier to clean up than mortar. Here in the UK "floor tile adhesive" is commonly used; while mortar is used for some floor tiles that tends to be on rough concrete floors.
    – Chris H
    Commented Dec 2, 2015 at 9:02
  • 3
    You want to make sure you don't apply excess mortar in the areas where you will not complete tiling. Once the excess sets, you will have a hard time lining up the next course and need to grind or chip it away. This is time consuming and can also damage the in place tiles. Commented Dec 2, 2015 at 15:56

5 Answers 5

17

It certainly is acceptable to do a tile job in phases. There's no structural reason that tiles need to have their supporting mortar connected mechanically. The critical bond is to the substrate, not adjacent tiles or mortar. Large residential and commercial tile jobs are done in stages every day, and with no special procedures or materials.

One caveat might be the grouting. Ideally you'll complete grout work for a room in one step using grout from a single mix batch for visual consistency.

5
  • 3
    Agree with grouting all at once. (It's fast, so that shouldn't be an issue.) But what bugs me about tile is mixing mortar, so I'd do anything in my power to only have to mix one batch. How about doing all your cuts and a dry fit one day, then doing mortar on another? Commented Dec 2, 2015 at 2:08
  • 2
    Mixing mortar ain't so bad - and it can be difficult to completely dry-fit with everything loosey-goosey - or at least to have the wet fit work the way the dryfit did ;-) Getting some tile stuck down really helps to move the job along.
    – Ecnerwal
    Commented Dec 2, 2015 at 2:32
  • @AloysiusDefenestrate - I tried that. As Ecnerwal said, the wet fit didn't work the way the dry fit did. I ended up trying to trim tiles (and wall plaster) to make the final row fit.
    – AndyT
    Commented Dec 2, 2015 at 11:37
  • To do a dry fit first you'd want to not remove all the tiles after the dry fit. Only remove a few at a time to allow standing room. Alternatively, trace the grout lines after your dry fit.
    – isherwood
    Commented Dec 5, 2015 at 15:39
  • Another caveat is if you're relying on a tile leveling system to minimise lippage. In that case, you have to remember to put the sticks in under the last row of tiles before the mortar dries. But even then, the leveling system should bring the tiles to the same height, but there may be a peak between the rows because you can't adjust the angle of one row of tiles.
    – Paul Price
    Commented Mar 18, 2021 at 22:23
10

You can certainly stop for the day. The things you have to watch are:

  • Finish your tiles all in one line or row, not on the diagonal. That way you can check it with a laser or string to make sure everything is straight. Once it sets, you can't nudge tiles to get a good line.

  • Depending on your pattern, you may have adjacent joints lap one, two, three or more tiles. The more laps, the easier it is to hide errors in height. When the tiles are wet, the installation of adjacent tiles lets you feel height differentials (lippage), and then adjust using hydraulic pressure of the cement as you lay the next run of tiles (tap the high tile down, or lift a low tile by tapping adjacent tiles).

    When you stop for the day, that leading edge you have laid can come back to haunt you the next day when you start your new run because the lippage can't be adjusted. If your floor is completely flat, its usually okay, but if you are laying on a floor that's not perfect, it can be a problem. It also depends on how picky your client is, and what you are laying. Marble and granite can be polished down to remove lippage, but ceramic and porcelain don't work that way. Bigger tiles are worse than smaller tiles.

    We install lots of tile, and its all got to be within 1/32 height to the next tile (otherwise you feel it underfoot when its done). You can solve this pretty much if you use a tile levelling clip system as you install. Just leave a height setting tile "clipped " in place along each both sides of the joint at the terminal line, just don't mortar it in. Next day, come back, slip out the tile and continue.

  • Don't disturb the tiles the next day. Assuming you finish at 5 and back at 8 the next day, the tile mortar hasn't had enough time to set fully. If you start laying new tiles too soon, you may inadvertently disturb the terminal row. Let it cure for 24-36 hours.

  • Use a good quality polymer modified mortar to install. This will give a stronger bond and minimize the chances of popping tiles as you start and adjust the new course on day 2. Dyna Ceraflex 610 is my go to mortar. Or Flextile 52, but honestly, they are pretty much the same and the former is half the price.

0
3

This is how I handled it on a recent small room project. Each bullet-point was a day or afternoon. It was a herringbone pattern with 3x6 tiles, so it took a while, but the results were great.

  1. Laid out pencil grid on the floor.*
  2. Laid half of field tiles only, no cuts.
  3. Laid second half of tiles.
  4. Next few afternoons I didn't have much time - cut edge tiles in batches.
  5. Long day, got to lay all the edge tiles that were previously cut to "finish" the tiling.
  6. Cleaned grout lines of mortar.
  7. Finally grouted. All in one day because I mixed the whole box.
  8. Sealed grout.
  9. Wife was pleased - mission accomplished.

* Since I planned to do a little at a time, I was very meticulous with the layout lines so I could basically start or stop at any time and not loose my alignment.

Anyway, my belabored point is that it's fine to take several days. That's the joy of DIY - projects that go on forever so you're never bored!

2

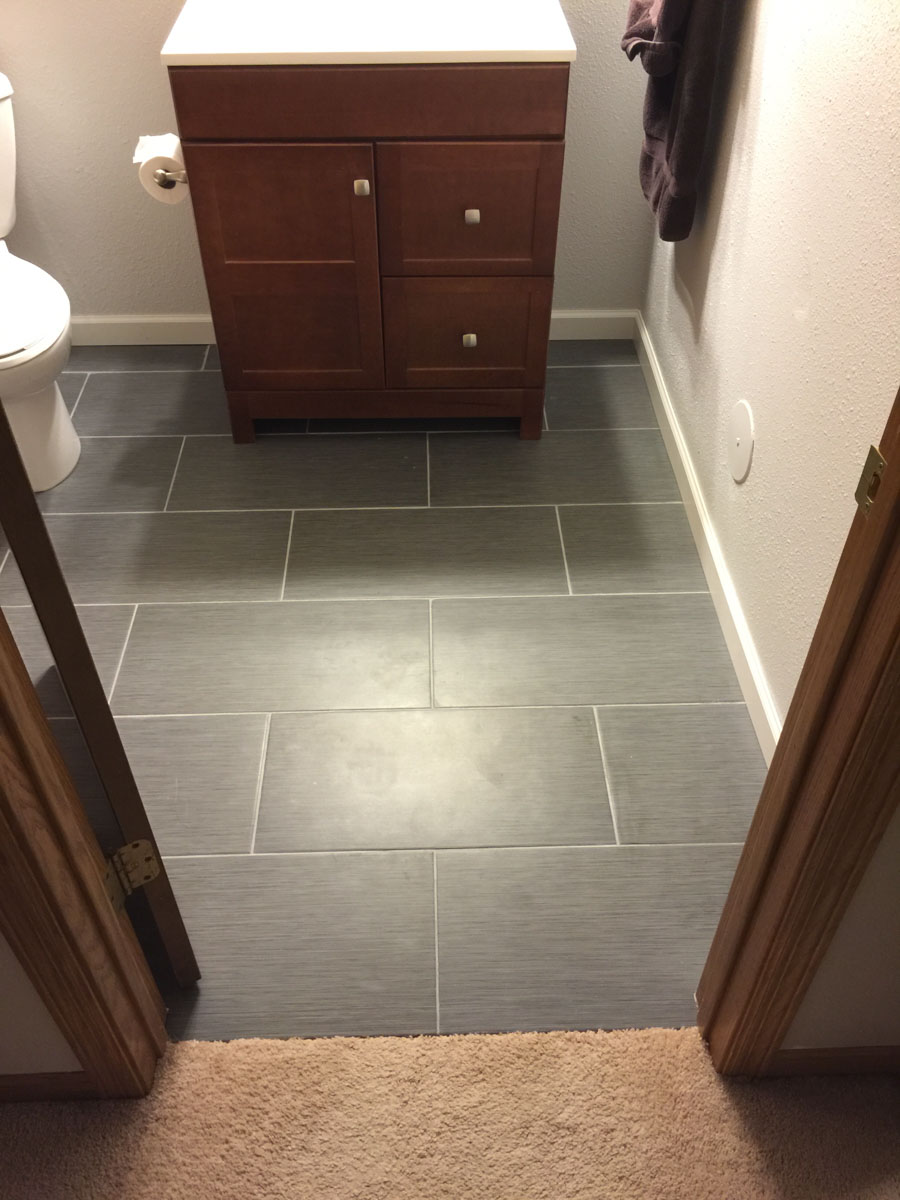
I can report back. I started and stopped this job on three different days with no ill effects (as of a year later). I was sure to cleanup any excess mortar that would interfere with the pieces to be laid later. I also kept at least 2 days between each session so I was not disturbing the existing tile; although that was more due to my available time and less about the job itself. Here are the results:

enter image description here

2
  • 2
    Looks good, but why did you install the toilet at an angle?
    – Preston S
    Commented Feb 13, 2017 at 21:31
  • 2
    @PrestonS - Great question, it's my throne and as the king I wanted to be comfortably angled ;)
    – dpollitt
    Commented Feb 13, 2017 at 21:33
1

I agree with "personal privacy advocate" above. You can really get into trouble starting over at the 'hard edge'. I understand that it shouldn't make any difference because you're using spacers and laying on a notched bed etc., but in practice there is a degree of juggling; swings and roundabouts if you like, where the tiles magically self adjust into each other as they nestle into place. Having a hard edge can interfere with this process. It's even awkward coming back to the tiles after lunch!

I know it sounds daft, but I suspect any tiler will follow what I mean.

Is it possible to rearrange other jobs to give you a better run at it?

My observations are based on tiling maybe a dozen bathrooms/kitchens per year over the past 30 years or so... I'm not a 'real' expert (I'm not tiling daily, or even weekly) but I've done a few!

Not the answer you're looking for? Browse other questions tagged or ask your own question.