8

I have 108 year old original wood trim throughout my house. Due to a roof leak last February, three rooms on my first floor need to have most of the (also 108 year old) plaster walls removed and replaced because it is moldy (inside the wall). I am doing the demo myself (see my other post here) and have decided to try to keep the original wood. Partly because I want to keep costs down, partly because of the character of it, partly because I have read enough answers here that condemn folks who paint or otherwise destroy perfectly good hardwood and now feel too guilty to consider that alternative.

My plan was to remove all the wood downstairs and strip it and re-stain it. Since this wood 1) has been subjected to lead paint removal (at least), and 2) is old, I figured this would require a delicate touch, and the use of a chemical stripper since I doubt it can stand up to any rough sanding. I want it all to match because I HATE that it doesn't right now (most is a hideous honey gold, some is a dark 80's fake wood paneling brown).

Now that I've tried to remove some of the crown moldings (not really! its actually picturing hanging rail someone butt up against the ceiling) and it is splintering into bits no matter how gentle I am, nor how much I plead with the patron saint of DIY. I did the whole room that is getting gutted entirely, and I only have enough to put 40% back up.

So, my new plan is to only remove as much as I have to and try to stain the rest in place. Is this possible? Is this what I should have planned to do in the first place? Obviously, I've never attempted to stain anything more (important) than my 8th grade woodworking project. Another reason I wanted to do it in the garage-in case I make a big freakin' mess.

Should I just forget it and just get all new wood? This would solve my other problem - attempting to match the old pattern (am I using the right word there?) - but would create a problem in the budget department.

If there are alternatives I haven't mentioned here-feel free to pitch me a softball...I need help, and needless to say, no one I know is handy, has good taste, and/or owns a house and understands the stakes. My fate is in your (collective) hands! No pressure. ;-)

2
  • I would try to preserve the wood if at all possible. It is likely extremely hard, beautiful, old-growth wood of the kind you can't easily get anymore.
    – iLikeDirt
    Commented Oct 5, 2014 at 1:55
  • @iLikeDirt that's what I'm trying to do but the beautiful old growth wood is, well, also very, very dry and brittle and not happy to be jostled. Maybe I'm doing it wrong? Removing it that is...
    – Jax
    Commented Oct 5, 2014 at 18:47

4 Answers 4

2

We have a similarly old house, and I can say, if you are patient, stripping, sanding, and refinishing can be done in place. We have done casing trim, and baseboards in place, but chose to remove the window apron to refinish that. For grooves, look into dentist picks to pull any paint.

For sanding, use odd shapes of scrap with sandpaper adhered to it.

2
  • I agree - sometimes when you remove old trim you can run into a multitude of problems. The main thing is protecting the floor.
    – DMoore
    Commented Nov 7, 2015 at 5:53
  • 1
    I selected this answer bc it turned out to be true. I had to thoroughly tape the walls behind the wood, and I covered the floor in plastic sheeting and then canvas drop cloths. In the places where the stain did get to the plaster, I sanded it off as best I could then spot primed with a professional grade plaster primer.
    – Jax
    Commented Apr 16, 2016 at 14:04
1

We've refinished some of our douglas fir trim in place - can definitely be done.

However, if you're taking down the walls (plaster) and replacing with drywall, then you may create some gap problems -

Our plaster (lath + plaster) is 1.25" thick, but drywall is 1/2" or 5/8", so if your place is like ours, you'll have a 3/4" or 5/8" gap between the back of the trim and the new wall. Lots of ways to solve that problem too (strapping, shims etc), but all more work.

Removing the trim cleanly is upfront work, but may yield better results long term. It's a challenge but not impossible.

Invest in a set of small, flat pry bars of varying sizes, work slowly, and pry close to the nails - it's possible to remove even old dry doug fir without splitting it.

Check this TOH video (around 8 minute mark) for tips on how...

http://www.thisoldhouse.com/toh/tv/video/0,,20622667,00.html

2
  • Warning: when you remove the trim, label it so you know exactly where each piece goes back... and be aware that when released it may warp in ways that make it hard to reattach. I tried to reuse some trim when I remodelled, and the carpenter basically said "can't do it." If we has established that sooner, I would have saved those boards for other projects, grumble mutter.
    – keshlam
    Commented Oct 17, 2015 at 18:14
  • I followed your advice and ditched the pry bar (which was labeled as being for this specific purpose) and tried using putty knives and a metal spatula at the nail to pry the wood. I slipped the flat metal behind the wood then added, one at a time, thin pieces of wood (shims, the thinnest ones I could find in a pack) behind the metal, tapped into place with a small hammer. Sometimes it worked, sometimes it didn't. Occasionally the wood would pop off the wall and the nail would stay, but most often the wood would still splinter. Thanks for the suggestions, inc labeling. That was def helpful
    – Jax
    Commented Apr 16, 2016 at 14:50
1

[I was intrigued by situation and your questions as I will have to help my son restore a 1930s house in Atlanta next summer. I have a bit of experience on home repair. As a teenager, I helped my step father fix parts of our 1940s house. It had plaster walls and crown molding. Earlier I learned about plaster ceilings. At my grandmother's I jumped on the floor of a 2nd floor bed room and caused the plaster ceiling of the downstairs living room to fall to the floor. Her house in South Carolina was built around 1900 and had 10' ceilings. I watched the laborious work of 2 or 3 plasterers take a week to restore it. Then after college I worked for a drywall contractor. Now, I do all the work on my house. Somewhat recently, I had to find a piece of door trim for my 1968 built house to replace a side my dog chewed up. Knowing a bit about drywall, but not much about plaster, I checked the internet for your problems and the ones I will face next summer.

I strongly advise you to be careful using a chemical stripper to remove the paint from your downstairs wood. Putting on too much or letting it stay on too long may bleach the wood and make it unstainable. Definitely follow the manufacturers instructions. One time when I was refinishing an old rocker, I left the remover on a bit too long. I had to do a bunch of sanding before it would take a stain. Being a bit scared of paint removers I found the "safer" recommendations of This Old House. #1

1) thecraftsmanblog.com/veneer-plaster-an-affordable-alternative/

Looking for something other than a chemical remover, I found Silent Paint Remover. It loosens paint by heat for lite scraping. Site #2 A discussion of its use is here. Site #3 Also, if there is not a lot of paint to remove, wood alcohol may be able to it. For the very difficult areas you might have to resort to some light sand paper. Although this article is about furniture, I found it quite interesting. I think it might work well with trim. Site #4 I don't know if your restaining will be a dark color to match an existing one. I found this article saying current stains may not be dark enough to match one in a turn-of-the-century house. If you need it there are step by step instructions. Site #5

2) www.silentpaintremover.com/

3) delafleur.com/blog/?p=2860

4) www.thisoldhouse.com/toli/article/0„20220362,00.html

5) www.oldhouseonline.com/tips-for-finisbing-old-house-woodwork/

You mentioned your difficulty in removing the crown molding. You are probably using something like a prybar. I found an article about using a metal spatula and hammer rather than a prybar to remove trim. I had never thought of using that method. Site #6 Also, you said you could not save a lot the molding to put back. I know getting custom molding done a millwork shop is expensive because you have to buy the custom knives for and pay for all the millwork expenses. I found this article on How to Duplicate Custom Molding and thought you might like to see it. Site #7

6) delafleur.com/blog/?p=425

7) http://www.thisoldhouse.com/toh/article/0,,20456859,00.html

Duodenalsalmons mentioned sheet rock vs plaster. I don't know if this is a concern of yours, but it is in my son's house. I found several articles comparing the two. Site #8 I personally don't like the prospect of doing plaster. I'm pretty good with sheet rock, so I'd like to use it. But plaster looks better in an older house. I found some neat stuff that can make sheet rock look like plaster. Sites #9, #10, & #11

8) homefixated.com/plaster-vs-drywall/

9) www.oldhouseweb.com/blog/how-to-skimcoat-a-wall-like-a-pro-almost/

10) www.texmaster.com/magictrowel.html

11) thecraftsmanblog.com/veneer-plaster-an-affordable-alternative/

I hope my suggestions can help. I know they are going to help me with my son's house. Sorry some of the links don't show in blue, but they are true links. Just copy and paste.

4
  • Hello, and welcome to Home Improvement Stack Exchange. Your answer would be a lot more useful if it included inline links instead of an image showing (non-copyable) links. See the help center for formatting help. Commented Nov 30, 2015 at 3:25
  • Unfortunately I was not able to set links. Since I did not have a high enough reputation points I was limited to 2 links. The only way I could put the number of links I wanted was to insert an image with the links on them. Hopefully I will have some reputation points that will allow me to put the links with my answer. Commented Dec 4, 2015 at 23:23
  • Understood, and that makes sense. I don't know the minimum rep for that many links; hopefully when you hit that threshold (or if you already have) you'll have time to come back and make those links real. It would make a good answer into a great answer. Commented Dec 5, 2015 at 2:17
  • I have revised the answer by putting in the actual links. Hopefully that is worth some votes. Commented Dec 5, 2015 at 4:23
-2

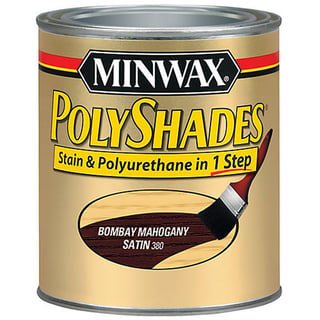
The can says it all. Personally I don't like it but landlords love it. Left with 40% usable material there's not much you can do except replace it all. Multiple rooms worth of salvage may make up for one of them. Reading your other post, this trim was recently reattached, making it rather impossible to remove without destroying it. This product requires only a scuff sanding to bond well, all reasonably done in place.

enter image description here

3
  • Hmm, I'll give it a try on one of the useless fragmented pieces. If it sucks, I'll just add the can to the collection of barely used paints and finishes I inherited with the house.
    – Jax
    Commented Oct 5, 2014 at 4:01
  • It's basically a mixture of the two, try making your own. I don't think its going to make anything lighter though. Without it being the first coat on fresh wood, it's kinda like just painting on some dark. Useful for quick touch-up on gouges. @Jax
    – Mazura
    Commented Oct 5, 2014 at 4:52
  • 2
    The down vote was appropriate, IMO this is a stop gap product.
    – Mazura
    Commented Oct 5, 2014 at 22:24

Your Answer

By clicking “Post Your Answer”, you agree to our terms of service and acknowledge you have read our privacy policy.

Not the answer you're looking for? Browse other questions tagged or ask your own question.