0

I've had a new consumer unit/fuse box fitted, which is a different shape to the old one. I now have some repair work to do around it and I'm unsure of the approach.

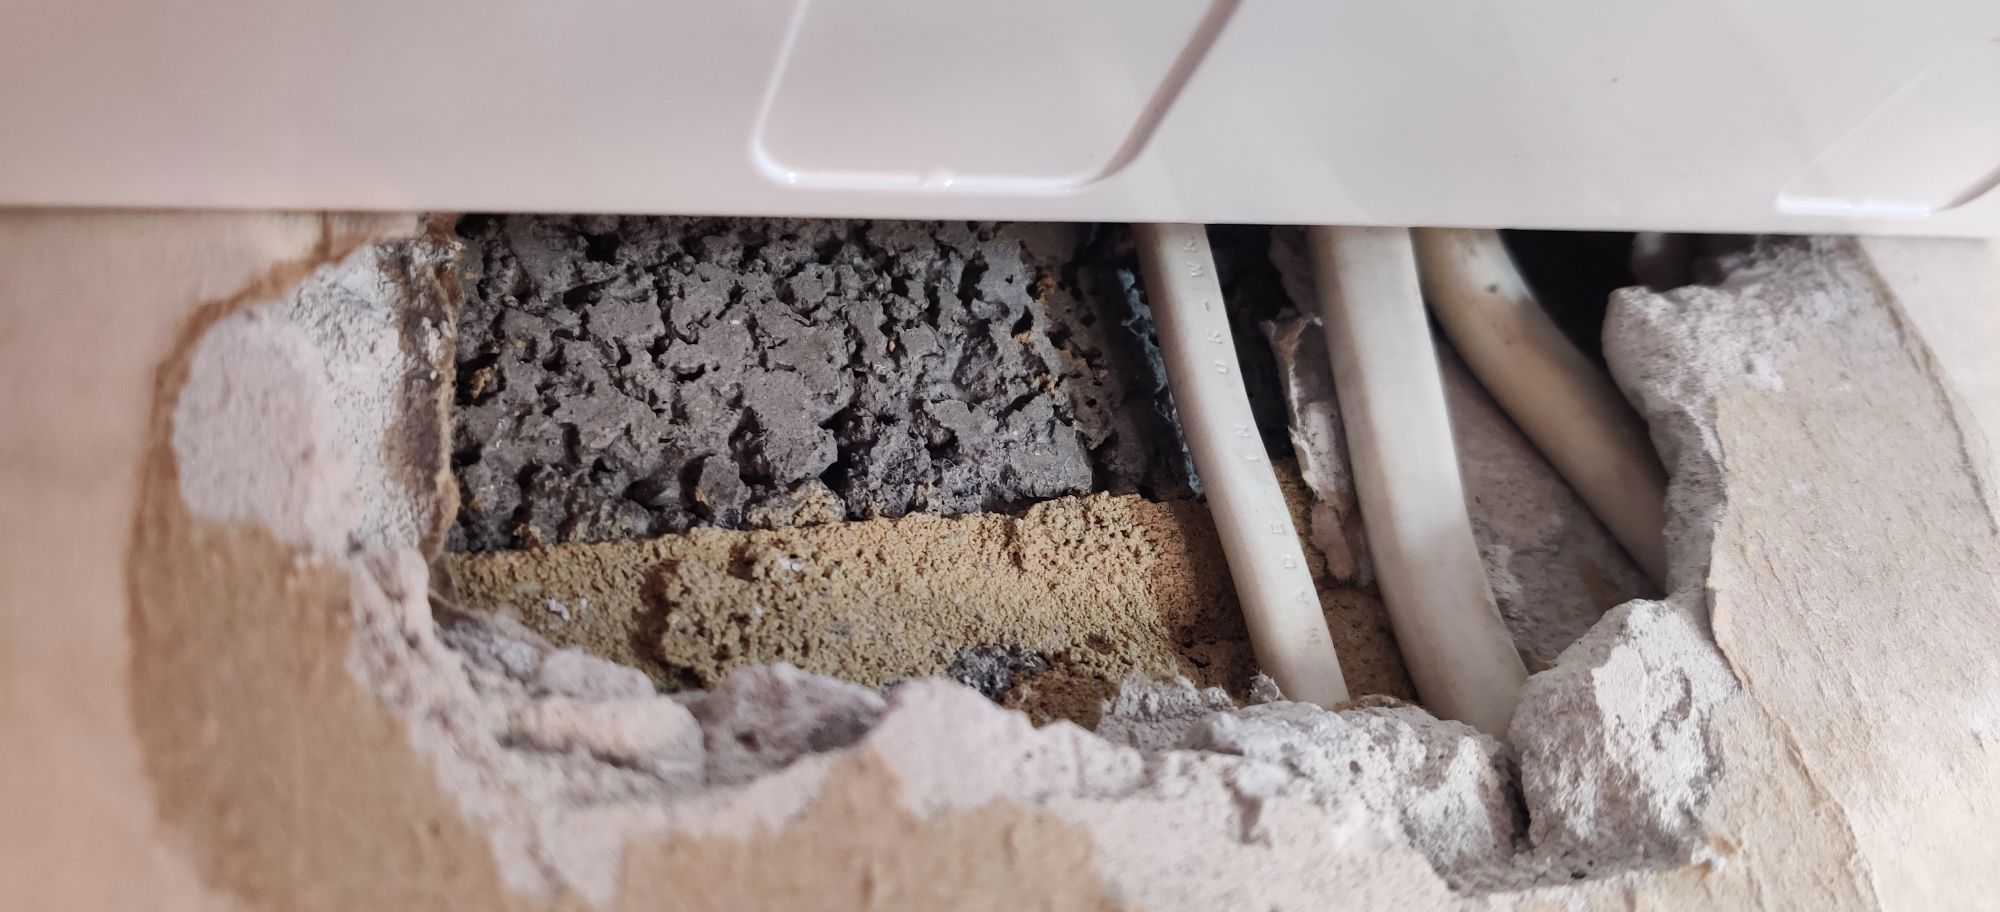
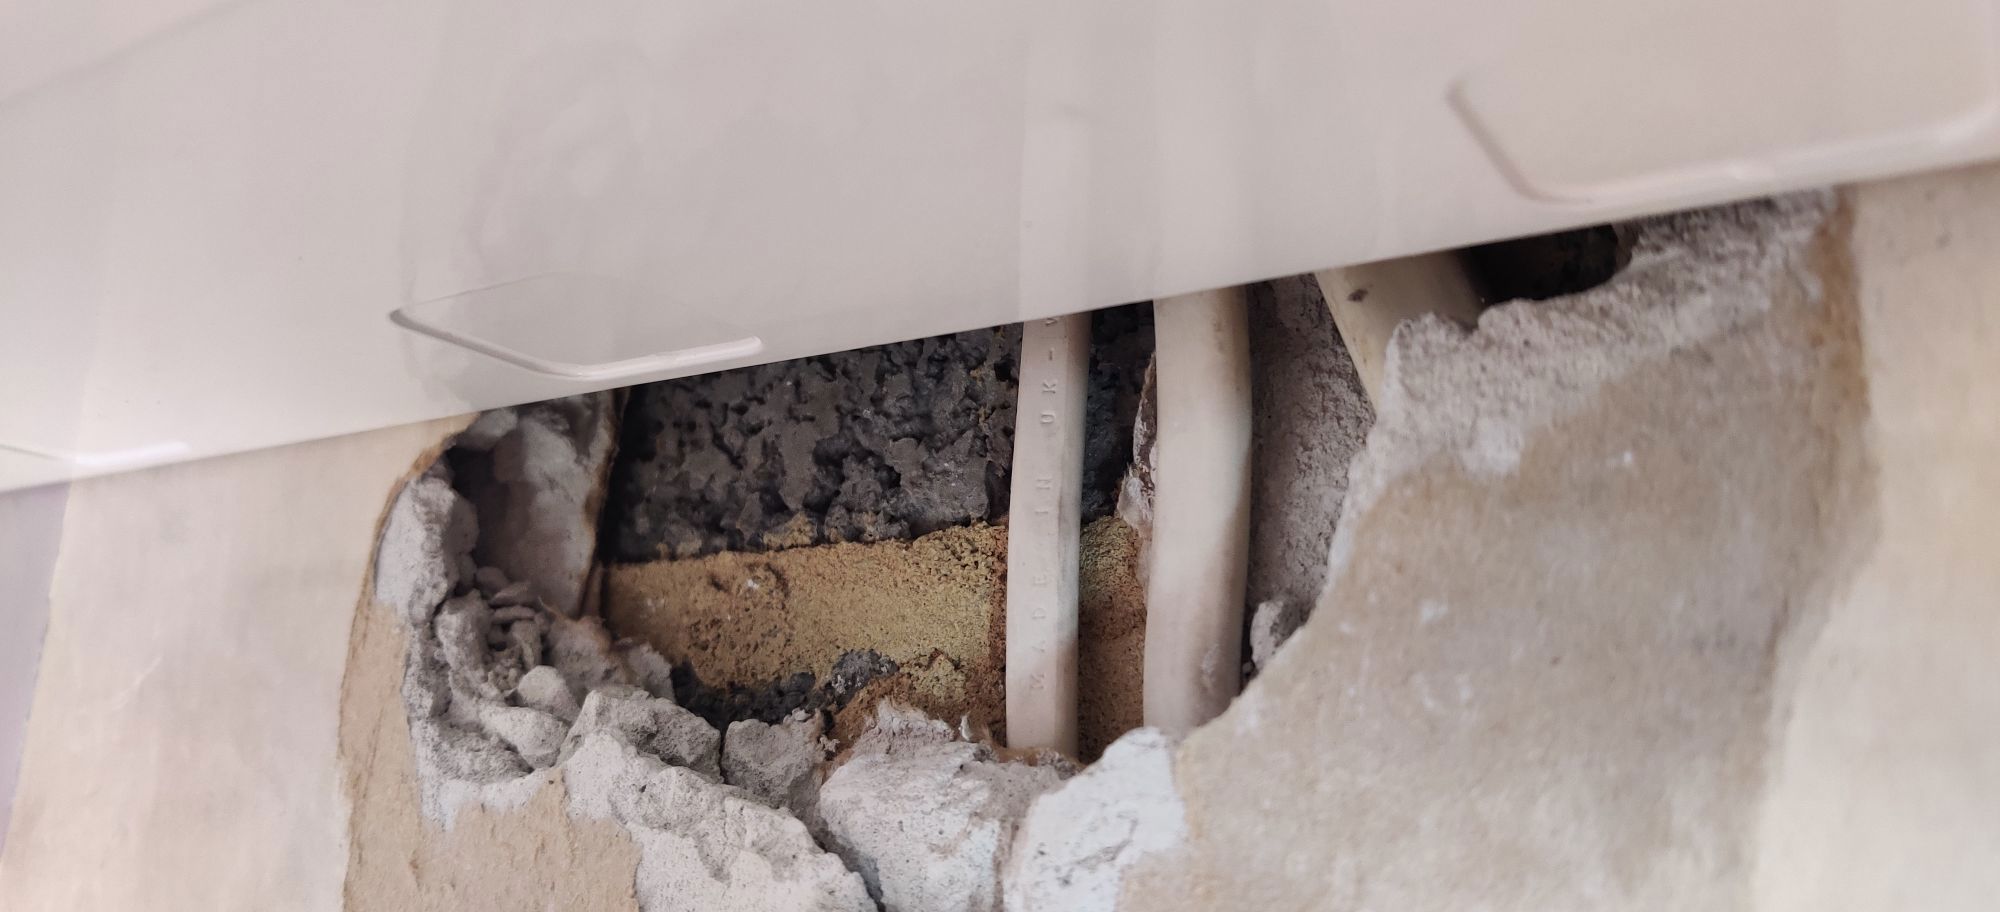
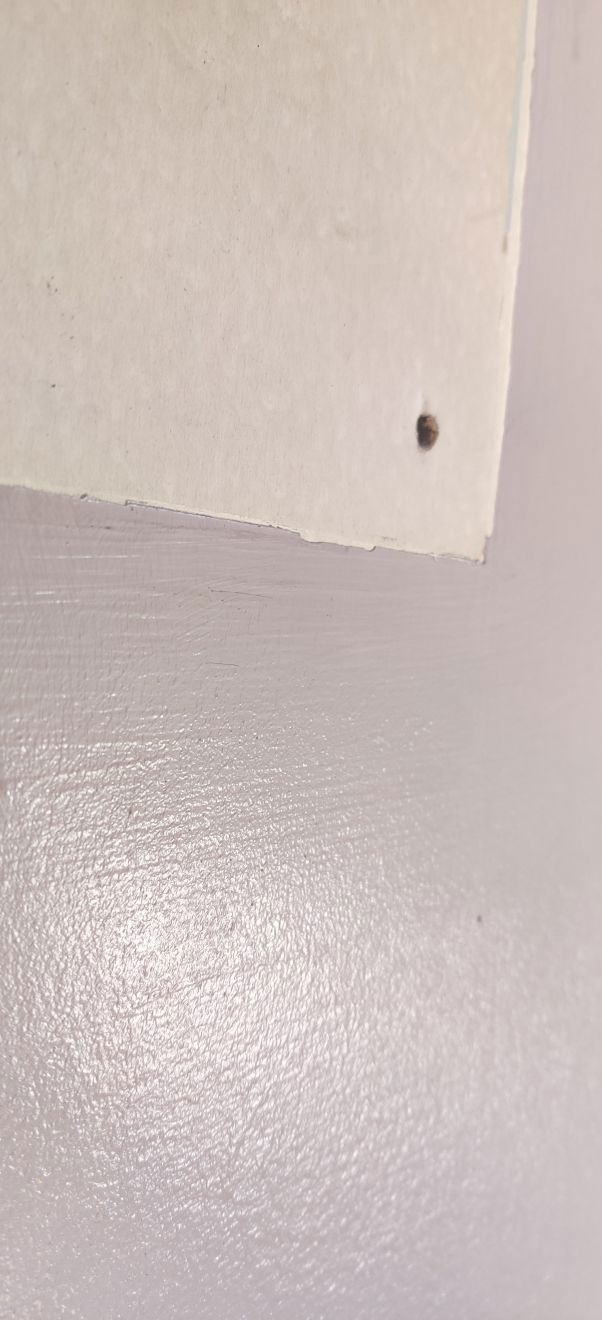
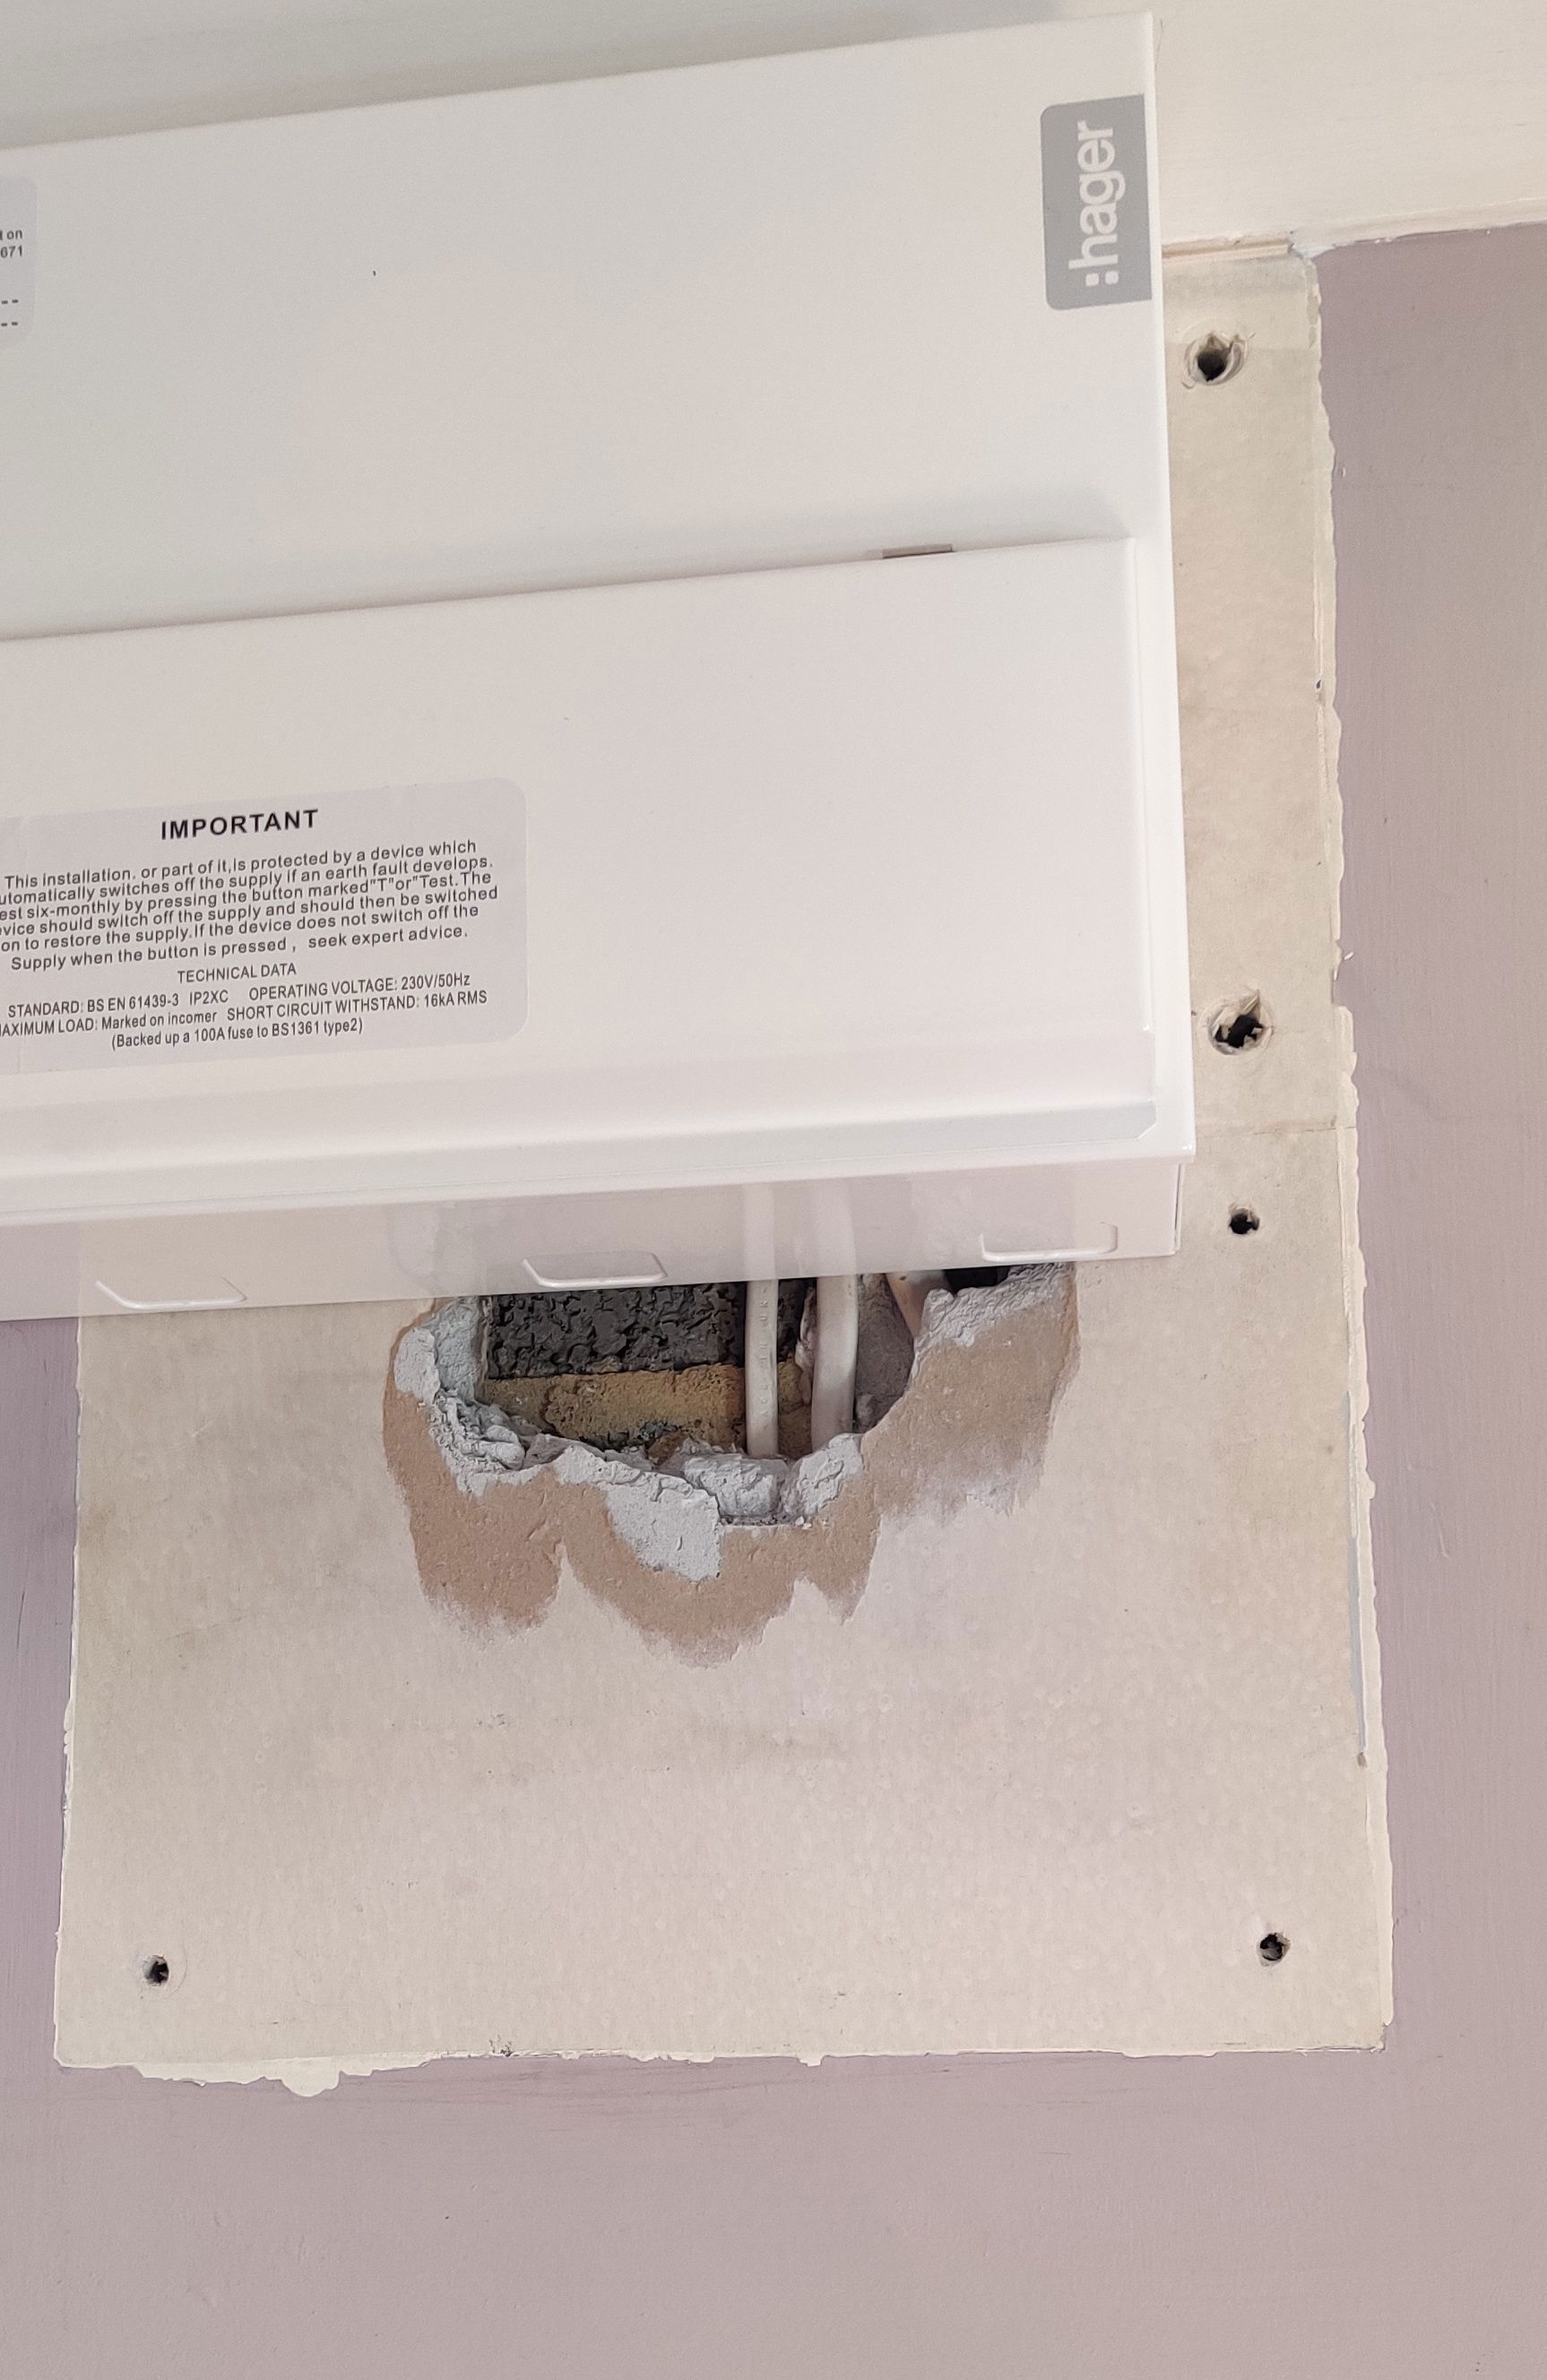
Here are some images to show the situation (the hole is about 15cm wide by 6cm (down from the bottom of the unit). The plasterboard is 0.5 inches thick: Consumer unit zoomed out Hole 1 Hole 2 Paint texture
You can see that the construction is breeze block, a small gap, cables that can move around, plasterboard, (maybe a skim of plaster) then paint.

I'd like to make it good and have some ideas about how to approach this:

  1. It has been suggested that I just fill in the whole space with poly-filler or some similar generic filler.
  2. Another approach is to try and place a new piece of plasterboard in and bind it to the old.
  3. Perhaps to do this, I should excise even more of the existing plasterboard.
  4. I have more of the paint that was used for the walls.

I have these concerns though:

  1. You can see 3 cables in the image through the hole. I'd like to leave these free to move around to make it easier to install and modify future circuits/cabling from the consumer unit.
  2. The hole goes underneath the back of the consumer unit and so I think any fix needs to go up and behind the consumer unit by a few mm (possibly more but that is making it harder). For this I could loosen up the screws holding the consumer unit in place with the power off, but not much more than that.
  3. The edges of the current hole have broken and loose bits of plaster that are held in place by the backing paper.
  4. The paint has a finely pattered texture (shown in the 4th picture). This may be the texture of the plasterboard or perhaps a thin skim of plaster that went over it or perhaps it is the natural texture of the paint. I'm hoping for a finish that looks natural.
  5. Besides the hole itself, there is a region of whitish paper with some drill holes in it that needs preparing in some way before painting and also the edges of the paint need preparing in some way. Perhaps this requires a skim of plaster, but I don't know what kind.

I suspect that my hole in the wall problem is fairly common and even with the interaction of the electrics, people must have hade to deal with this many times. Could someone advise me on how to approach this please? I'm in the UK in case that affects anything.

1 Answer 1

1

There are a number of ways to repair wallboard, such as those suggested by Popular Mechanics.

You have two conflicting goals, however:

  • Make the repair seamless, or at least aesthetic.
  • Leave access to the wires underneath.

Since patching wallboard is relatively easy for the average person, I'd suggest you just cover the wires with a wallboard patch, and cut through that patch when changes are needed. The alternative would be to make some sort of removable L-shaped panel, held in place with screws and/or hinges, which might be unsightly. If this is in a utility room, it might not matter.

  1. Using a straight-edge and level, mark the outline of the L-shaped section to be replaced.

  2. Cut along the outline. Since the wallboard goes directly against a solid surface sans furring-strips, a saw might not work well. Perhaps a router might be used, set for a very shallow cut to avoid cutting the wires. Use a mask and face shield for dust protection. Be very careful near the wires. Cutting just partway through the wallboard might be sufficient to break through with a knife.

  3. Cut a piece of wallboard to fit the opening. From the photos, it appears it will need to rest on top of the wires! You might need to use the router to create a recessed channel in the patch to accommodate those wires.

  4. Apply the patch, using thin wood shims held with construction adhesive, as needed, to bring the patch surface flush with the existing wallboard.

  5. Wipe down the surfaces.

  6. Apply joint tape along seams -- do not overlap at corners.

  7. Apply joint compound and let dry.

  8. Sand joints and wiped down.

  9. Paint to match.

6
  • 2
    I'd add a steel plate across the notch cut out to route the wires. Commented Aug 16 at 20:12
  • As commented by @DelphicOracle, a no-nail plate to protect those cables is a must. Commented Aug 16 at 23:10
  • I'd also set a plastic trim ring in the patch for the wires to exit the wall from.
    – Huesmann
    Commented Aug 17 at 13:22
  • @DrMoishe Pippik, thanks for your in-depth guide. I agree with the patching idea. In terms of leaving access to the cables, what I had in mind was that they could still be accessed from inside the consumer unit (I won't be patching the hole behind it, except perhaps a few mm). There is a small gap (a few mm) btw between the breeze/cinder block and the plaster/wall board which the cables run down at the moment. This might have been understood, but I wasn't 100% sure.
    – aghsmith
    Commented Aug 18 at 10:55
  • @Huesmann, I like this idea but I don't think it will be practical to implement as I'd need to remove the consumer unit to get a trim ring in place.
    – aghsmith
    Commented Aug 18 at 10:56

Your Answer

By clicking “Post Your Answer”, you agree to our terms of service and acknowledge you have read our privacy policy.

Not the answer you're looking for? Browse other questions tagged or ask your own question.