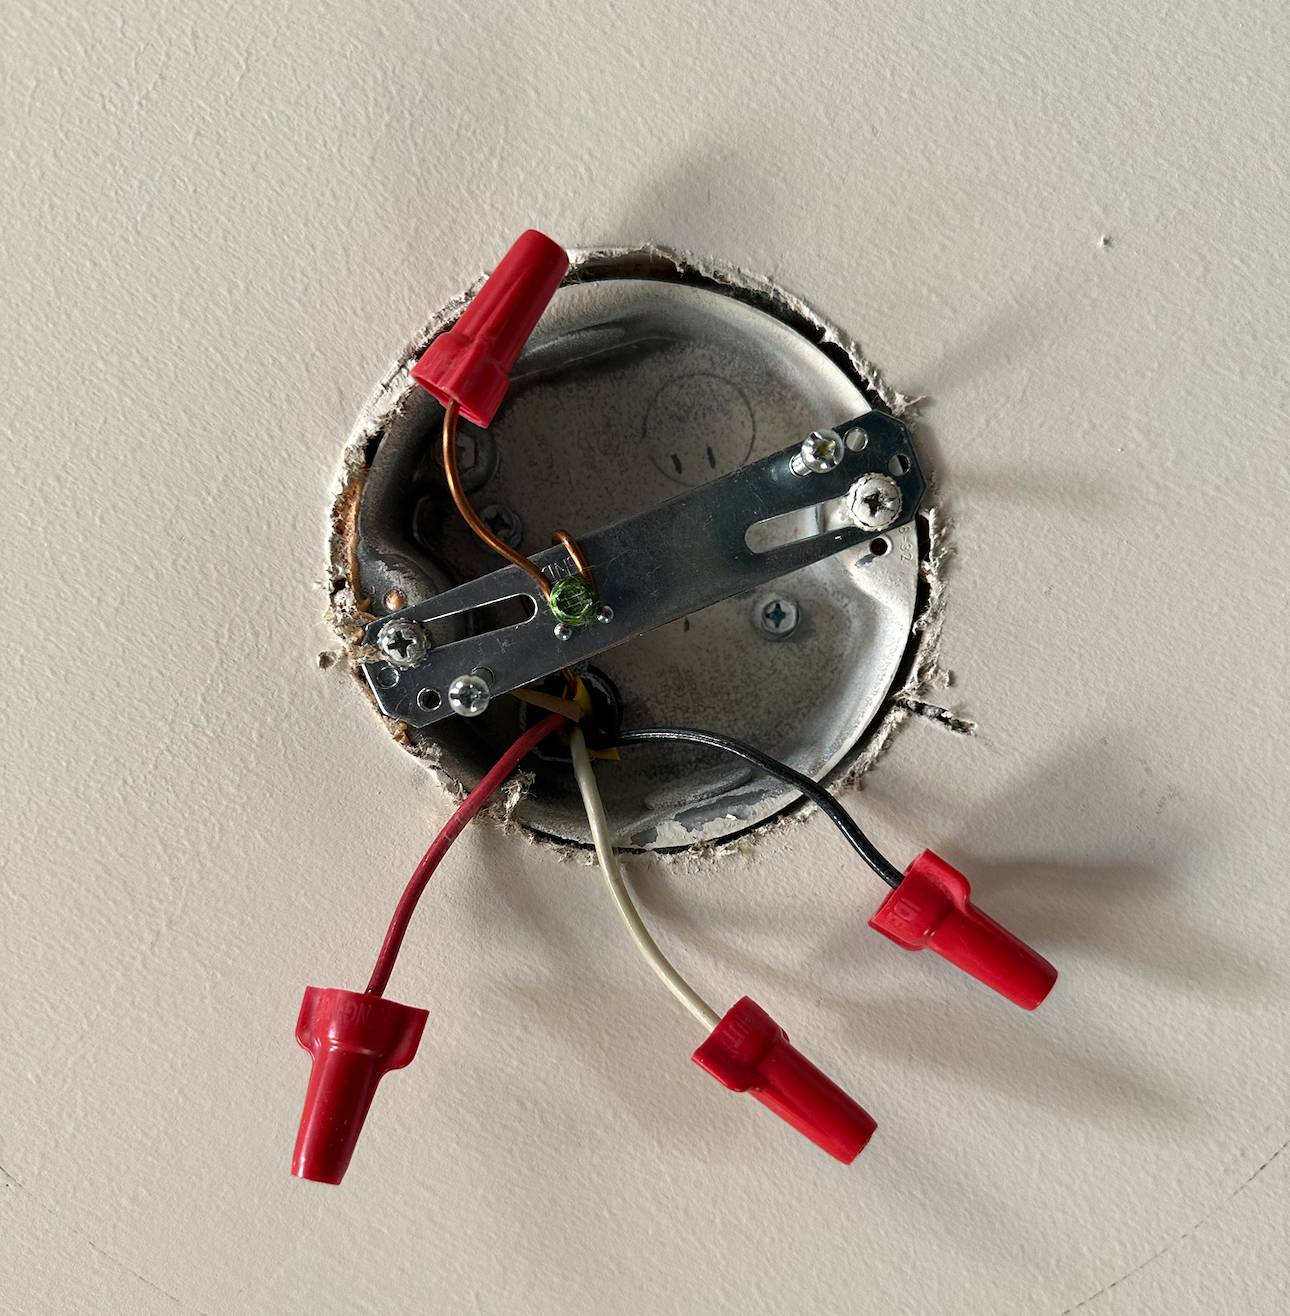
Based on edits made after this answer was written, it's no longer appropriate for the OP who wants 4 receptacles in an existing box. I will, however, leave it as it's perfectly valid for anyone who wants a single yoke in the ceiling in a single-gang size box.
Take a look at the two switches. Odds are really good that one of them is connected to the red wire.
- On the outlet, there will be a little brass tab between the two screws on each side.
- On the HOT SIDE ONLY (brass screws, not silver), break this tab off.
- Connect the white wire to one of the silver screws.
- Connect the black wire to one of the brass screws.
- Connect the red wire to the other brass screw.
- Connect the ground to the green screw.
- If you have a metal box in the ceiling, and the bare ground wire is attached to a screw in the box, simply buy a "self-grounding outlet" and skip this step. The outlets will be grounded simply by screwing them in.
- Mount the receptacle and a cover plate.
Plug your lights into one of the receptacles and turn on the switch. If they don't turn on, flip the other switch. If this isn't the switch you want to control the lights, just plug the lights into the other receptacle. Label your switches (make a mental note, at least).
Plug your projector into the other receptacle.
NOTE:
If you do not yet have the receptacle you're going to install, I highly recommend that you spend the extra dollar or two for the "commercial grade" receptacle that will be listed as "side clamp". This will allow you to push your wire straight into the clamping mechanism on the side and tighten it down with the screw.
This is significantly easier than making a shepherd's crook in the wire and making sure that you loop it clockwise around the screw.
It's significantly more safe than pushing the wire into the "backstab" hole that relies on a little brass spring inside to hold the wire in place. These have a high tendency to fail over time and can lead to fires.

