0

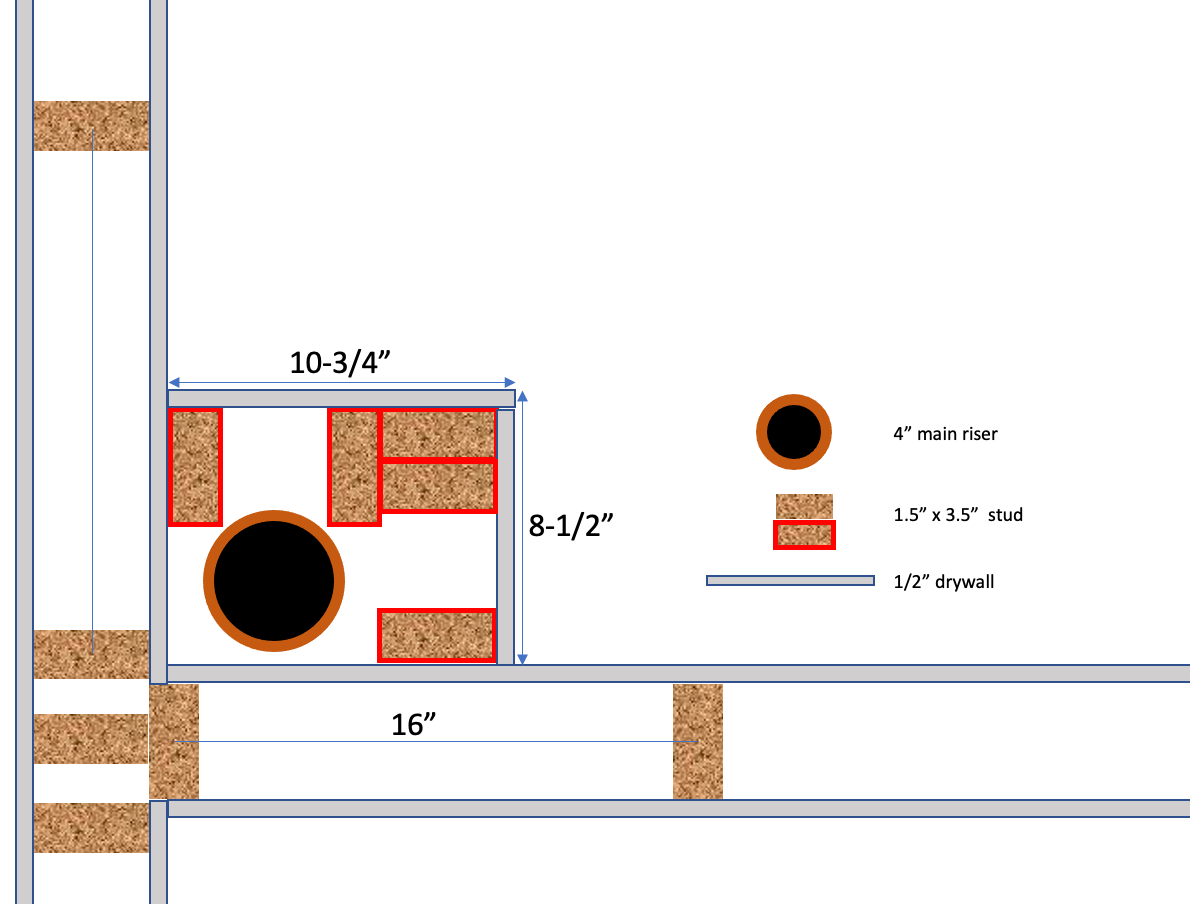
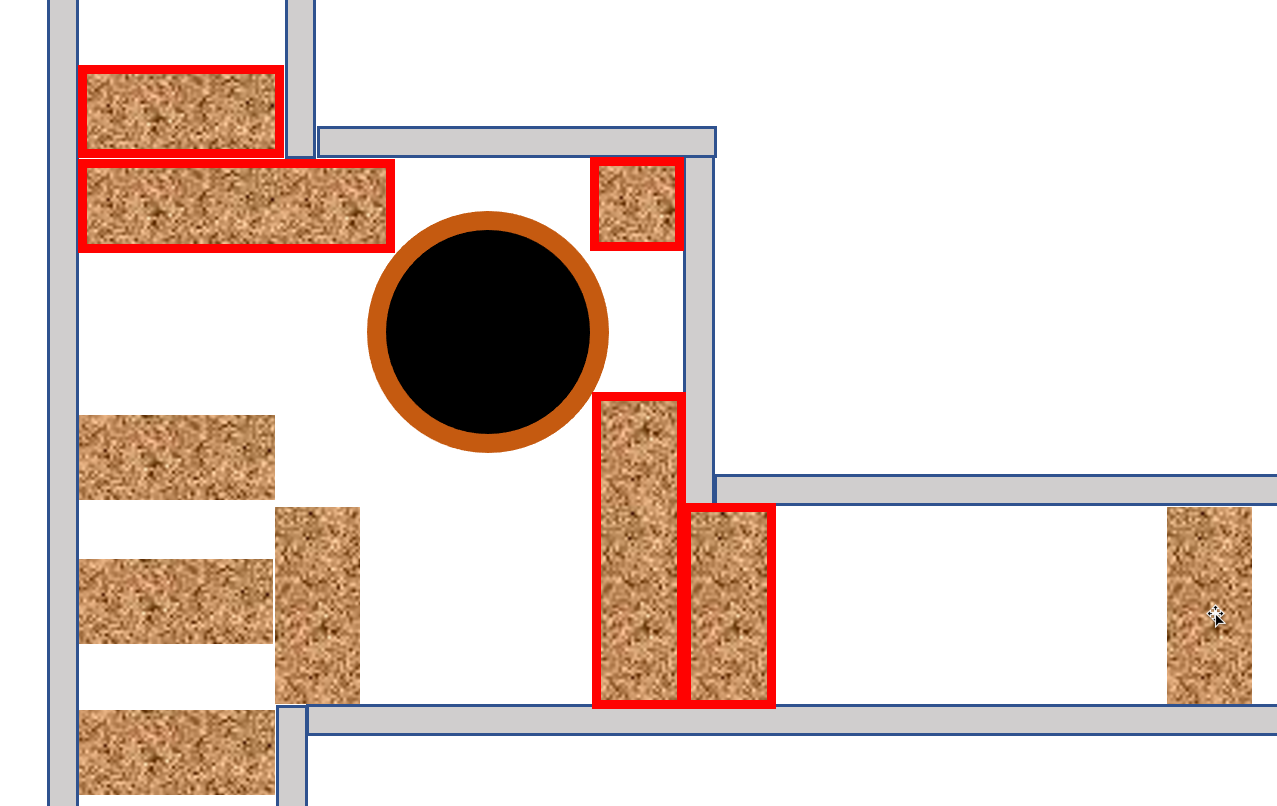
I have a 4 inch cast iron riser in the corner of a room and I'd like to build an enclosure as small as possible. Is it ok to box it in very tightly, as shown, with the studs on one side almost touching it?

The studs shown are 1.5x3.5. Could I make the box even smaller by trimming the studs down to 1.5x1.5? For such a small box, it seems like it would be strong enough.

Are there any code or practical issues with doing this? If this is a bad idea, what is the smallest enclosure I should aim for?

enter image description here

In answer to some probable questions:

  • Why not put the riser in the wall stud bay? The walls and riser are already there. I'm renovating the room in the northeast of this diagram. Moving the riser would mean breaking walls in the floors below and above this.
  • Why do I want to shave an inch off the size of the box? Because I'm putting in a bathroom, and am within an inch of code in fitting a standard vanity and toilet along one wall. Getting this box right means I can have the layout and fixtures I want.
2
  • 2
    The only thing structural about this construction is that it has to hold itself and some drywall up. Why not use some 2x2? The hardest part will be getting them securely fastened to just the drywall, I'd imagine.
    – FreeMan
    Commented Mar 2, 2022 at 14:50
  • @FreeMan "2x2s" I believe is what I meant by 1.5x1.5. I guess I can buy those as 2x2s. As far as fastening them, they will be floor to ceiling and I can break open the adjacent walls in the vicinity of the pipe in order to add joists that will help support the new box. The walls I don't want to break are in the rooms above and below.
    – jay613
    Commented Mar 2, 2022 at 14:56

4 Answers 4

2

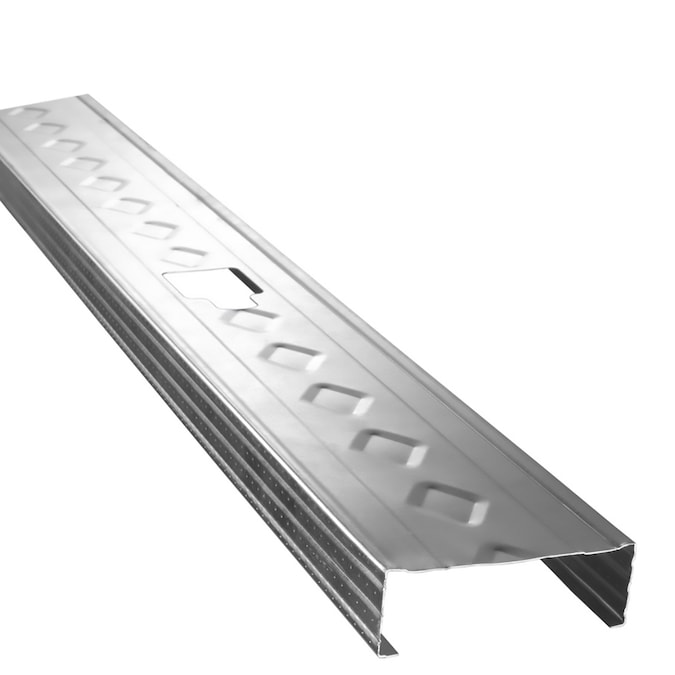
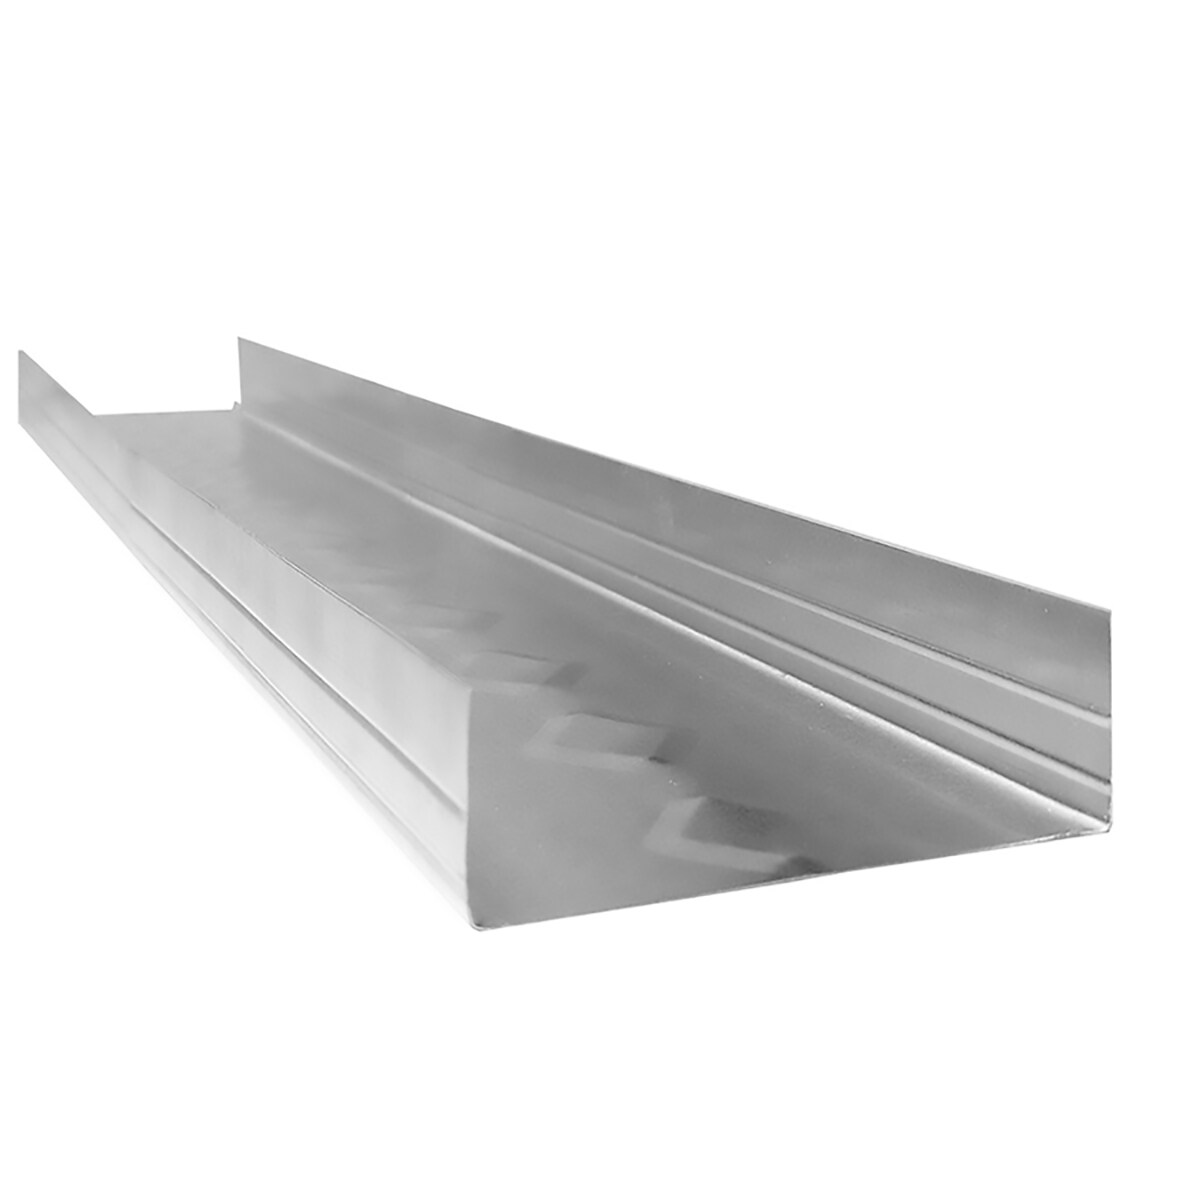
The only suggestion I could give is that the box could be built much smaller if you make the acquaintance of alternate building materials. For example: steel studs. Below are photos of a steel stud and a track profile (photo credit: lowes.com).

steel stud steel track

The open C shape of these studs could allow the stud to partially hug around the pipe, permitting the stud to be placed closer to the pipe than would be possible with wooden studs. Be creative -- for example the "track" component doesn't have to go on the floor. If you wanted to arrange two lengths vertically with one nested inside the other at a right angle, it would be nice to use track as the outer part because its leg doesn't have the 3/16" return that the studs have. These can be easily trimmed or modified with tin snips or other metal cutting tools.

You're under no mandate to use exclusively steel or wood. You could use wood pieces where they make sense as well. The object is just to create a structure strong enough to hold drywall.

The examples pictured happen to be sized the same as a 2x4 and are commonly available in home center stores. Other sizes are also available but you'd have to find a commercial construction supply house. It might be worth your while to search for 2x6 or 2x8 size: two pieces of that could entirely box around the pipe with very close clearances.

Then again: it might work well enough if you cut one leg off the stud/track to form an L shape. Secure one to each existing wall and put another at the outside corner -- held in place by the drywall itself!

2

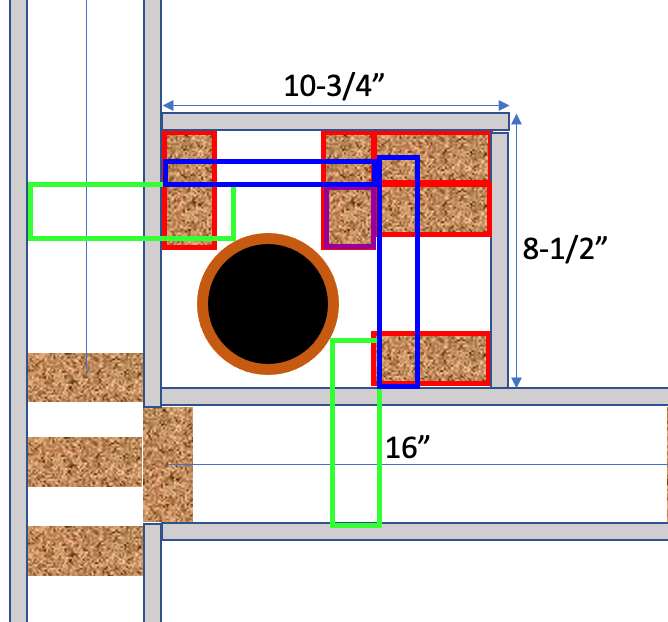
Since you're up for opening the walls, you could do something like the following (very not to scale!)

alternate version of OPs drawing showing 2x6 & 2x2 construction

Put two 2x6 (or so) studs (green rectangles) into the wall cavity itself, giving plenty of strength and allowing you to toe nail them into the top/bottom plates. Adjust the 6" width of these as necessary to fit the size space you have.

Line up a 2x2 (purple square) so that it will make a nice, square corner for your drywall.

Attach the drywall (blue rectangles) to the 2x6 and 2x2s.

To minimize the measuring, you could attach a scrap of drywall to one 2x6 and the 2x2, then adjust its location by moving it back and forth in the wall until it all just clears. Tack another scrap of drywall to the other side of the 2x2 and locate the other 2x6 the same way.

This will leave the original drywall hanging, but they make drywall clips that will allow the drywall to die into the face of the stud but be clipped into place. The beauty is that there is no need to finish that joint, it'll be hidden.

Note that all dimensions & locations are approximate based on exactly where 90° lines from the pipe fall. If the pipe is further out from the wall, the 2x6s could be partially tucked behind the pipe to further reduce the size of the box. In that case, the 2x2 might run into the pipe and not allow for a 90° corner, so trim the corner off that interferes with the pipe. Remember, this isn't structural, it just has to hold the drywall in place.

2

Speaking from living in old houses with pipe chases (codeword for "boxed in pipes") if you don't have to have drywall as your surface, a pair of 1" (i.e. 3/4 or less planed) boards all by themselves for the outer sides and painted as the rest of the trim in the room is even more compact and works just fine. If you want to get fussy I suppose you could space them out so the surface is 1-1/2" from the pipe, but It's a cast iron pipe so I don't think you need protective plates, and it's a pipe chase, so you ought to know there's a pipe in it and not try to drill it to death.

It's trim. It's cosmetic, not structural. I leave the details of how you get them to stay put up to you (several good ideas here on that front,) but with the drywall-framing-focus you waste a LOT of space. A few blocks top, middle, bottom to screw or nail to should do it. These were made compactly to cover pipes that were added to houses after they were already built, which might even be your house's situation.

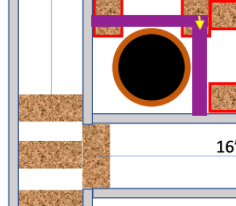
The yellow is trying to show screws or nails holding the corner together.

If you have to have drywall, you could just drywall over the boards and it would still be more compact than the "framed drywall" approach.

Pipe Chase

3
  • Now this is thinking outside the box! (Or is that inside the chase...?)
    – FreeMan
    Commented Mar 2, 2022 at 18:58
  • Good idea. Good answer to the question as asked so I upvoted. But in this room I may tile this, and the "drywall" would instead be backer board. I could put the backer board over the wood boards as you say. Do you think the box, using screws as you show, and fastened to the wall with furring strips, would be strong enough to be tiled? I'd worry about movement.
    – jay613
    Commented Mar 2, 2022 at 19:09
  • If you're going to tile, the joints (correctly prepped) in the backer board itself will help hold it in place. But you'll probably need @FreeMan's extra studs to support the backer board joints (wall to this) to spec. And then it will certainly be solid.
    – Ecnerwal
    Commented Mar 2, 2022 at 19:19
1

Applying the excellent ideas from @greghill and @freeman with a little more precision and adding some comments

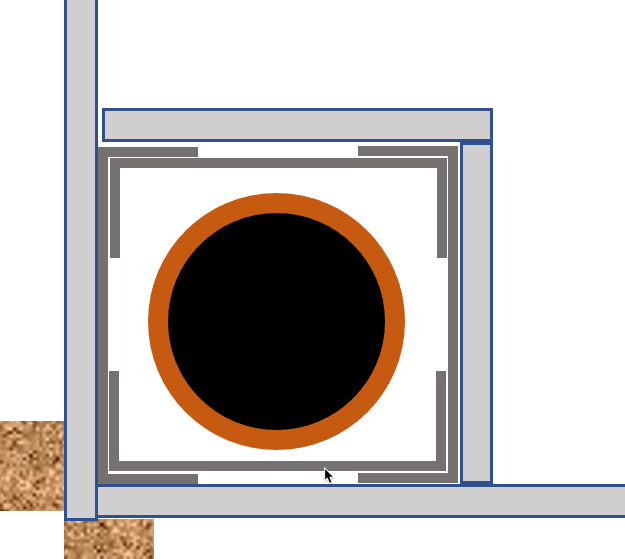
Boxing tightly with 4 steel 2x6 studs and without breaking the adjacent walls

enter image description here

My initial reaction to the steel studs idea is that it's very easy and effective. The drawback is that it's fastened mostly to old drywall/plaster walls, not well supported. Perhaps by virtue of being a complete box it will be quite strong by itself. [ Edit: Steel 2x6s are costly and it's wasteful to use 4 as pictured here. I'm not going to edit the picture but if I go this way I think only two are necessary, and the one on the left in this picture is certainly not needed.]

Boxing with combination of wood 2x6 and 2x2 into adjacent walls:

enter image description here

This seems probably quite strong and rigid, though I wonder whether the outside corner using an otherwise-unsupported 2x2 might be a little bouncy in the middle.

EITHER WAY the box is even smaller than what I need! I think the best advice is from Gregg Hill ... to be a little creative and use a combination of materials that gets the job done, to be determined after I demolish the existing enclosure and see exactly what I'm dealing with.

A probably good solution: Freeman's answer, and wrap the 2x2 outside corner with a steel L-bracket, perhaps cut from a steel 2x4, to add rigidity.

Your Answer

By clicking “Post Your Answer”, you agree to our terms of service and acknowledge you have read our privacy policy.

Not the answer you're looking for? Browse other questions tagged or ask your own question.