0

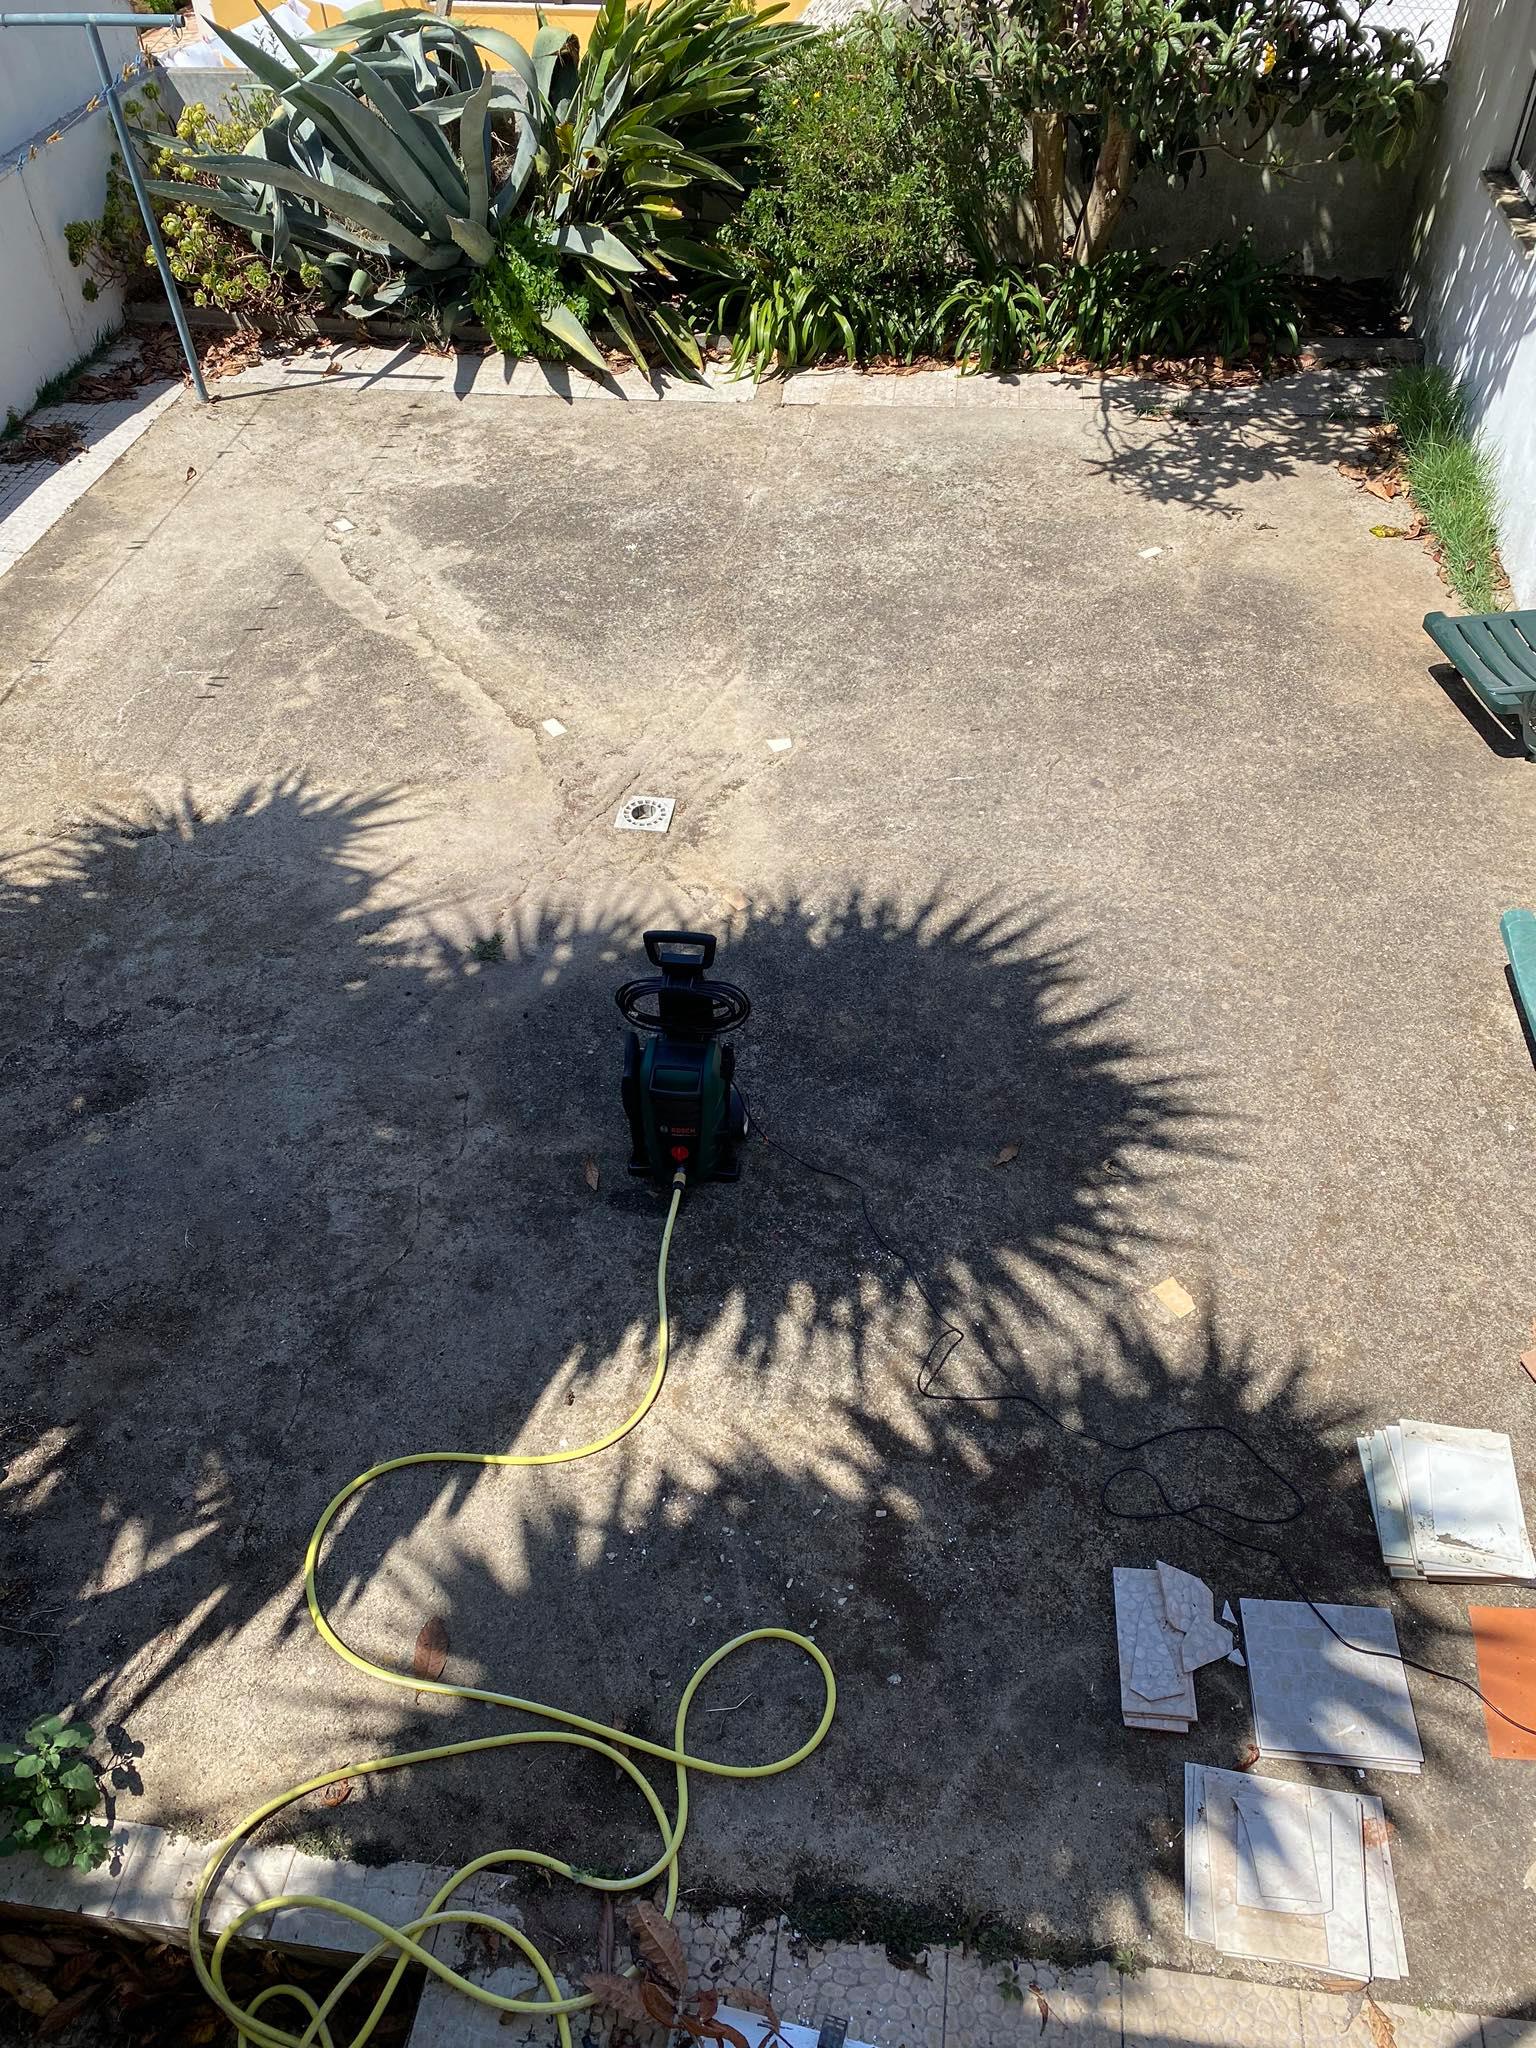
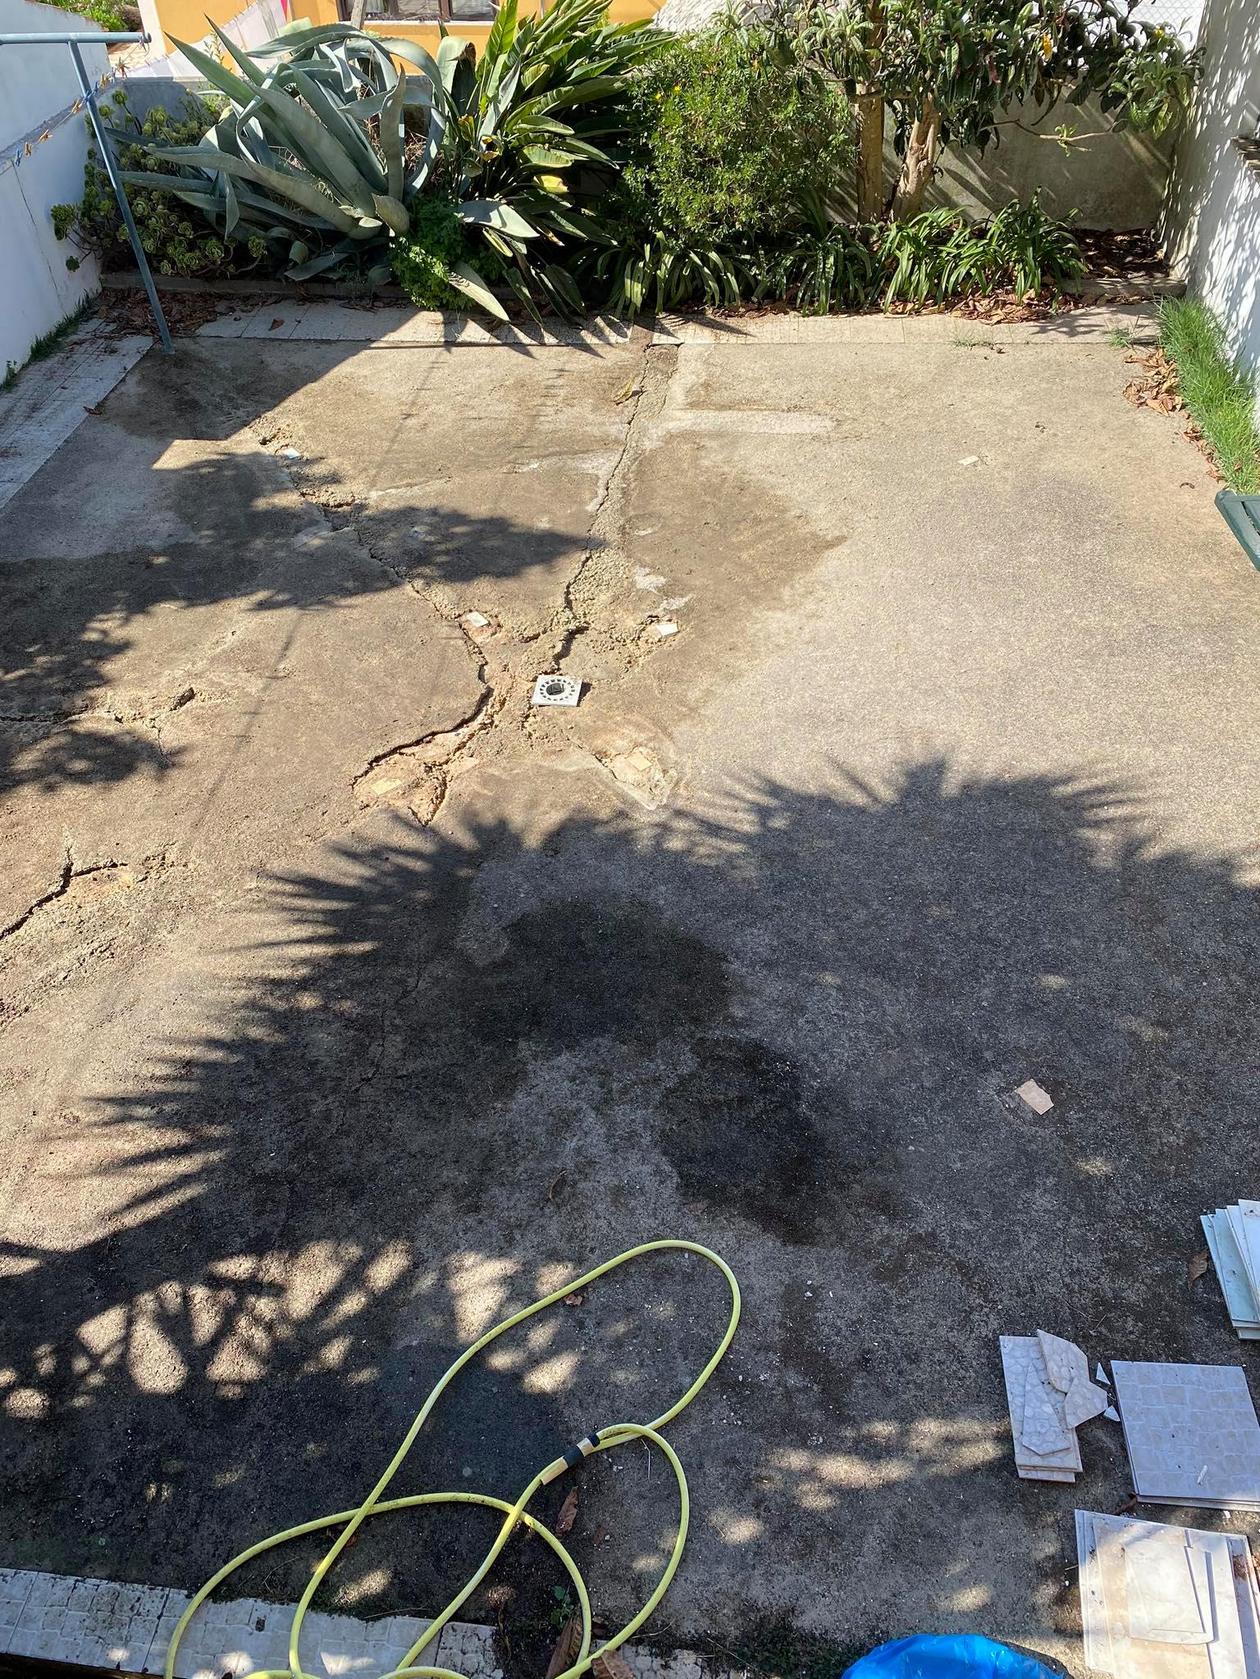
We have an outdoor patio at my house which was made of concrete, but I don't think it ever got the finishing coat (it was supposed to be tiled but never happened) nor sealed and it has been there for 10 years or more. The concrete is really damaged in some spots, we already knew that. Today we decided to power wash it so we removed the damaged concrete which was already only sand in some places, so we can later resurface and fix it.

Before power wash: Before power wash

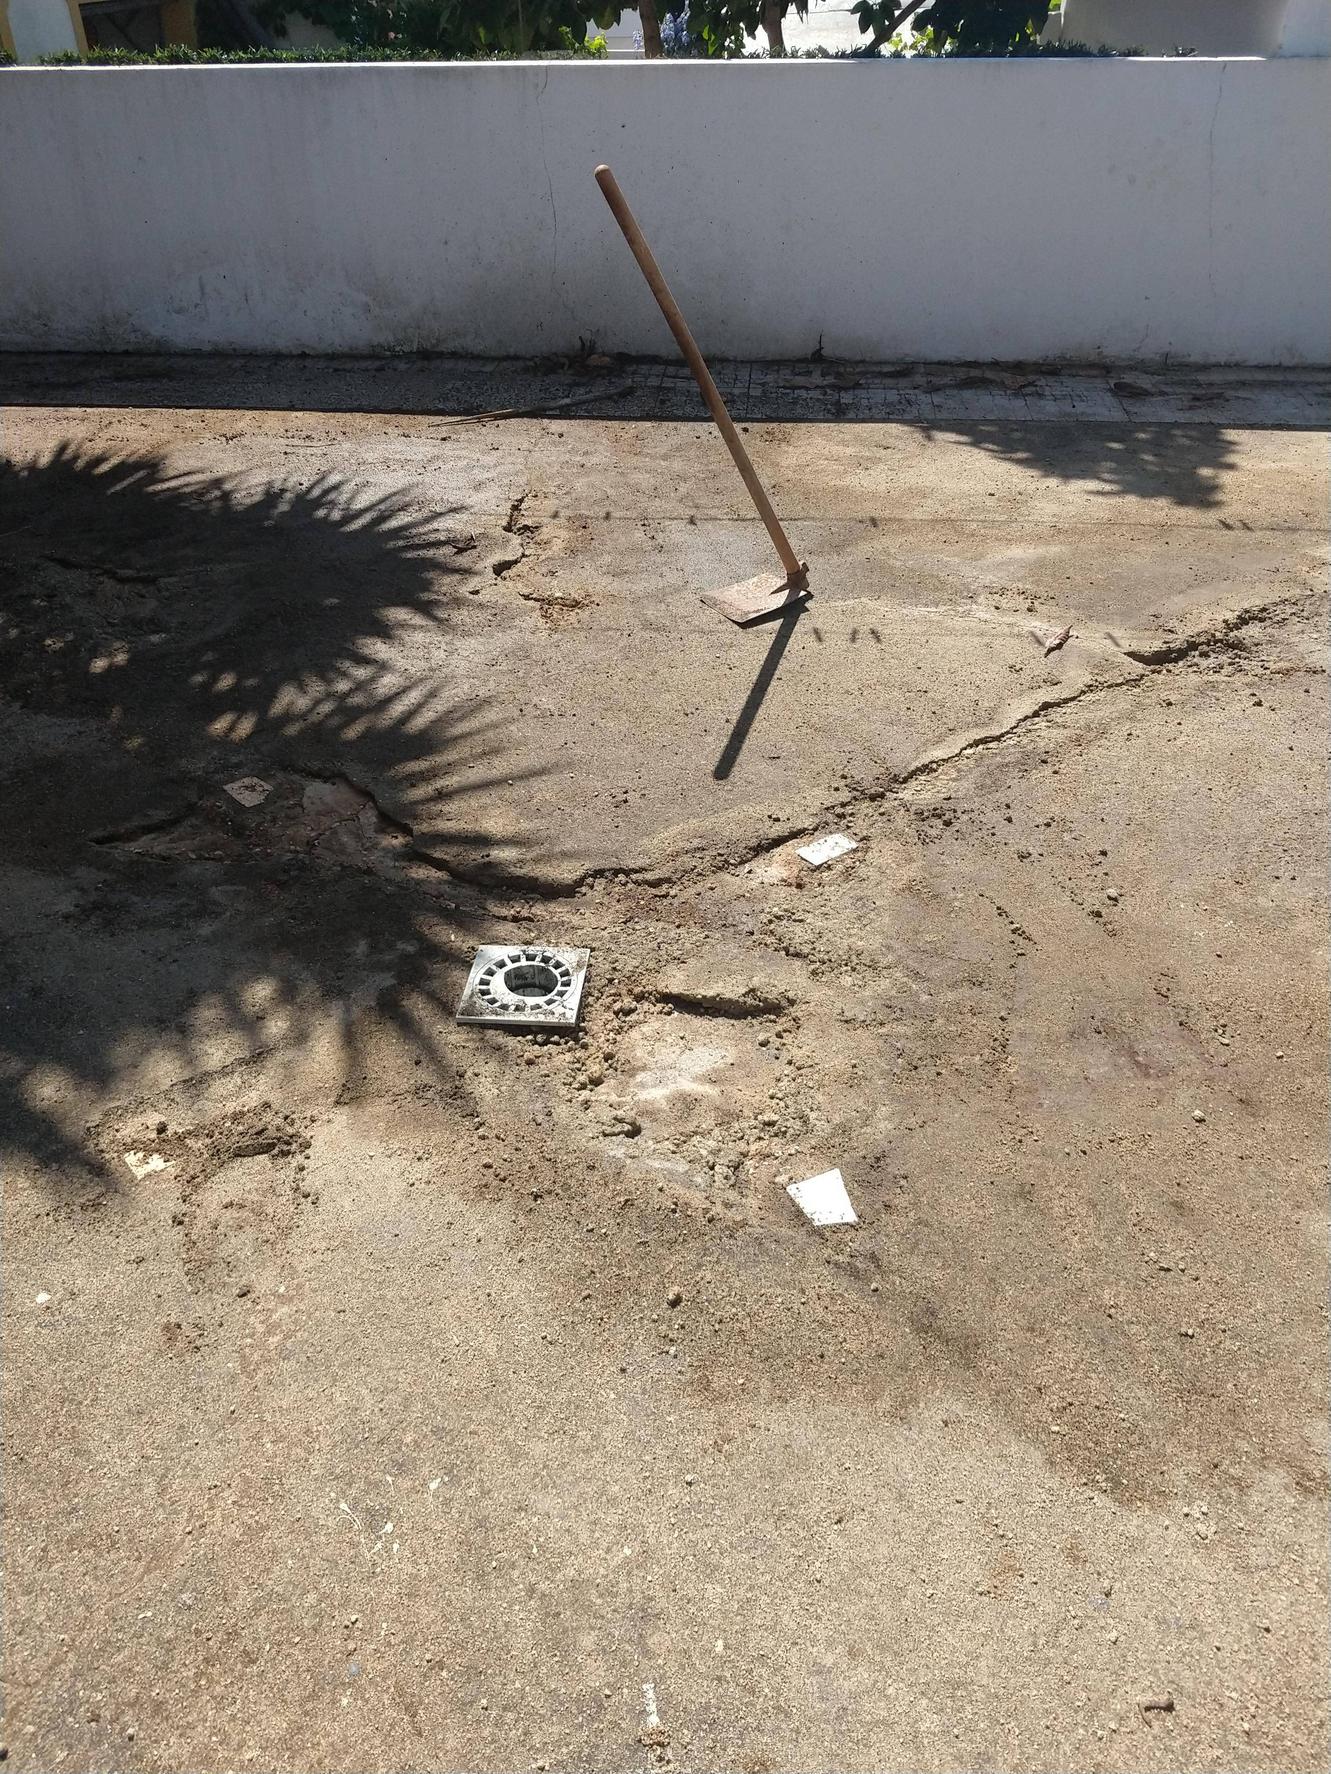
After power wash:

After power wash

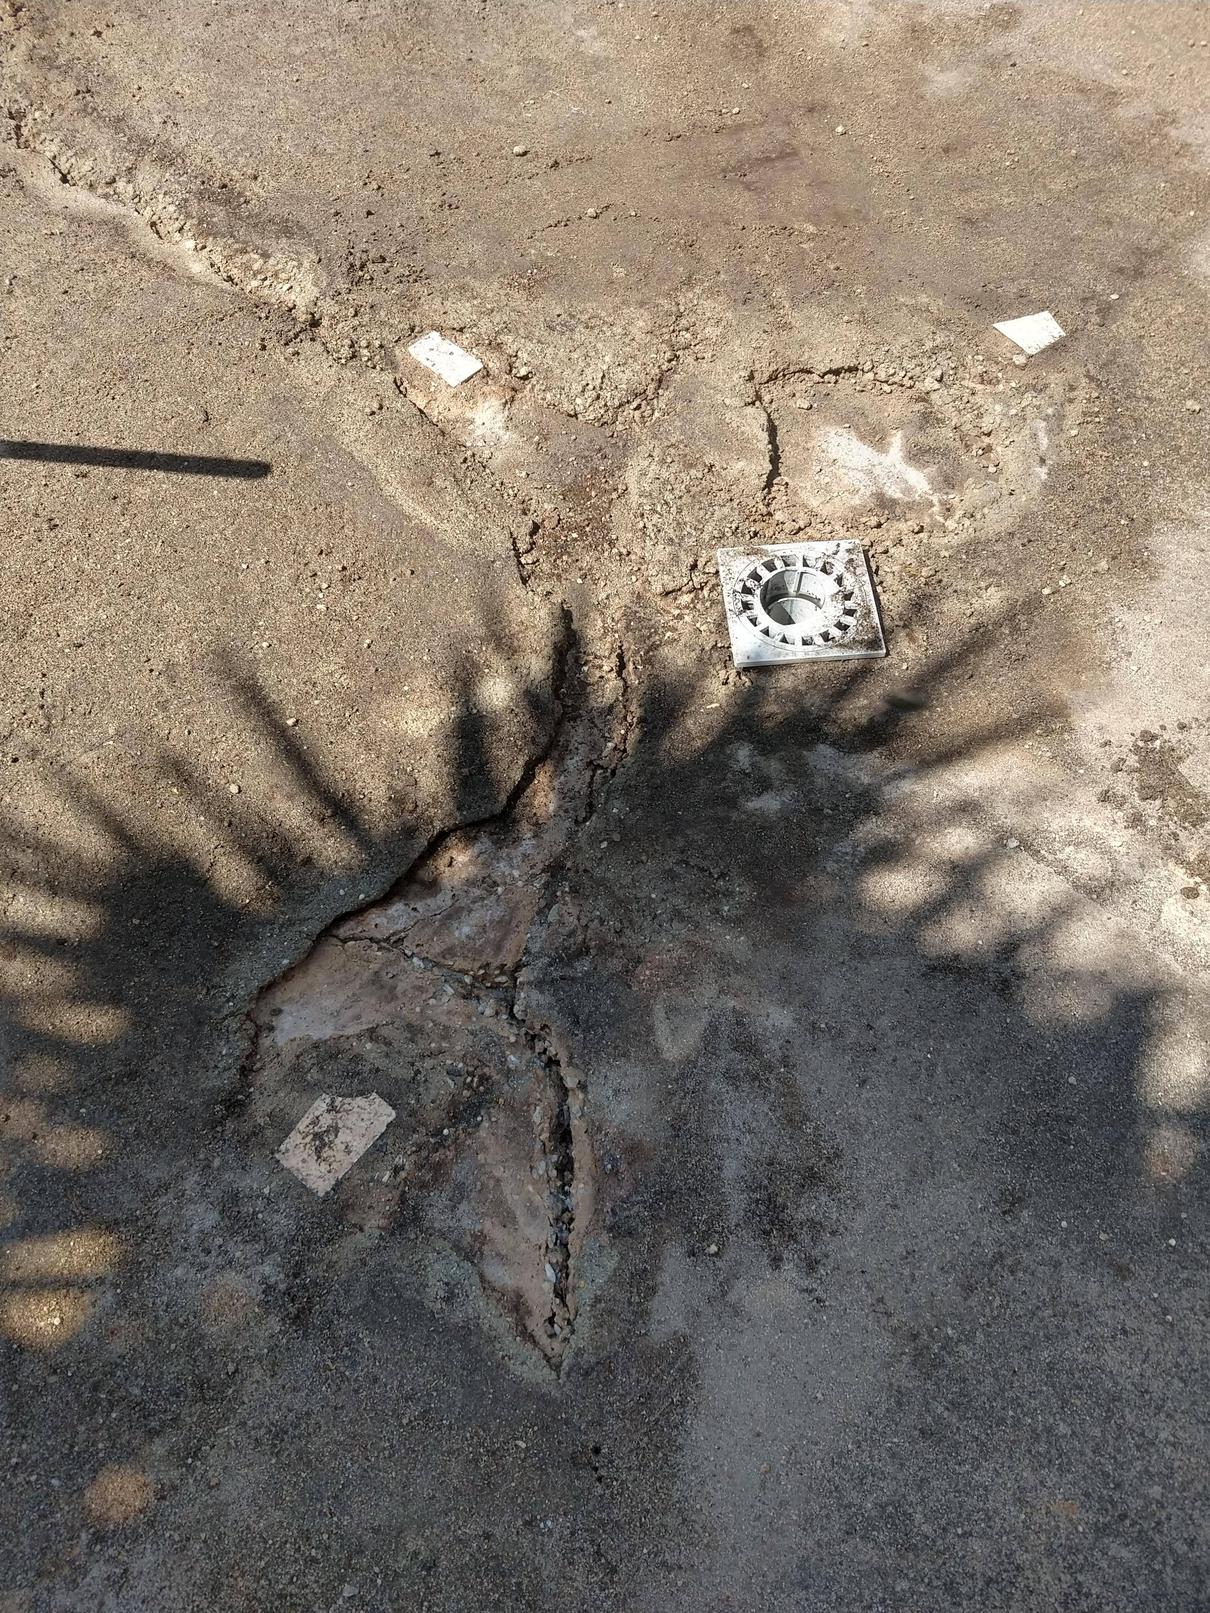
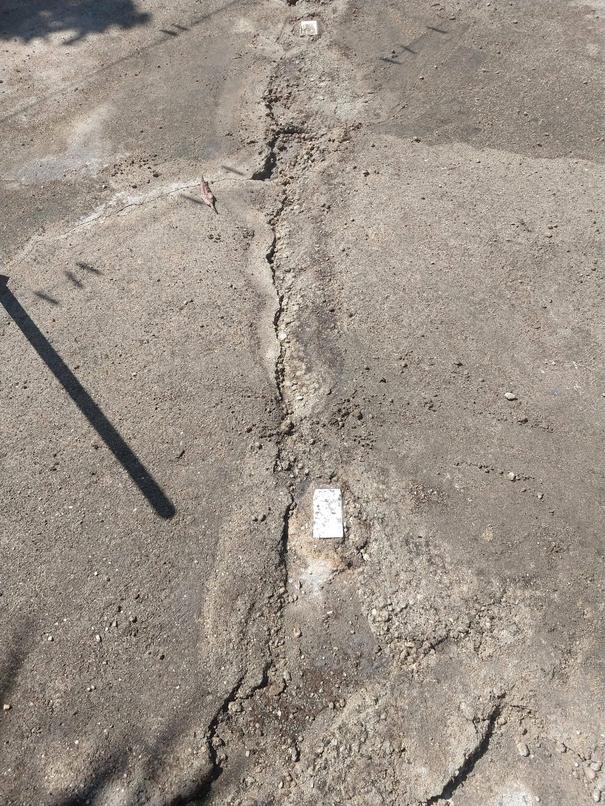
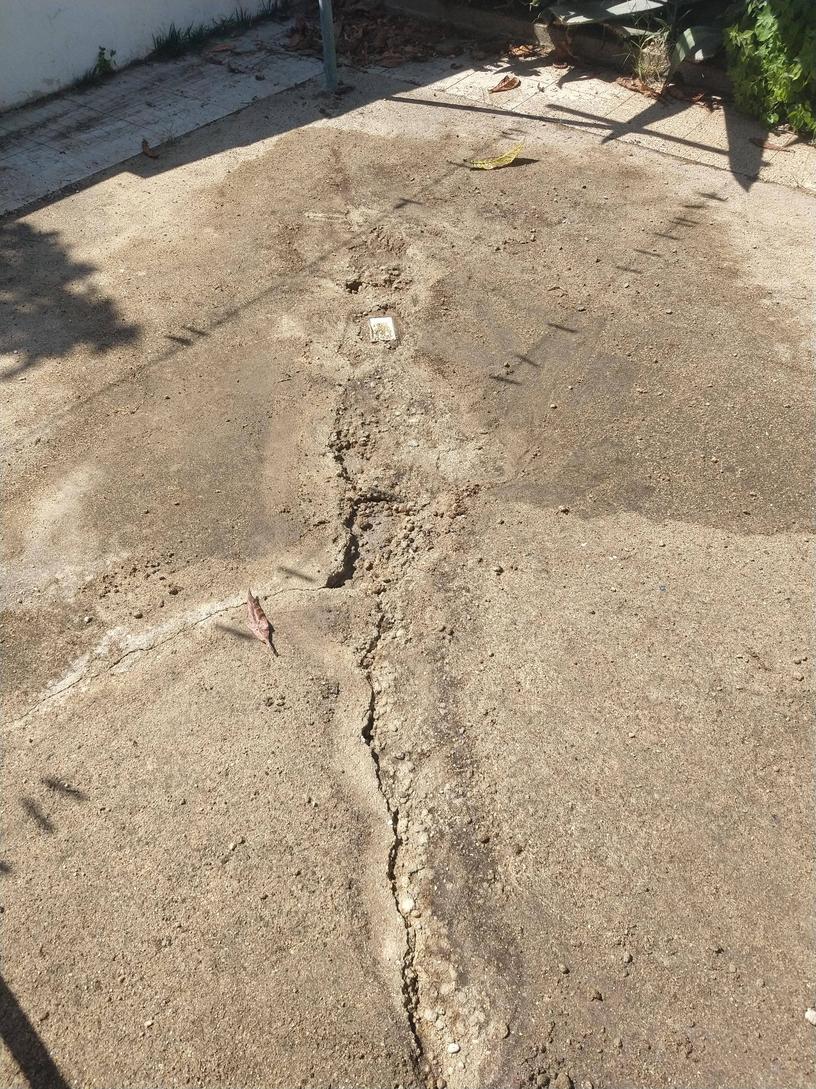
As you can see the concrete is really really damaged in some places. Here are some close-ups:

Close-ups

Close-ups

Close-ups

Close-ups

How can we repair the holes?

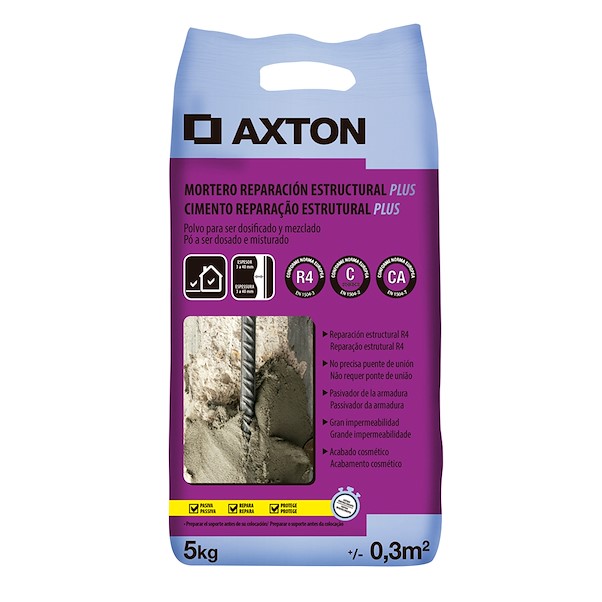
My plan was to use a concrete repairing compound on the holes like this one:

Concrete repairing compound

Would this be appropriate to repair the holes? Should I add some kind of glue around the concrete holes before filling it with the compound? (I saw some video of one guy doing this)

After the holes were repaired the plan would be to resurface the whole concrete. How could I do this and leave a smooth finish? I was thinking of using this product: (sorry it is in Portuguese) https://secilpro.com/upload/documents/5cd04d0e01b89.pdf

Resurfacing compound

Would this work? If not what do you advise?

After resurfacing we wanted to seal it. Which sealant could I use? We wanted to paint over it if possible. I read about a liquid membrane sealer but I also think that you can't paint over them, am I right?

Also the concrete is a bit slopped so the water flows to the center drain. Resurfacing wouldn't ruin this right? In my view the resurface compound would just follow along the profile of the pre-existing concrete. I guess I just can't use self-leveling compound or I would ruin this slope, right?

Thank you everyone for the help, looking forward for answers :)

1 Answer 1

1

Thin coatings placed on top of bad concrete, especially slabs that already have numerous significant cracks, and is outdoors will rarely, if ever, be successful. You will spend a lot of time and money to bandaid it up only to have it fail in the next series of climate changes.

Best suggestion for the mess showing in your pictures is to:

  1. Rent a jack hammer and break up all of the existing slab into manageable sized pieces.
  2. Clear out all the old concrete pieces and haul away.
  3. Evaluate the old base materials. In all likelihood the base there is totally inadequate as evidenced by the major cracking in the old slab.
  4. If necessary dig out the old base materials and follow regional recommendations to lay in proper base materials appropriate to your climate zone, soil conditions.
  5. Prepare the site with new edge forms to define the periphery of the replacement slab.
  6. Lay in a combination of mesh wire and a grid of tied together rebar to hold the slab together in the event that small fracture cracks occur. Make triple sure that the mesh and rebar is properly positioned so that it is within the thickness of the slab. It does no good if it is left laying on the base material with the concrete just poured on top of it.
  7. Pour the new slab. Highly recommend that the poured mix come out of a delivered redi-mix truck so that you get a professional mix appropriate to your area / project. A home mixed or small wheelbarrow mixing done from pre-mixed bags will not yield a quality job that will last for years. The existing old concrete and how it is failing seems to indicate that it was done in the way I am recommending that you avoid.
  8. Properly screed and finish the concrete after pouring. Professional tools should be used.
  9. Apply proper post pour care for the concrete slab while it cures. This may include wetting it down and possible even covering if there is a lot of hot sun that can make it dry out too fast.

For the steps outlined above numbered 4 through 8 you may want to really consider hiring a professional crew to come in to do the work. Unless you have good experience with concrete this may not be a project to tackle as a DIY. If you do hire a professional crew make sure that you check out references and look at similar projects that they have completed before. Also make sure that you work with a contract that includes some responsibility on the part of the contractor to repair or replace the project if it turns into a mess like you currently have on your property within 1 or 2 years. (It is highly unlikely that you can get any type of contractor warranty for any more than a year or so).

2
  • Hello, Thank you so much for the advice! Sadly redoing all the slab is not really an option. I know it would be the best choice. My mom is the owner of the house and says it would be too expensive. Could I use an angle grinder with a diamond blade and cut around the cracks so as to open them and see until where the damage goes? After that start with a primer, not just any primer but a bonding agent/coupling agent/adhesive-promoting agent especially for concrete. Once that has dried fill the holes with that repairing compound and add mesh/rebar in the holes to make it stronger?
    – Diogo
    Commented Jul 11, 2020 at 9:49
  • One guy suggested that in another forum, like you he also said my best option would be to redo the slab because the repair might fail again and I would lose time. Do you think is it worth giving a try at the repair part? Because I don't think all of the slab is bad. those parts that are horrible were the parts that got lots of water, but I am not sure.
    – Diogo
    Commented Jul 11, 2020 at 9:49

Your Answer

By clicking “Post Your Answer”, you agree to our terms of service and acknowledge you have read our privacy policy.

Not the answer you're looking for? Browse other questions tagged or ask your own question.