I have some plasterboard screws like this:
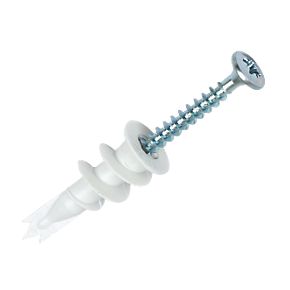
However, without a drill I have a job getting them into the wall. Am I safe to use normal screws on hangings that aren't going to be taking a great deal of weight? In this case it is a rack of coat hooks.
I have some plasterboard screws like this:

However, without a drill I have a job getting them into the wall. Am I safe to use normal screws on hangings that aren't going to be taking a great deal of weight? In this case it is a rack of coat hooks.
There are several approaches to hanging loads on drywall/plasterboard.
Light Duty - The most common anchors for used for light loads are expanding tubes that grip the sides of the hole they are in and flare lightly behind the hole
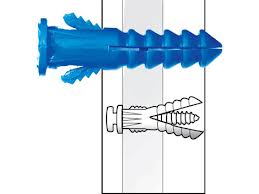
Others like yours, have a wide thread to grab more surface in the drywall itself. Some of the these threaded anchors have a flaring end, some do not.
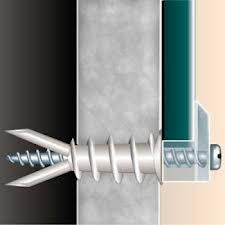
The limitation of all of these types is they depend on a small area of drywall to stay solid to hold them. They are good for light loads and when the main force on them is shear force. In a wall application, that means most of the force is pullin down, along the wall (as if you are trying to cut the screw in half right at the wall).
If you put a heavy load on these anchors, there is significant outward force, that is, pulling away from the wall. In a coat rack some of the load is shear (downward) and some is outward. This puts stress on the sides of the hole in the drywall and it crumbles. This is even worse when the load is dynamic (moving) rather than static (non-moving). A hanging coat is static. A coat being pulled form its hook is dynamic. And almost all of that load is outward.
The threaded anchors distribute the load better, but not enough for any significant load. Sometimes this is compensated for by using many anchors. An improvement, but usually not a good solution.
Plastic (or metal equivalent) anchors are almost never suitable for ceiling mounts, where all the load is away from the ceiling surface.
Medium Duty - Anchors for medium duty pull against a larger area behind the drywall to distribute the load.
Expanding anchors go into the hole as a tube and are then expanded behind the hole using a screw, bolt or tool.

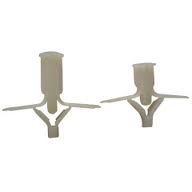
There are also toggle type anchors where the expanging section either rotates or springs out to cover a greater area.
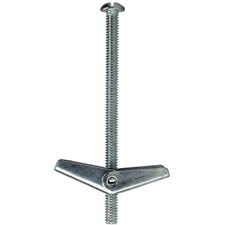
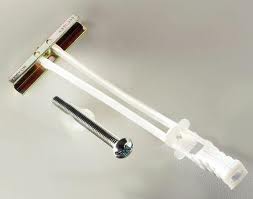
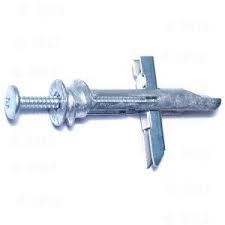
The advantages of these anchors is that they spread the load far beyond the hole in the drywal itself. While the hole may be prone to crumbling, these anchors rest on an area of solid drywall, from about 1 to 2 inches around the hole. This gives the anchor much more strength to deal with outward loads of medium duty, as well as shear strength. However heavy outward loads, especially dynamic loads, are pulling on on a few inches of thin plaster and paper. Again, adding many anchors helps spread out the load.
Some of these anchors allow removal and reattachment but some do not (for example, spring toggles fall off in the wall when the bolt is removed).
Heavy Duty - On a plasterboard wall, the heavy duty mounting of choice is directly into framing members.
The most common approach is to find studs, the upright framing members that hold up the wall surface. These are either wood or steel. Screws are driven throught the item to be mounted, through the drywall and into the middle of the stud. An alternative is to screw into cross bracing framing. These are wooden or steel sections running horizontally to brace a wall or serve as a firebreak. These are marginally less strong than upright studs, but for practical purposes can hold all but the heaviest loads.
Studs and cross bracing can be found using a stud finder.
Screws should be long enough to reach at least 1 inch into a wodden stud, longer if the load is especially heavy. In steel studs, finer thread screws should be used (sheet metal screws) and length is less of an issue.
In wooden framing, an alternative to regular screws are hanger bolts that can be threaded into the studs and leave a bolt on the outside of the drywall for hanging the object.
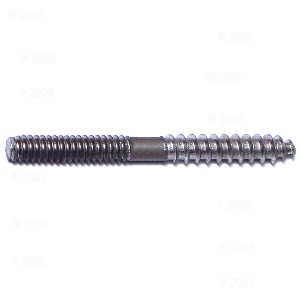
The advantage of hanger bolts is the ability to easily remove and reattach the load using a nut or wingnut.
When there is no framing member in the exact spot needed, it is sometimes worth the trouble to add one. A section of drywall can be removed from the area, a cross brace inserted exactly where you want the mounting and extending horiziontally to the two supporting studs on either side. A drywall patch can be then put back to cover the cross brace (using the drywall section removed or a new piece).
The plug you included in your picture is actually a self-drilling anchor. Take the screw out and you will see that the anchor itself has a Phillips head. Screw it into the location in your wall until it is flush with the drywall. Then screw your hook with the screw into the anchor.
Drywall itself is won't hold a screw - after you get past the paper outer layers, it will just break up into powder. The anchor expands in the wall to grip it which lets you put something like a hook on the wall to hold some loads.
If you don't use an anchor, it will almost without a doubt pull out - especially a coat rack holding heavy jackets that are constantly being lifted and re-hung.
It's not the shear stress that you're worried about when mounting a coat hook. The bigger issue is the pullout stress which depending on the design of the hook can increases the pullout force.
The benefit of the threaded screw insert that you posted is that the threads are wide and deep. The wide spacing helps to keep the drywall intact and not crumble while the depth of the threads provide better pullout resistance.
The other issue is that these screws will be receiving dynamic loads which will also increases the effect of the drywall crumbling over time if there is any pullout movement. The short and tight threads of a typical screw will simply breakdown the drywall faster and allow complete pullout.
I would definitely recommend using the posed insert or even a small toggle bolts depending on the size of the coat hook.
Using screws directly into drywall should be kept to light static loads.
Since you don't have a drill, perhaps consider these metal hammer-in plasterboard fixings. They're designed for plaster, but I've used them to hang a coat rack on drywall and they worked perfectly. They also have the benefit of less damage to the wall if you eventually pull them out. They come in varied weight ratings, so be sure to buy ones big enough for your project.
The WallClaw Drywall Anchors operate similarly - no drill required - but I cannot speak to their performance.
They're for holding things up on sheetrock. Instead of using just a regular screw in the sheetrock that can damage it if pulled out, or if you need the extra strength for say a large heavy mirror, then these come in handy. The plastic anchors screw ito the sheetrock until they are flush with it, then the metal screw is used for whatever application you need it for, it screws into the plastic and provides strength.
When using these self-drilling anchors I've found a few things things really helpful:
Note that my ony metion of a drill here is to say avoid it.
For something that's on the limit of what these anchors will hold, a little glue, e.g. PVA (wood glue), on the threads helps stabilise the plaster around the hole and stops the anchor creeping out.