3

I'm helping a friend remodel an old addition on his house. We've uncovered a construction technique that may have been normal 60 years ago, but isn't up to the standards of today. I'd like to know if there is a simple remedy.

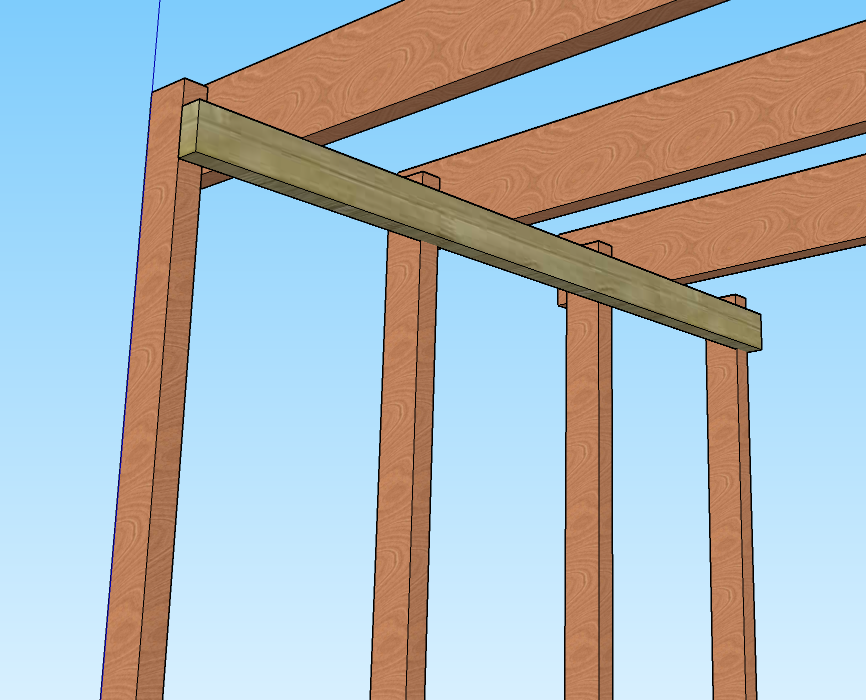
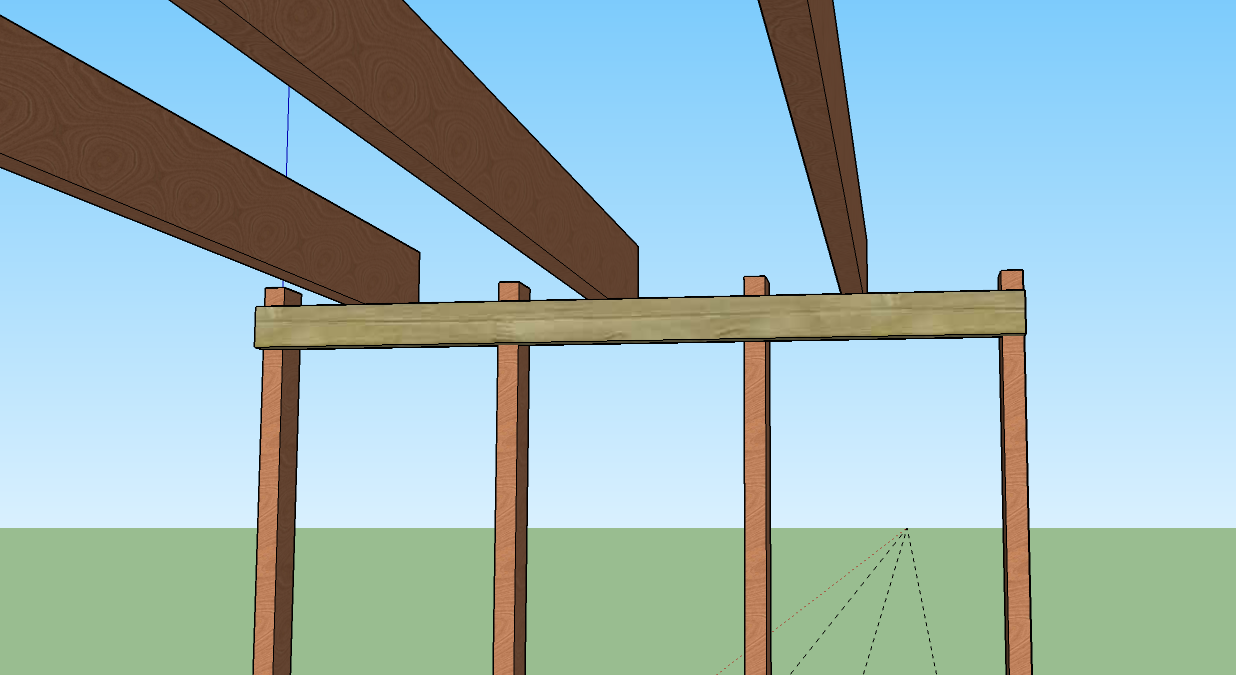
We are looking at a 2x4" (actual dimensions, not 3.5x1.5) ledger board that is face nailed in to the exterior wall studs, which are also 2x4". The ledger is not let in at all.

There are 2x8" floor joist for the 2nd story that are resting on the ledger. What this means is the entire weight of the 2nd story is effectively being loaded on the old nails that attach the ledger to the 2x4s! Talk about some sheer strength!

We've considered adding a wall directly below the ledger to help support the weight, but there simply isn't enough room to make that happen. We've also looked for some sort of Simpson Strong Ties that might add additional support, but found none. Even after calling the manufacturer.

Do any of you have any bright ideas that might help us out of this pinch?

angle 1 angle 2

2
  • How open is the wall? Can you add framing in between the existing studs? What's your goal? (Obviously it has worked until now. Why not just add some countersunk lag screws and move on?)
    – isherwood
    Commented Jan 16, 2018 at 22:05
  • My goal is to make sure the ledger is strong enough to bear the weight above. I can add framing between the existing studs, which are 24" on center. The exterior side of the wall has sheathing and siding covering it.
    – Doug Hill
    Commented Jan 17, 2018 at 3:26

2 Answers 2

4

The 2x4 ledger is sufficient to support your 2x8 joists, but it needs 4 or 5 16d common nails per stud at 16" on center to be able to carry the load if it is only carrying the floor load and no roof load. Typically the framers would have also nailed the side of the floor joist to the side of the wall stud so the the ledger isn't carrying all of the load, but I'm not going to assume they did that.

If you are concerned about it and want to replace it, first add a temporary support (build a temporary wall) to support the floor joists, next remove the 2x4 ledger, and then replace it with a 2x6 ledger.

Fasten the new 2x6 ledger to the wall with two Simpson SDS25312 1/4" x 3-1/2" heavy-duty screws into each wall stud. Put the top screw 2" down from the top of the 2x6, and put the bottom screw 3/4" up from the bottom of the 2x6.

I'm suggesting to use a 2x6 ledger to give yourself more room for the new SDS screws to work at their full capacity. If you have the room and want to overkill it, then upsize to a 2x8 ledger and put 3 screws into each wall stud.

If it's hard to find those specific screws, you can use any other 3" to 4" screw if it is rated for 350 or more pounds of shear strength.

2
  • Unfortunately, the framers did not nail the floor joists in to the studs at all. From what I can tell, the joists aren't even fastened to the ledger. They are just resting on it. Thanks for the tip on the Simpson screws. At a minimum, those seem like a good idea to add even to the existing ledger.
    – Doug Hill
    Commented Jan 17, 2018 at 3:32
  • 2
    If you want a positive connection between the ledger and the joists, you can use Simpson H2.5T or H1 (Hurricane Ties).
    – Dotes
    Commented Jan 17, 2018 at 14:54
2

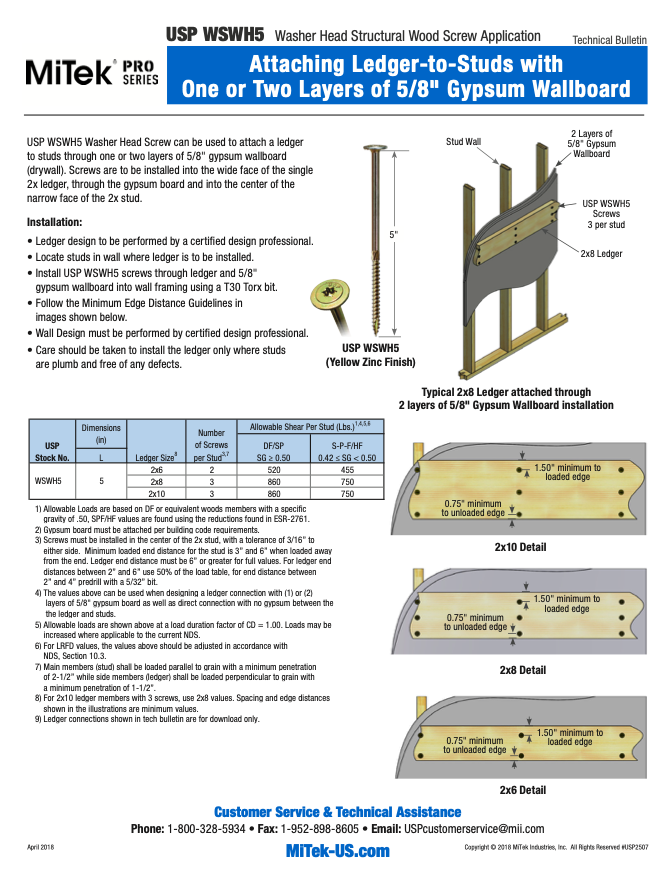
In case someone finds this question later, MiTek (who makes USP hangers and ties, similar to Simpson), has a technical bulletin illustrating the screw placement and minimum clearances for different 2x dimensions when attaching a ledger board to studs, with or without gypsum board:

MiTek Technical Bulletin Screenshot

1
  • +1 for showing the importance of edge distance in shear loading. Dotes reference of using 4 or 5 16d nails at each stud will not work.
    – Lee Sam
    Commented Dec 3, 2019 at 16:41

Your Answer

By clicking “Post Your Answer”, you agree to our terms of service and acknowledge you have read our privacy policy.

Not the answer you're looking for? Browse other questions tagged or ask your own question.