5

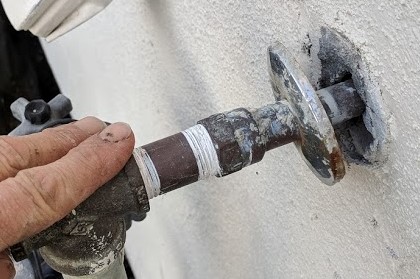
The pipe leading to this exterior faucet was apparently never secured inside the wall (contractor mistake when the wall was built):

enter image description here

So it pulls in and out in use, and no doubt lets rain water drip into the wall. It certainly means the grade D stucco paper behind has an unintended gap.

Accessing it from inside is hard. What would the external repair options be? What would a proper bracket look like, to secure this pipe from the outside (after caulking the heck out of the gap)?

The right thing seems almost like a floor flange: enter image description here
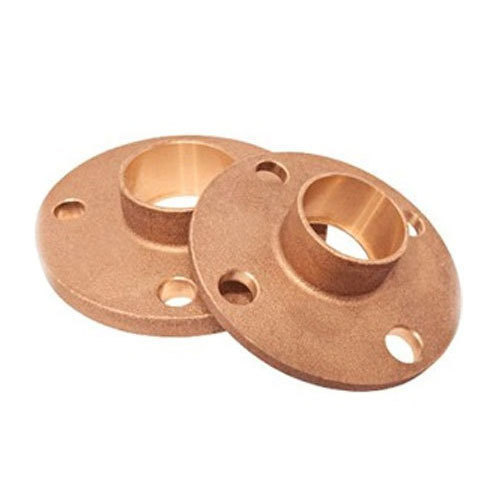
But this flange would require pipe cutting, so it could slip over the pipe for solder, and that all seems a bit awkward also, in part because soldering might stress or melt the tar paper inside.

6 Answers 6

4

Don't cut the pipe to seek some "creative" or "inventive" complete resolution to a springy pipe. Especially forget about a floor flange. Let the pipe relax to its unstressed position, direct caulk into the space between the pipe and the wall, and push the loose flange flush. If the existing flange interferes with caulking, you could cut it off with tin snips and put on a two part flange. This is not an emergency, you are not getting any significant rain water into the wall around this pipe.

A possible alternative to ordinary caulk would be copper wool. This is used to block openings to prevent rodent entry. Force this into the space around the pipe.

See this How do I secure a copper pipe going through a wall?

This is the only fitting I can find and it does not really look suitable for the outside of a finished wall. https://www.amazon.com/Pasco-5023-Hose-Bibb-Anchor/dp/B005G8UTUC Surely there must be purpose-designed two-part clamps available that would clamp to the copper pipe and then be secured to the wall with screws into anchors.

4

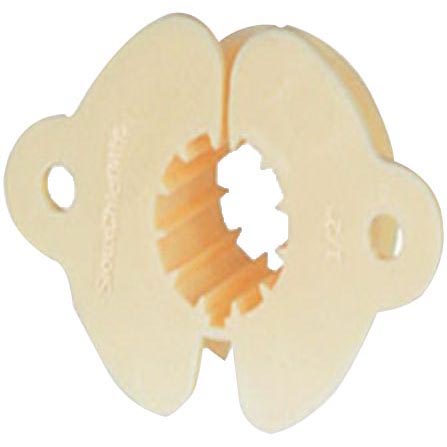
You will probably want to use a "split drop-ear" pipe strap like this:

enter image description here

Can be found at most any decent plumbing supply shop.

1
  • That looks OK, but not like it actually clamps to the pipe. Is there anything that's more resistant to hose pull? And, UV light?
    – Bryce
    Commented Dec 23, 2017 at 6:44
2

If you just want to secure it and aren't too concerned about aesthetics you can come underneath with a block of pressure treated wood. Then use a pipe strap to fix the pipe to the wood. If you can source a short piece of composite deck lumber for the job it might even look ok. Fill the hole with spray insulation foam.

1
  • Interesting idea..
    – elrobis
    Commented Dec 20, 2017 at 14:37
2

When I ran a faucet through my wall last year, I used an exterior grade adhesive (i.e. Liquid Nails Heavy Duty) to glue the faucet to the wall. The beauty of this approach is it doubles to seal the hole. You'll still want some exterior caulk around the edges, but my pipe doesn't move.

2
  • I sincerely hope your sillcock never freezes, corrodes (galvanically or otherwise), handle breaks off, or in general needs replacing. I cannot imagine what replacing a sillcock that's been liquid nailed into place might be like. Whoever you sell that home to will curse your name every way from sunday when they have to replace it.
    – Russ
    Commented Feb 27, 2020 at 20:39
  • @Russ All my other faucets are in mortar/brick. Same basic difference.
    – Machavity
    Commented Feb 27, 2020 at 20:59
1

Fill the opening with silicone and push the plate back. Once the silicone dries it may be enough to keep the pipe from moving back and forth. If it's not then pull the pipe out push the plate back then put and automotive hose clamp on the pipe, if the pipe tires to spring back into the wall the automotive hose clamp will keep it from springing back into the wall.

1
  • Interesting. Though I think the problem is people yanking on the hose, which can be a fair amount of force, probably more than I'd want to put the pipe into tension for.
    – Bryce
    Commented Dec 23, 2017 at 7:37
0

I took three small L brackets and two hose clamps. Clamped the brackets to the body of the hose bib (inside house) and screwed the other end of the brackets to the wood. Seems to work. There are official brackets on Amazon, but this is quicker and less expensive.

2
  • 1
    A photo would improve your answer. Commented Jun 28 at 11:46
  • Unfortunately, I did not take a picture and job I did for my mother in law is 300 miles away. Maybe this will help. Each L bracket (bent metal, 90 degrees) has one end under the hose/band clamp that is around the body of the frost free hose bib (inside the house). The other end of the L bracket is screwed to the wall. Because the three brackets are screwed to the wall and attached to the body of the hose bib inside the house, this prevents movement both in/out of the wall and does not allow it to rotate either. Sorry for the lack of a picture.
    – Eric
    Commented Jun 28 at 19:20

Your Answer

By clicking “Post Your Answer”, you agree to our terms of service and acknowledge you have read our privacy policy.

Not the answer you're looking for? Browse other questions tagged or ask your own question.