2

How can I keep my faucet from twisting on it's center axis and becoming loose?

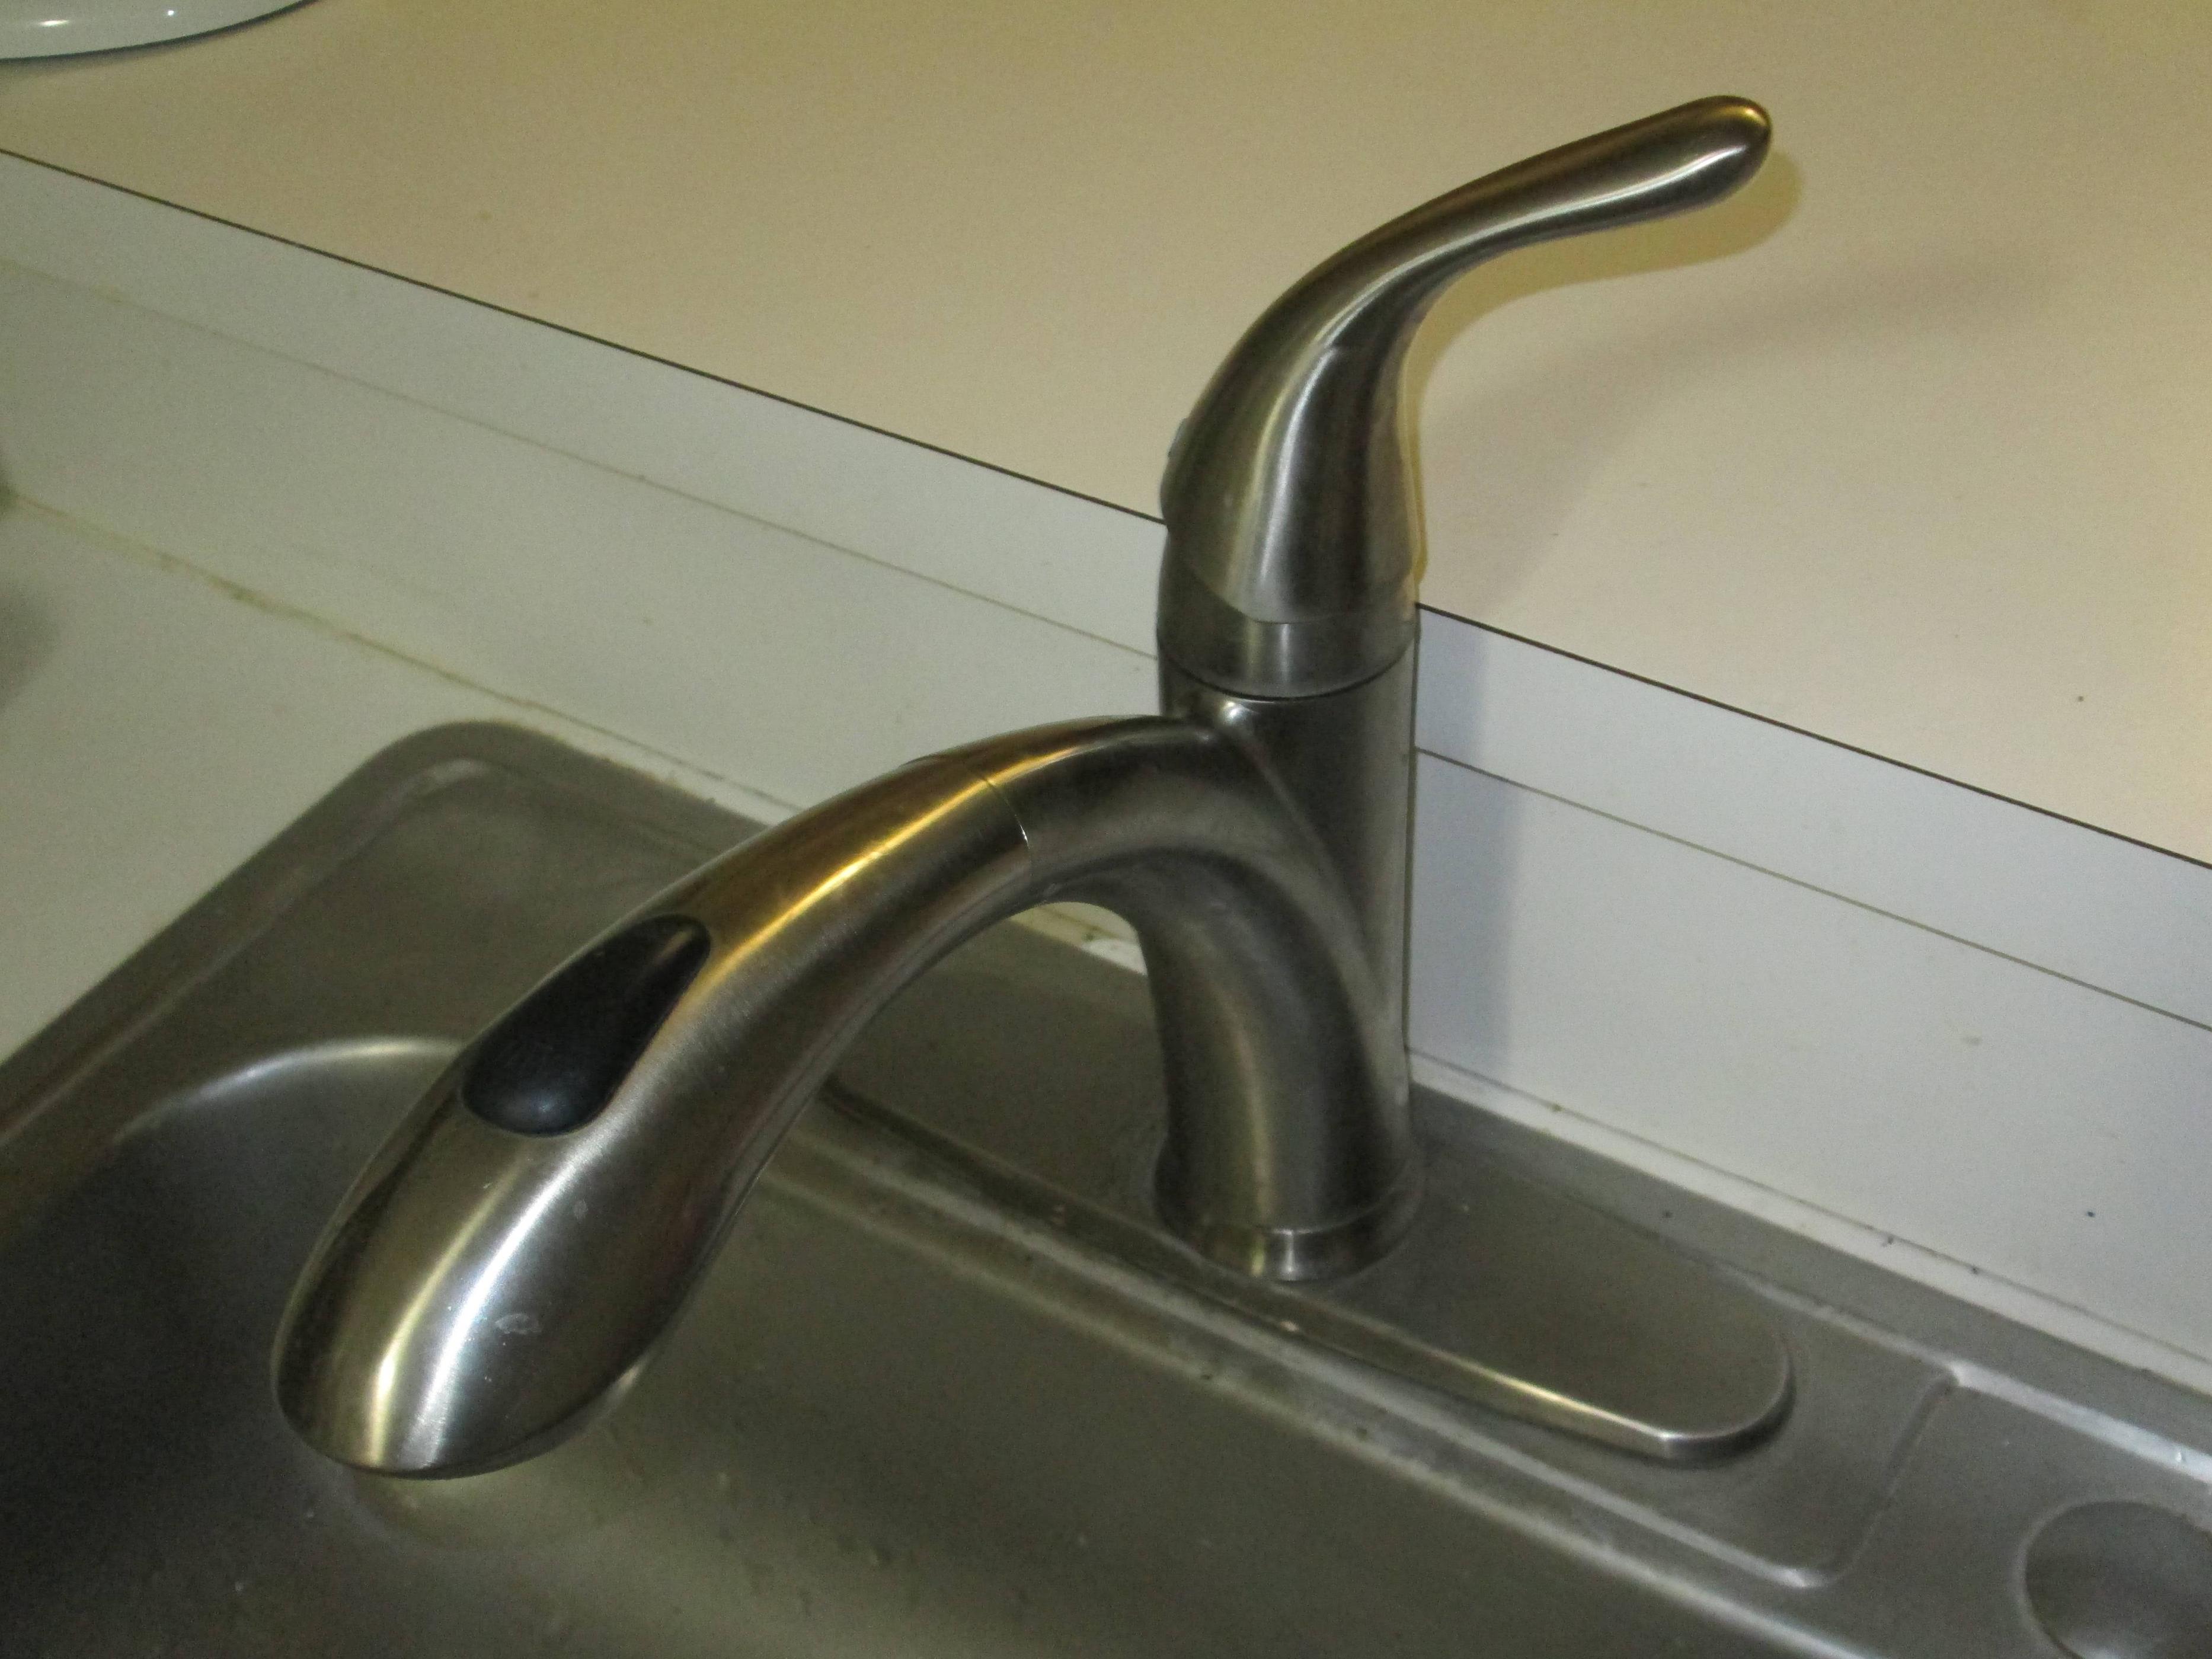
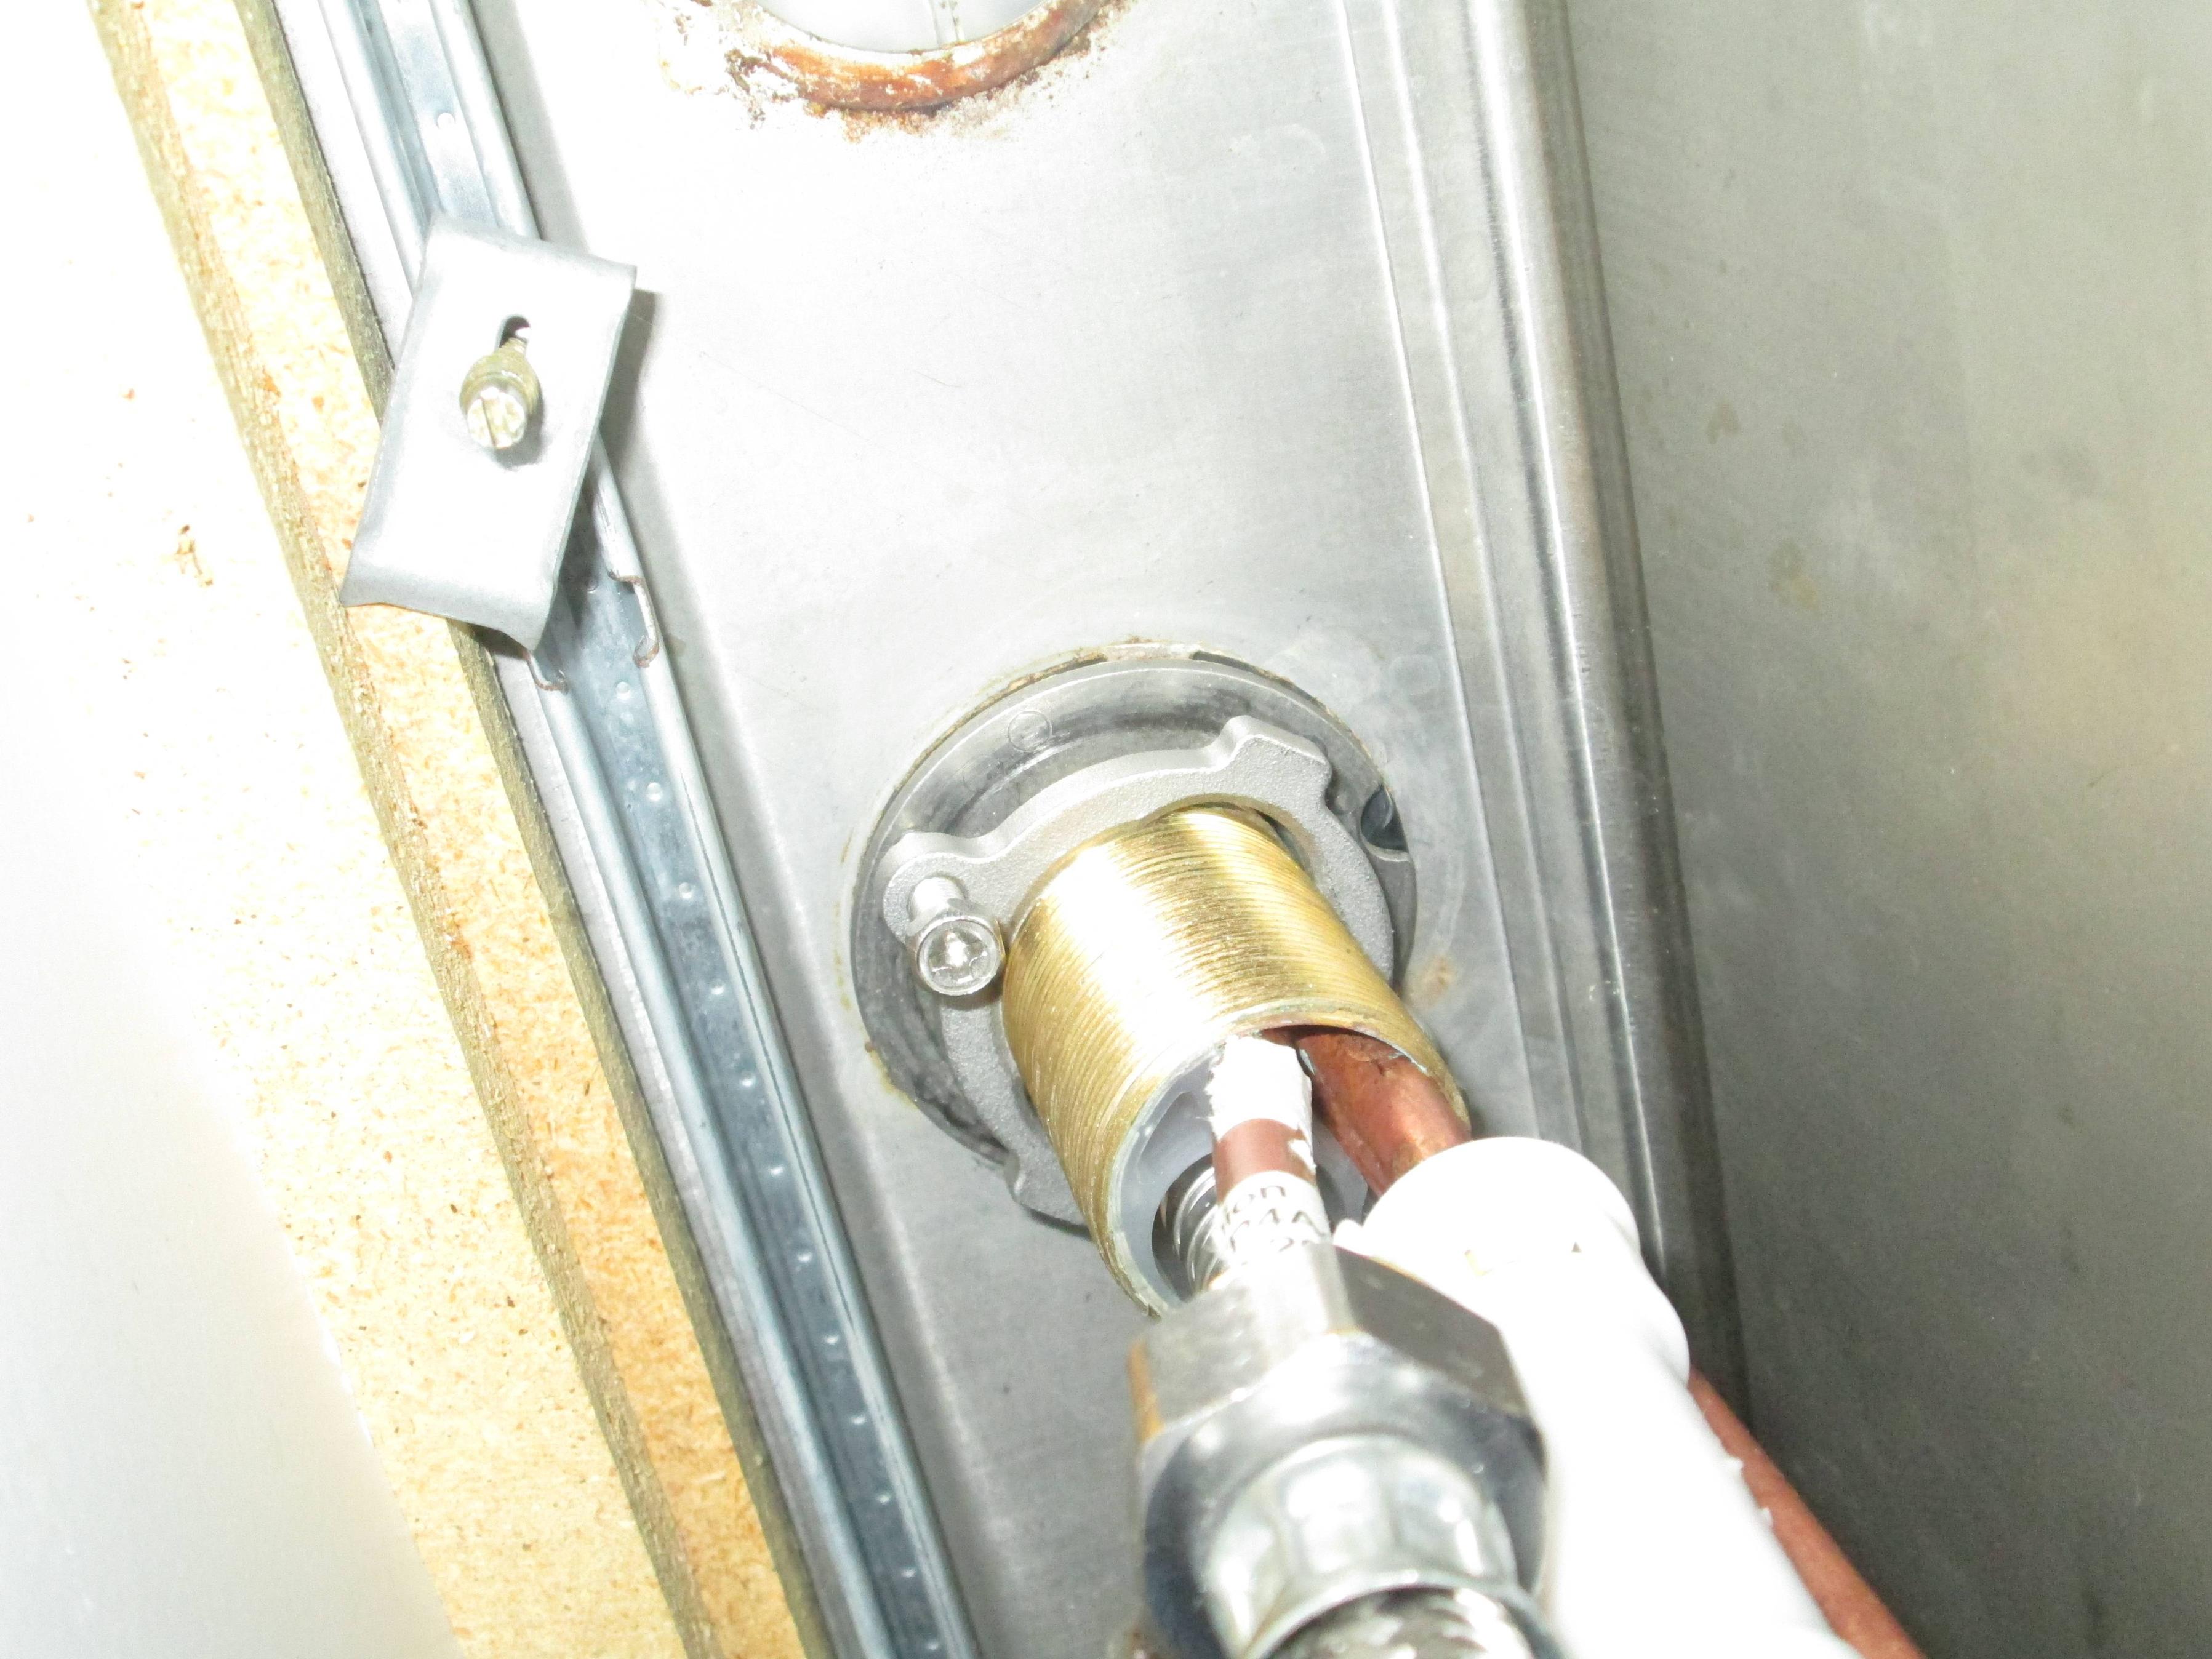
I have a Glacier Bay Keelia 8 in. Single-Handle Pull-Out Sprayer Kitchen Faucet, as you can see in the below photo. In the photo below that, you can see how it attaches to the sink.

The problem is that the sink pivots on it's center, and over time this makes the large nut loose. This causes the whole faucet to separate and wobble around a little bit.

Thus far, the solution has been to re-tighten the nuts and the screws. However I would like to avoid

  • making this a every 3-6 month task
  • purchasing a new sink

Picture of Glacier Bay faucet.

Picture of Nut Holding Faucet to the sink.

Completed Project Update

I took the advice of Fiasco Labs and used plumber's putty. I covered the bottom where the hard plastic piece meets the sink like in the picture below. After securing it I just removed the excess.
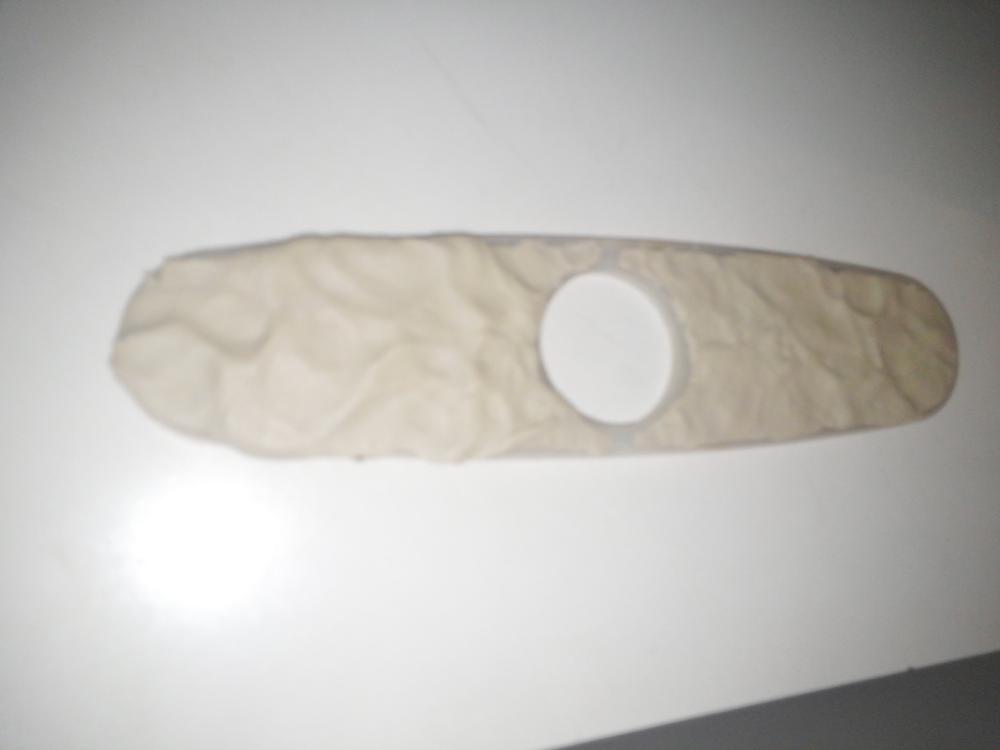
Plumber's Putty

Additionally I realized that the top part of the faucet has interlocking pieces with the base plate. I removed the ring, pictured below, since it did not also have the interlocking pieces. This greatly improved stability. Another issue to be aware of is the large hollow screw in the center of the faucet screws into the top part of the faucet with plastic threads, make sure that this is securely fastened as well. However make sure that you don't strip the plastic threads.
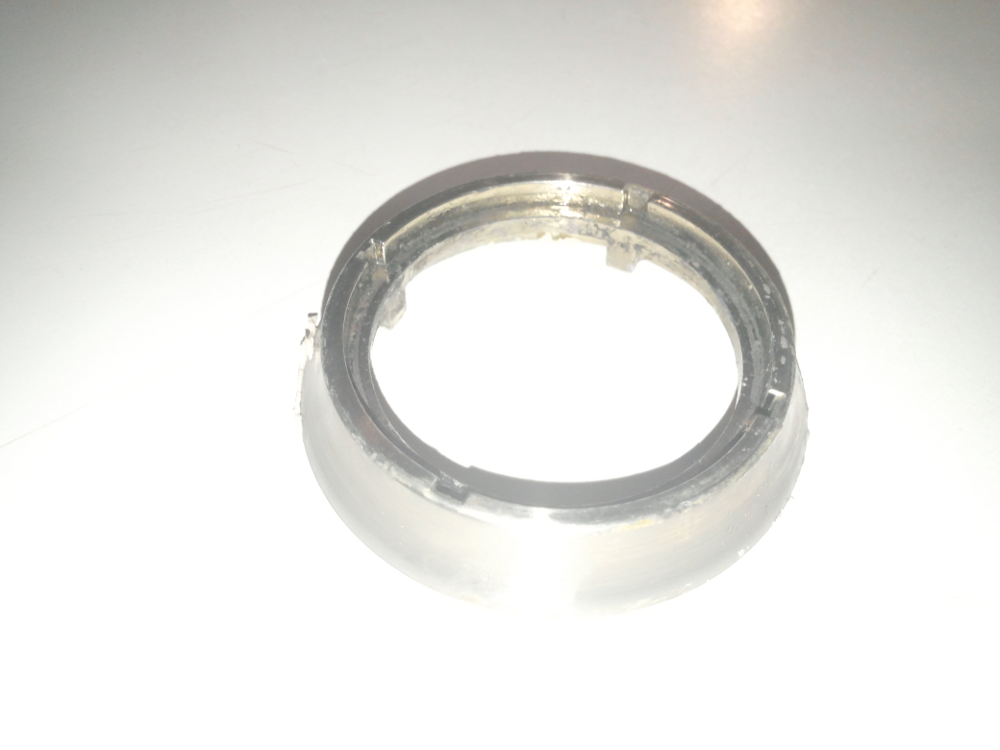
Faucet Ring

5
  • Is the problem with your sink or the faucet?
    – Steven
    Commented Feb 12, 2014 at 3:01
  • @Steven I believe the issue is the faucet.
    – Ryan Gates
    Commented Feb 12, 2014 at 5:11
  • I have this exact problem but I totally don't understand how you fixed it. Where does the putty go, it appears to be in a spot completely unrelated to where the screws tighten down on the piece of metal underneath (and physically above) the disc of metal that ring screwing onto the gold colored threaded pipe.
    – Michael
    Commented Jan 28, 2015 at 5:46
  • @Michael The putty helps create friction with the base so that it does not swivel. The other key was to remove the ring featured in the last photo. If you have a specific issue or photos, it may work better for you to create a chat or post a separate question.
    – Ryan Gates
    Commented Jan 29, 2015 at 2:21
  • No, thanks, I think I am starting to get the picture now. I think the opening on your sink (where you can't see) is slightly different than on mine and that was part of what was tripping me up.
    – Michael
    Commented Jan 29, 2015 at 5:40

3 Answers 3

3

This is one of those places where a little bit of plumber's putty is indicated.

The problem is that there is little friction between the base of the faucet head fixture and the sink to resist the torque.

Roll yourself a pencil of plumber's putty about 1/4" dia and long enough to form a ring around the hole. Add a couple extensions straight out from the sides so it looks like the old US Airforce star and bar insignia. If you did it right you will get little or no squeezeout, the base plate will adhere to the sink and you now have a water dam so no moisture can get through the hole.

Operating the sink handle once you have the faucet assembly tightened down should no longer allow a twisting force against the fastenings.

Don't use silicone caulk to do this if you can help it. The sink outlasts several faucets and having to remove it from the sink is nigh impossible and looks pretty ugly when a new faucet has a footprint that exposes it.

3
  • I have this exact problem with a different faucet make/model, but I'm having visualizing the solution you are proposing (and the asker's picture isn't helping).
    – Michael
    Commented Jan 28, 2015 at 5:44
  • Are you suggesting to put the putty above the metal washer that the screws are tightening down against? My impression from visual inspection is that the screws are losing friction against the washer, not that the washer is losing friction against the surface above it.
    – Michael
    Commented Jan 28, 2015 at 5:48
  • See the picture with the plumber's putty. The style faucet in the question has a metal base with a plastic spacer that goes underneath it. You want that plastic piece to stick to the sink so you have a large area to resist the torque from using the handle. The metal washer you mention does not have enough surface area to resist the torque and neither do the screws. You remove the undersink mounting junk so the faucet can be lifted and apply the putty to the sink surface under the plastic base piece that goes under the metal base cover. Commented Jan 28, 2015 at 7:00
0

The problem is the upper metal ring, or tailpiece washer, or thrush washer, or faucet flange is down in the hole instead of flush with the top of the sink. Also, the bottom ring, the one with the screw, is supposed to be screwed up tight against the bottom of the sink to pull the faucet down firmly against the sink top. But, fixing this may be problematic if you try to find a large washer suitable for the repair. Instead, I would get a couple of flat pieces of metal, say 1" wide by 3" long and about 1/8" thick (aluminum would be better since it doesn't rust). Then I would loosen one of the screws and slide one piece of metal under it, straddling the hole. After tightening this enough to keep the metal from falling (you could duct tape the metal up there to hold it), I'd do the same to the other side. Then when you tighten up the screws you will also tighten up the faucet. That should work.

2
  • 1
    If the upper metal ring is between the sink and the top of the faucet, how would the faucet base be flush with the sink surface? I cringed when you mentioned using duct tape.
    – Ryan Gates
    Commented Feb 18, 2014 at 4:46
  • I had the idea that a washer would work better as it has much better friction between the two metal surfaces (maybe not as strong though!), but as I only had a small washer I tried cutting it into pieces and of course couldn't get any of them to stay in place long enough to tighten! Still, I can't figure out how to get anything between the screw and the metal washer to stay in place while I tighten it up!
    – Michael
    Commented Jan 28, 2015 at 5:51
0

I created a better seal between the under the sink metal ring to the granite and the screws by making a kind of washer from cutting a square out of a cheap yoga mat rubber material. Rather than dissassemling the whole contraption I cut it so that I could fit it around the threaded piece>

The idea is that the assembly will retain friction longer and require tightening less frequently.

If anybody has a permanent sure fire fix, I'd love to hear it.

Your Answer

By clicking “Post Your Answer”, you agree to our terms of service and acknowledge you have read our privacy policy.

Not the answer you're looking for? Browse other questions tagged or ask your own question.