1

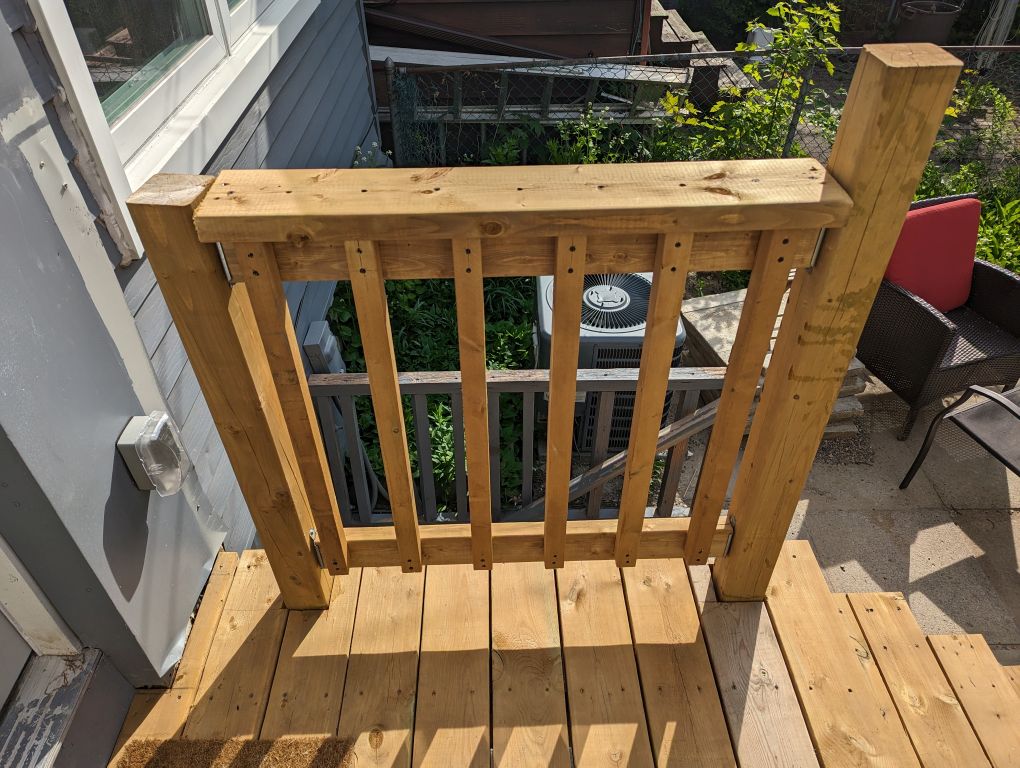
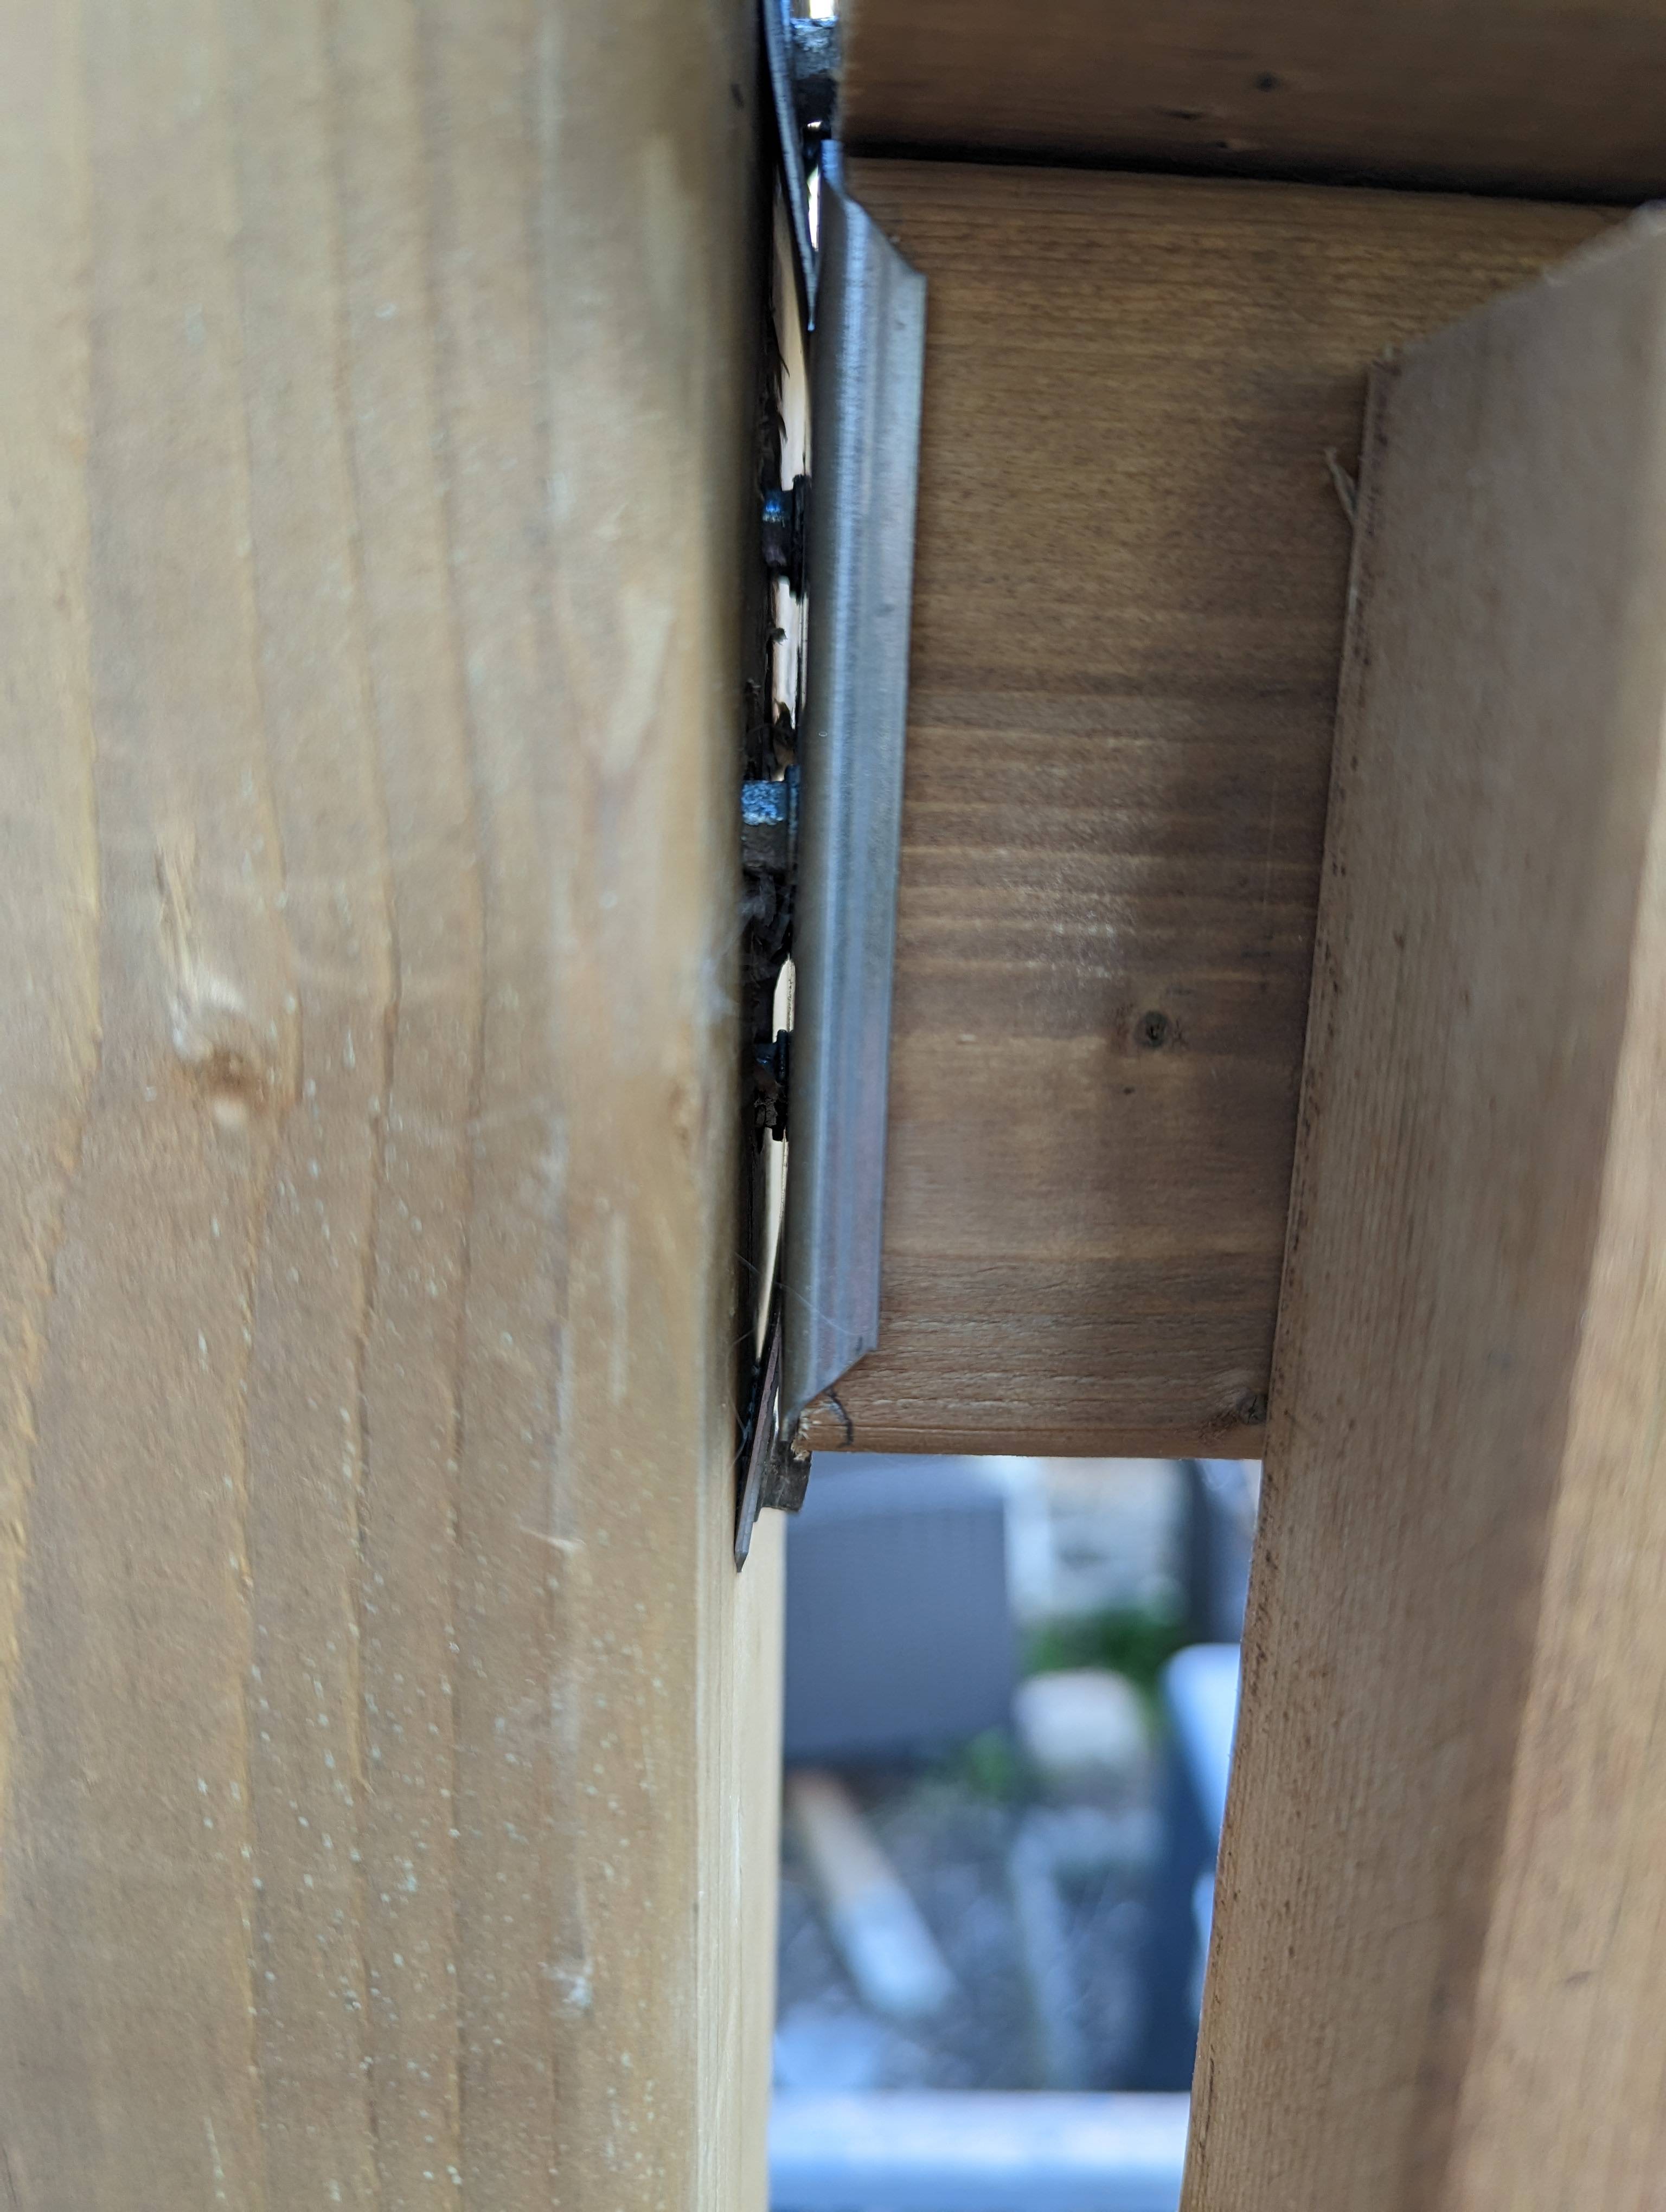
I'm finishing up my first deck, and I've installed the guard rails using Simpson FBFZ brackets, and they worked really nicely. I like the idea of metal interfaces, and the design of these connectors allow for a margin of error in the length of the railing.

I want to use the same strategy for the hand rails along the stairs, but am not sure what bracket to use. My first thought was to use the same FBFZ brackets, but I'm not sure if they're designed for angled connections.

I did find this product from deckorators, but I think they're for horizontal angles and I'm unclear whether they support vertical angles. If it comes to it, I can forgo brackets and just toenail, but would rather not if possible. I also realize that whether I toenail or use a bracket, I'll have to cut the ends of the rail at an angle so that the ends are tight to the posts.

Here is what the FBFZs on the guard railing looks like (balusters are on the inside by design):

Thanks for any suggestions!

enter image description here

enter image description here

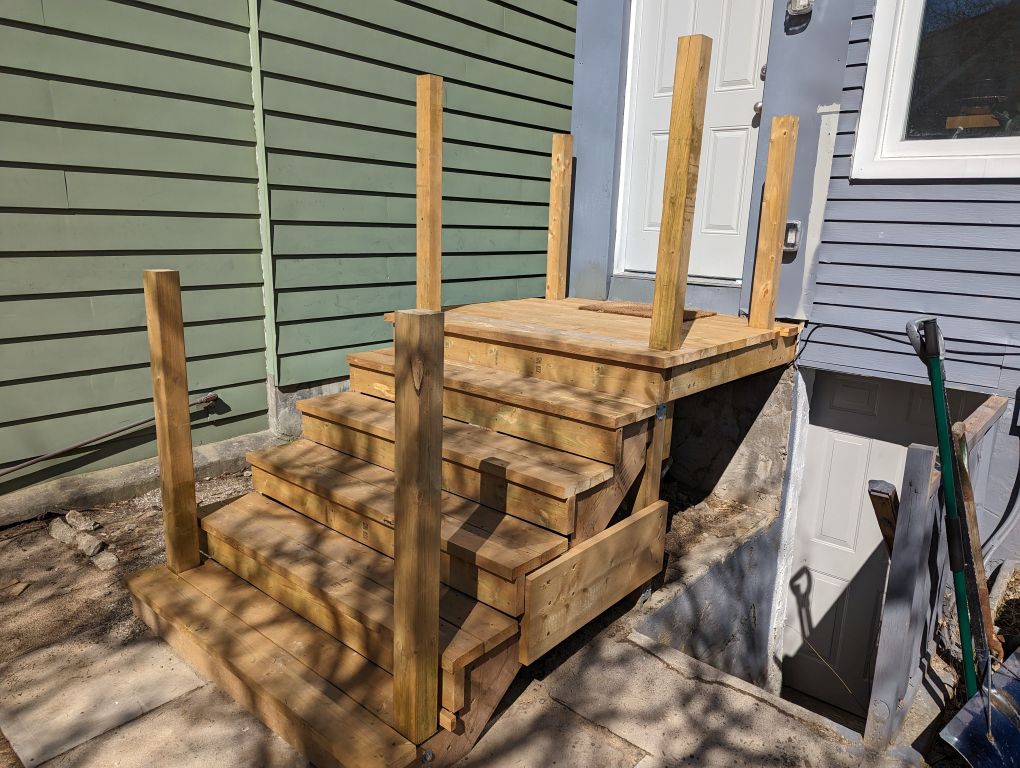
Here is full deck picture (taken before I installed the guard rails):

enter image description here

Edit 2:

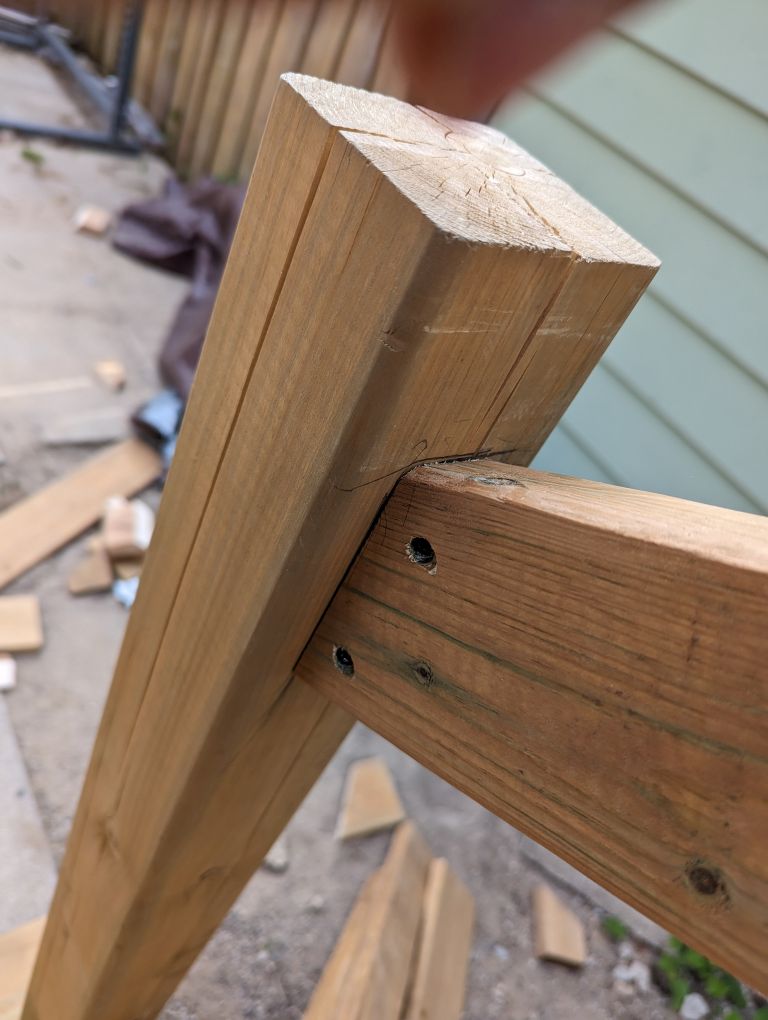
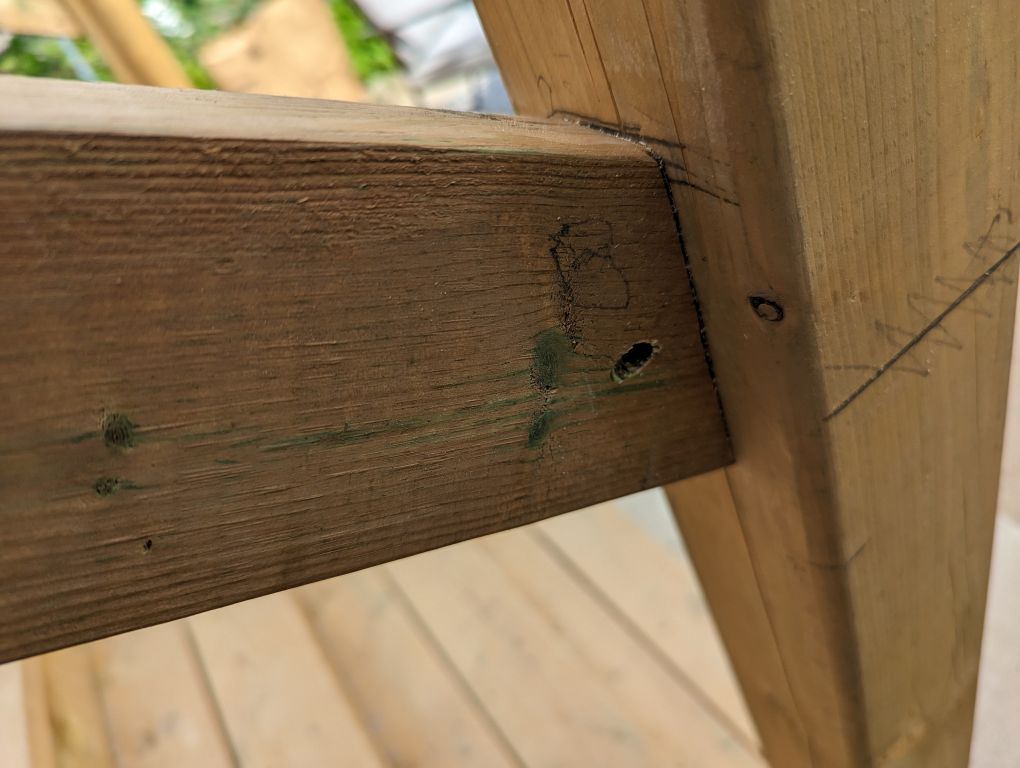
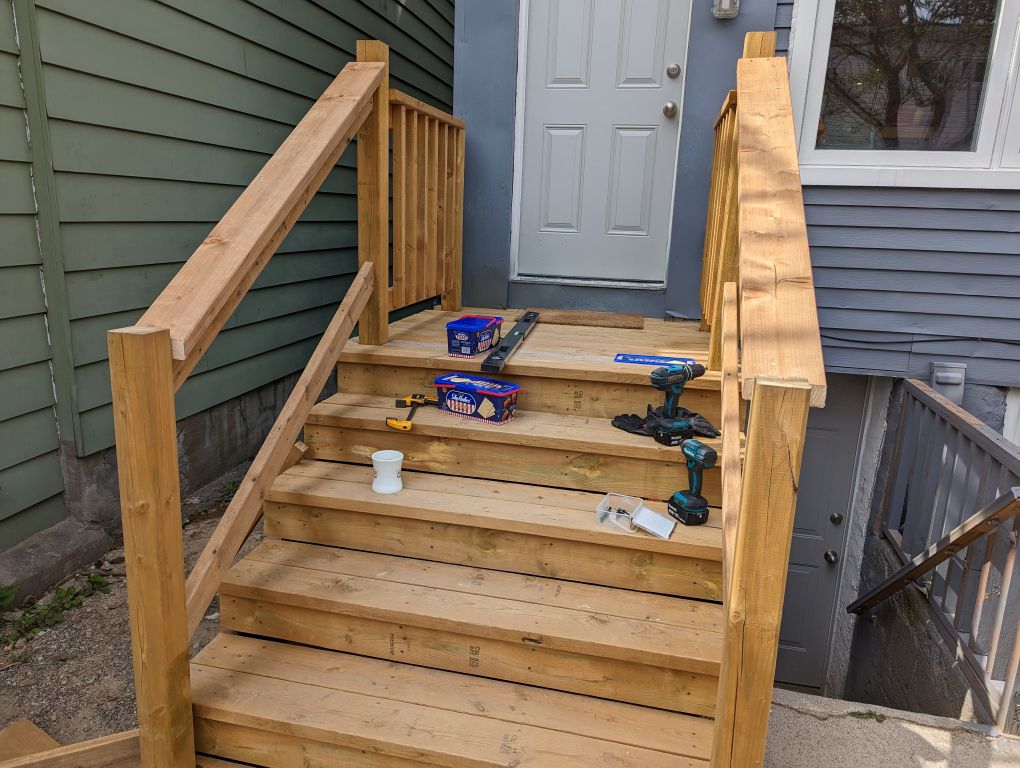
I took isherwood's advice, and toenailed. Below are some photos (balusters not yet installed).

One of the challenges I had was keeping the 2x4s in position as I drove the screws in. The 2x4s would often twist as a result of the asymmetric force provided by toenailing in from the side. Had I started with a toenail in the centre of the upper (or lower) surface of the 2x4, I imagine this would have been less of an issue, but at the possible expense of aesthetics. Either way, it worked out well enough that the balusters will still have a flush enough contact with the upper and lower rails. Thanks for the help! enter image description here enter image description here enter image description here

I cut some 2x6 caps for the rails (similar to the ones on the guard rails on the deck itself), and was in the process of installing them, but my wife made a good point that having the 2x4's alone was safer - her reasoning was that if someone slipped and made a reflexive grab for the railing, the 2x4 would be an easier and more natural gripping target. I took a photo though to show what it would have looked like: enter image description here
7
  • I'm curious what the 2x10 on the stringer is for. It looks like a patch. I'd bet we can do better. Or is it temporary?
    – isherwood
    Commented May 13, 2023 at 13:30
  • I installed that on both sides to restrict the degrees of freedom of motion of the stringers (and the two connected posts). It helped reduce lateral and upward motion of the stringers relative to the deck itself. I realize the risk is that if there is movement in the ground, this could cause issues, but I can easily uninstall them if so.
    – spacediver
    Commented May 13, 2023 at 13:45
  • for more context, neither the bottom posts nor the stringers are anchored to the ground - they are merely resting on it. And I'm using lscz stringer connectors to attach stringers to deck).
    – spacediver
    Commented May 13, 2023 at 14:02
  • I can't imagine where the stringers would go, and for that short of a span there shouldn't be much bounce. I'd replace those blocks with 2x4s on the inside so they don't look like a tacked-on afterthought. That'll hold the post just as well, and if they need lateral support run a 2x4 across between them. If you do have stringer bounce, add 2x4s to them underneath where they're hidden. I can't tell how many you have, but I'd expect four at that stair width.
    – isherwood
    Commented May 13, 2023 at 14:28
  • It was more to resist lateral forces to the bottom two posts. Before I installed these braces, if you were to apply a lateral force to the bottom post, the outer stringer would twist a bit. These braces helped to limit this twisting, thus making the posts feel more solid. After I've installed the hand rails, I may remove these braces and re-assess whether they're that important. I agree they are a bit of an eye sore. I don't think they'd work mounted to the inside of the stringer, as the inside of the stringer doesn't line up with the inside of the other post to which it would be attached.
    – spacediver
    Commented May 13, 2023 at 14:40

2 Answers 2

1

Those brackets don't care one iota what angle your boards meet at. They're simply a shear connection. The problem you'll encounter is that they'll be too short. Some ideas for that:

  • Nip the toe off your railings to a height of 3½" (to match the height of a square cut). A little sanding to match the eased edge on the rest of the board and you're good. The level top height should match that of your horizontal rails for best appearance.

  • Use two brackets. Cut one end off of each such that you arrive at a total length appropriate for the length of the angled rail cut. Drill extra fastener holes if needed.

In either case the lower post screw will be a challenge. Angle it upward and consider using a long, flexible bit driver.

That said, I'm not a fan of this kind of hardware. I consider it a crutch to good carpentry, and it doesn't look that great. It leaves gaps and metal showing. I would carefully drill and countersink three toenails on the less-visible side of your rails and go with that.

Or, use a wooden rosette in the same way you're using these brackets. You can by some 1x4 or split a bit of 2x4 down to 3/4" thickness and mount it to the rail, then screw it to the post. Actually, I'd replace the brackets with these across the board (so to speak). They'd look a bit better in my humble opinion.


Good work! Congrats on accepting the challenge to DIY. Here are a few other tips for now or future projects:

  • Leave your posts a bit higher than the top rail. Flush joints usually don't look great, and then you can bevel the post tops for visual interest. At this point you could cap your post with an oversized square two-by with beveled corners or top edges.

  • Bevel the corners of your flat top rail so they meet the posts a bit more nicely. The final width should be about 3" so you don't hit the rounded post corner.

  • Partially or completely bevel the bottoms of your balusters so they visually blend with the bottom rail a bit better and aren't as hazardous to ankles.

  • Countersink for the bracket-to-rail screw heads in your posts to avoid the gap they create, or use flathead screws and countersink the brackets.

5
  • Thank you! I was going under the assumption that toenailing wouldn't create as strong a joint as metal brackets, but I'm perfectly happy to use toenailing if it's sufficiently strong. And thanks for the other tips. I actually meant to leave all the posts higher than the top rail, but made a silly error. I'm hoping the post caps that I install later will make things look better. I've added a full deck photo to the original post also.
    – spacediver
    Commented May 13, 2023 at 13:26
  • Toenails are fine if done well. Make sure you pass through an adequate portion of the rail is all, and use long enough screws. 3" should do. Use rosettes if you have high load conditions. Mistakes happen. I can't even count all mine on two hands. :P
    – isherwood
    Commented May 13, 2023 at 13:28
  • Thanks. I have some 3 inch construction screws (size 8) that I think will do well here. I'm still a bit unclear on where the screws should go. I'm guessing one screw should go on top edge of rail, and one on either side (for a total of three)?
    – spacediver
    Commented May 13, 2023 at 13:47
  • I wouldn't put any on top. That will look bad. You have about 4-1/2" of vertical to work with. Space them accordingly. Maybe just two is enough.
    – isherwood
    Commented May 13, 2023 at 14:26
  • Thanks! I'll update this thread with a photo of the results once it's complete (potentially by end of wknd).
    – spacediver
    Commented May 13, 2023 at 14:41
0

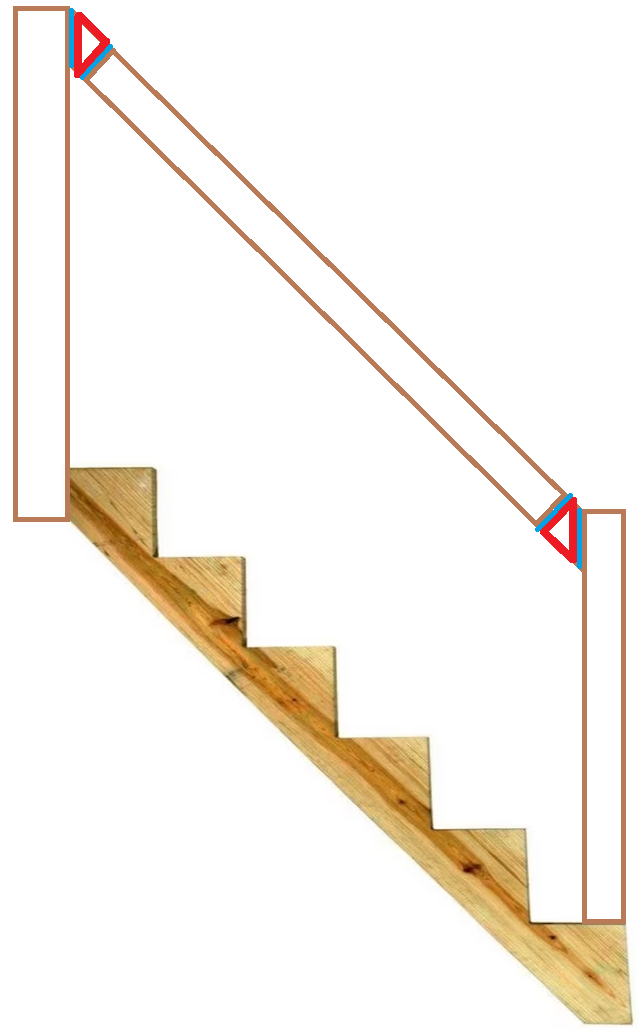
If you simply must use your metal brackets, cut wedges (red) to match your stringer angle and use your brackets (blue) on each side of the wedge. enter image description here

1
  • I don't see how this helps at all. It just creates more joints. How would the upper and lower screw holes be used? This answer needs more detail.
    – isherwood
    Commented May 13, 2023 at 13:09

Your Answer

By clicking “Post Your Answer”, you agree to our terms of service and acknowledge you have read our privacy policy.

Not the answer you're looking for? Browse other questions tagged or ask your own question.